.svg)

Deep Racer Assembly Guide | West Loop Strategy

So you’ve decided to get the AWS Deep Racer - now what? How do you get it set up to start testing and developing? Don’t worry we’ve got you covered!
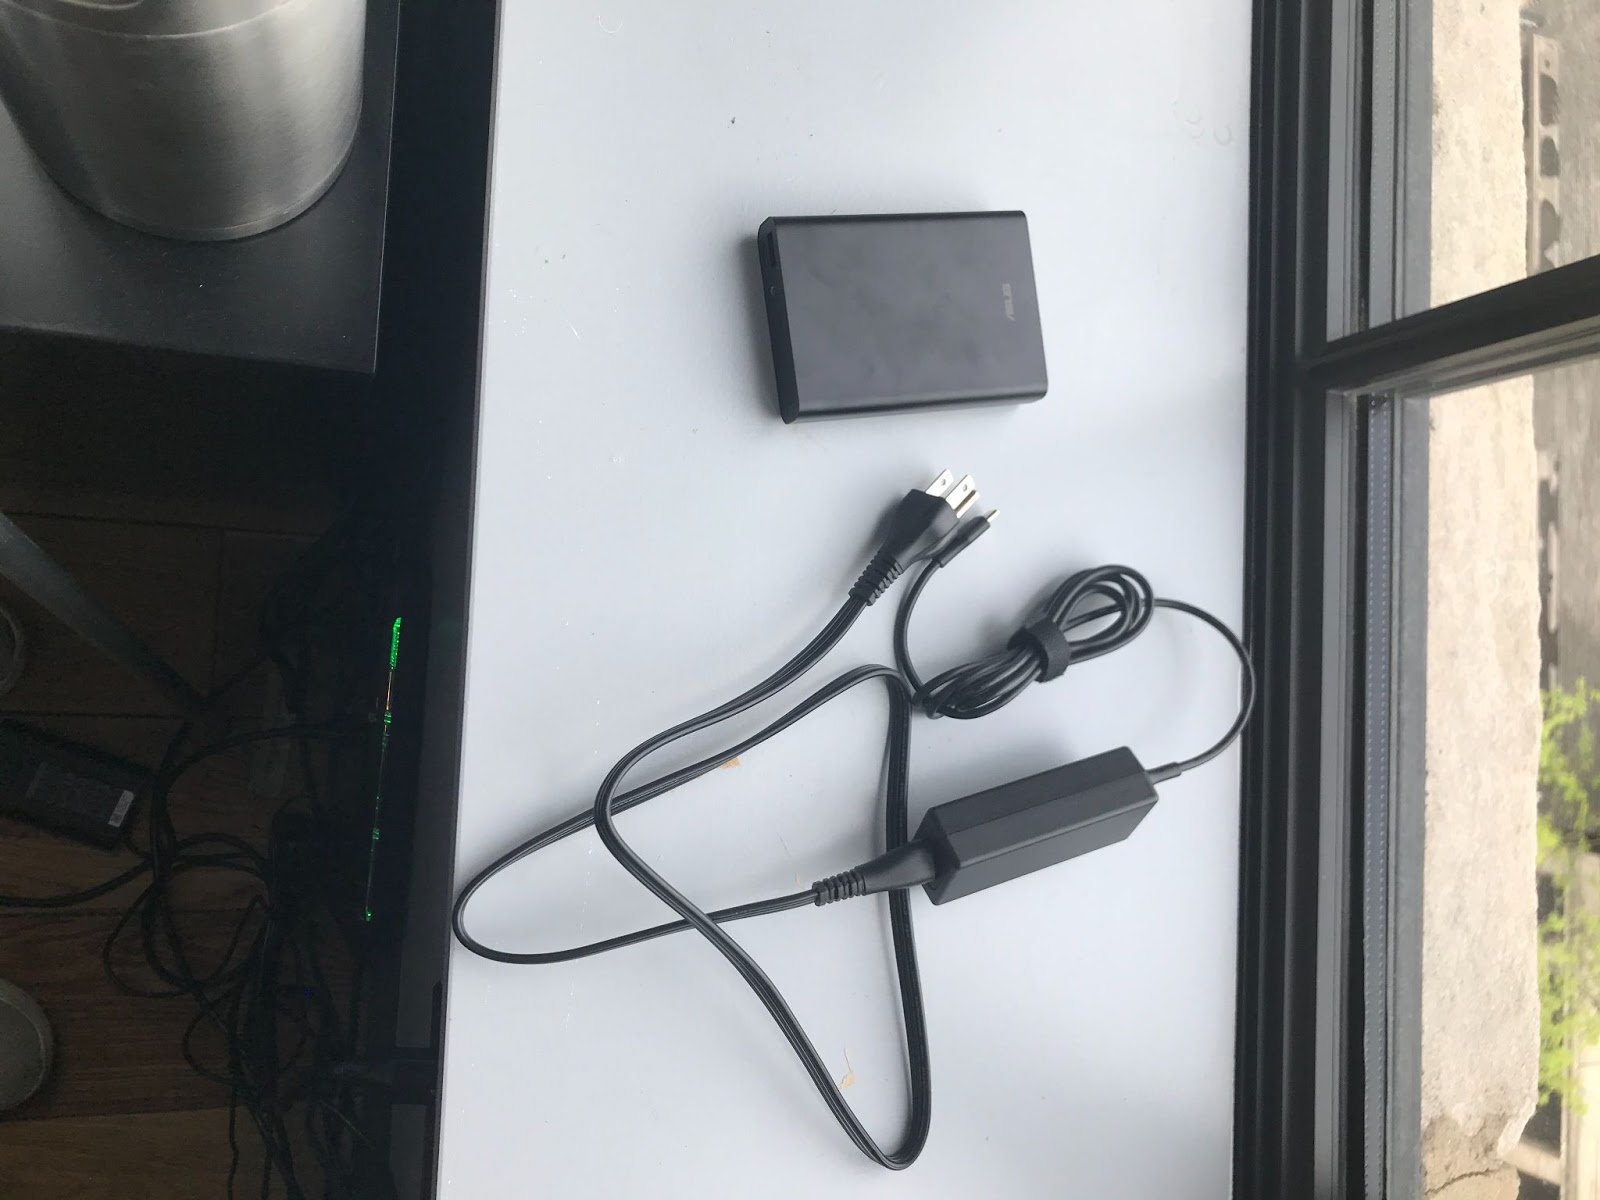
Connecting the Power Supplies
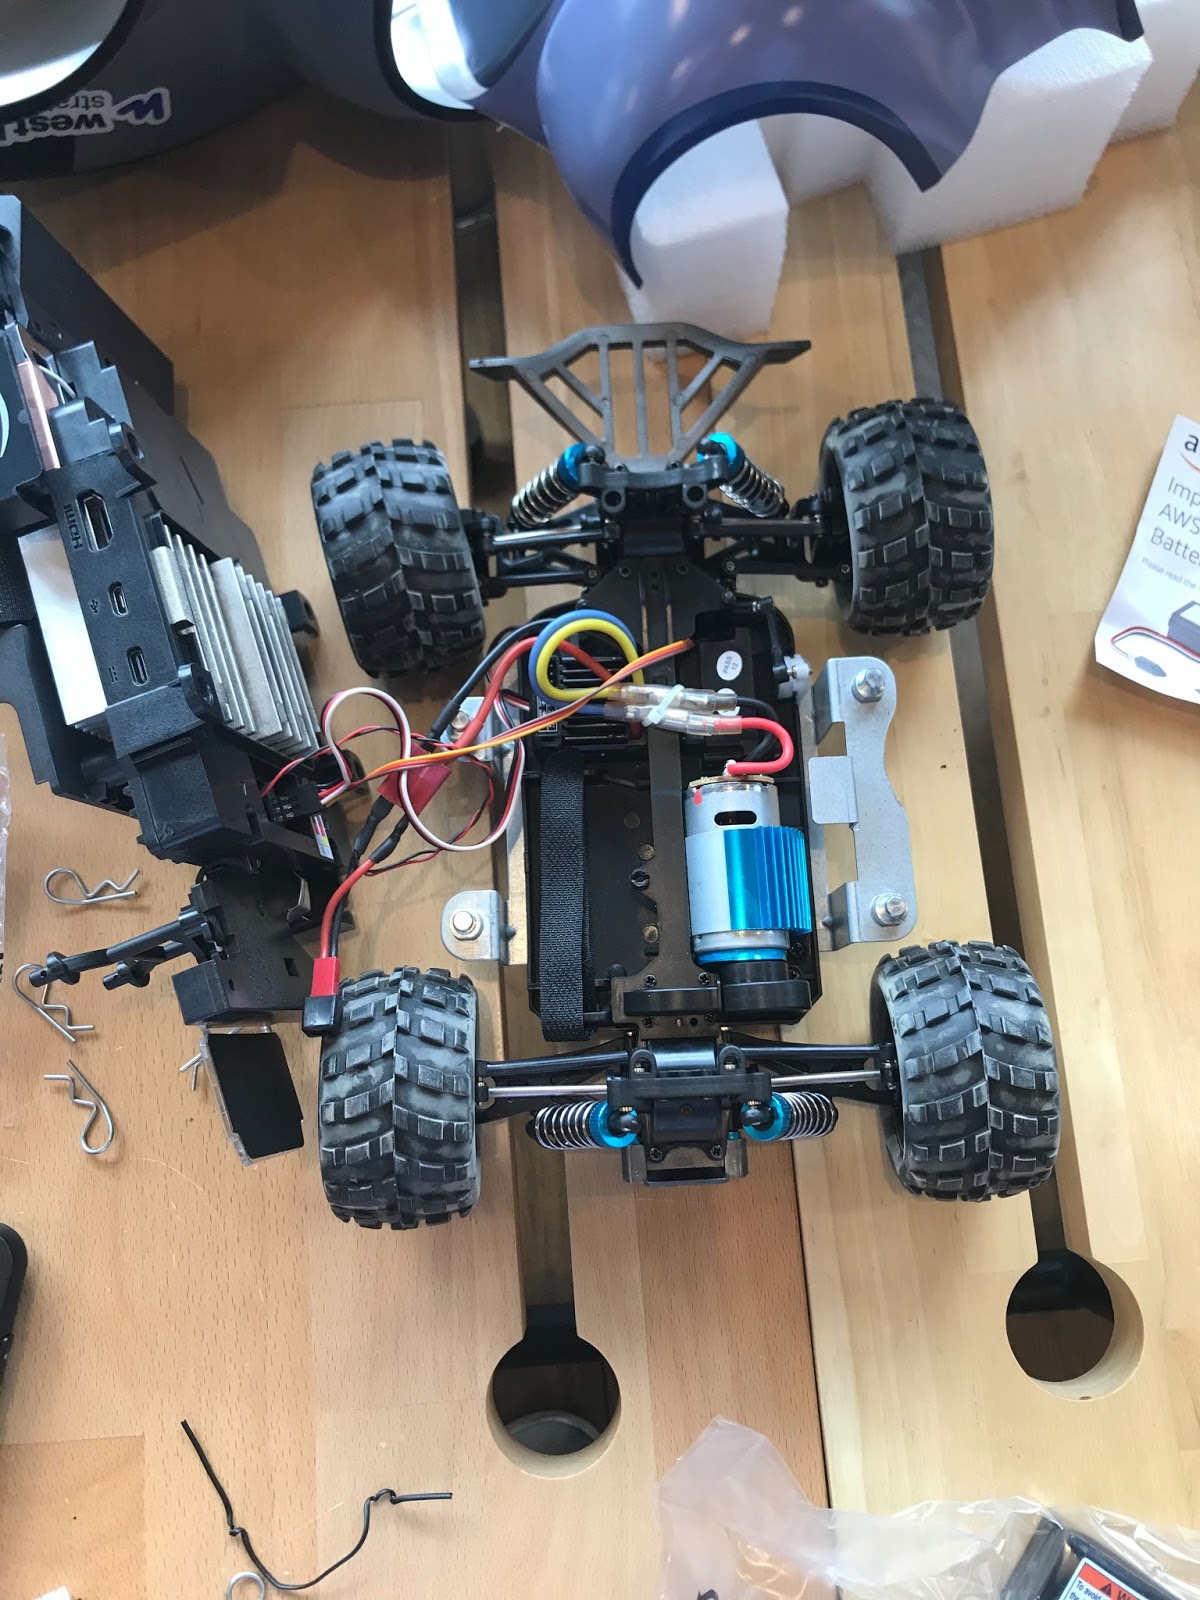
After unboxing and laying out all the materials, your first step is to unpin the car chassis. There are four pins on the side of the car. Remove the pins and gently lift the car chassis in order to install the car battery. Once unpinned, gently lift it apart. Careful! There are connected wires under the chassis. It should look like this when fully opened.
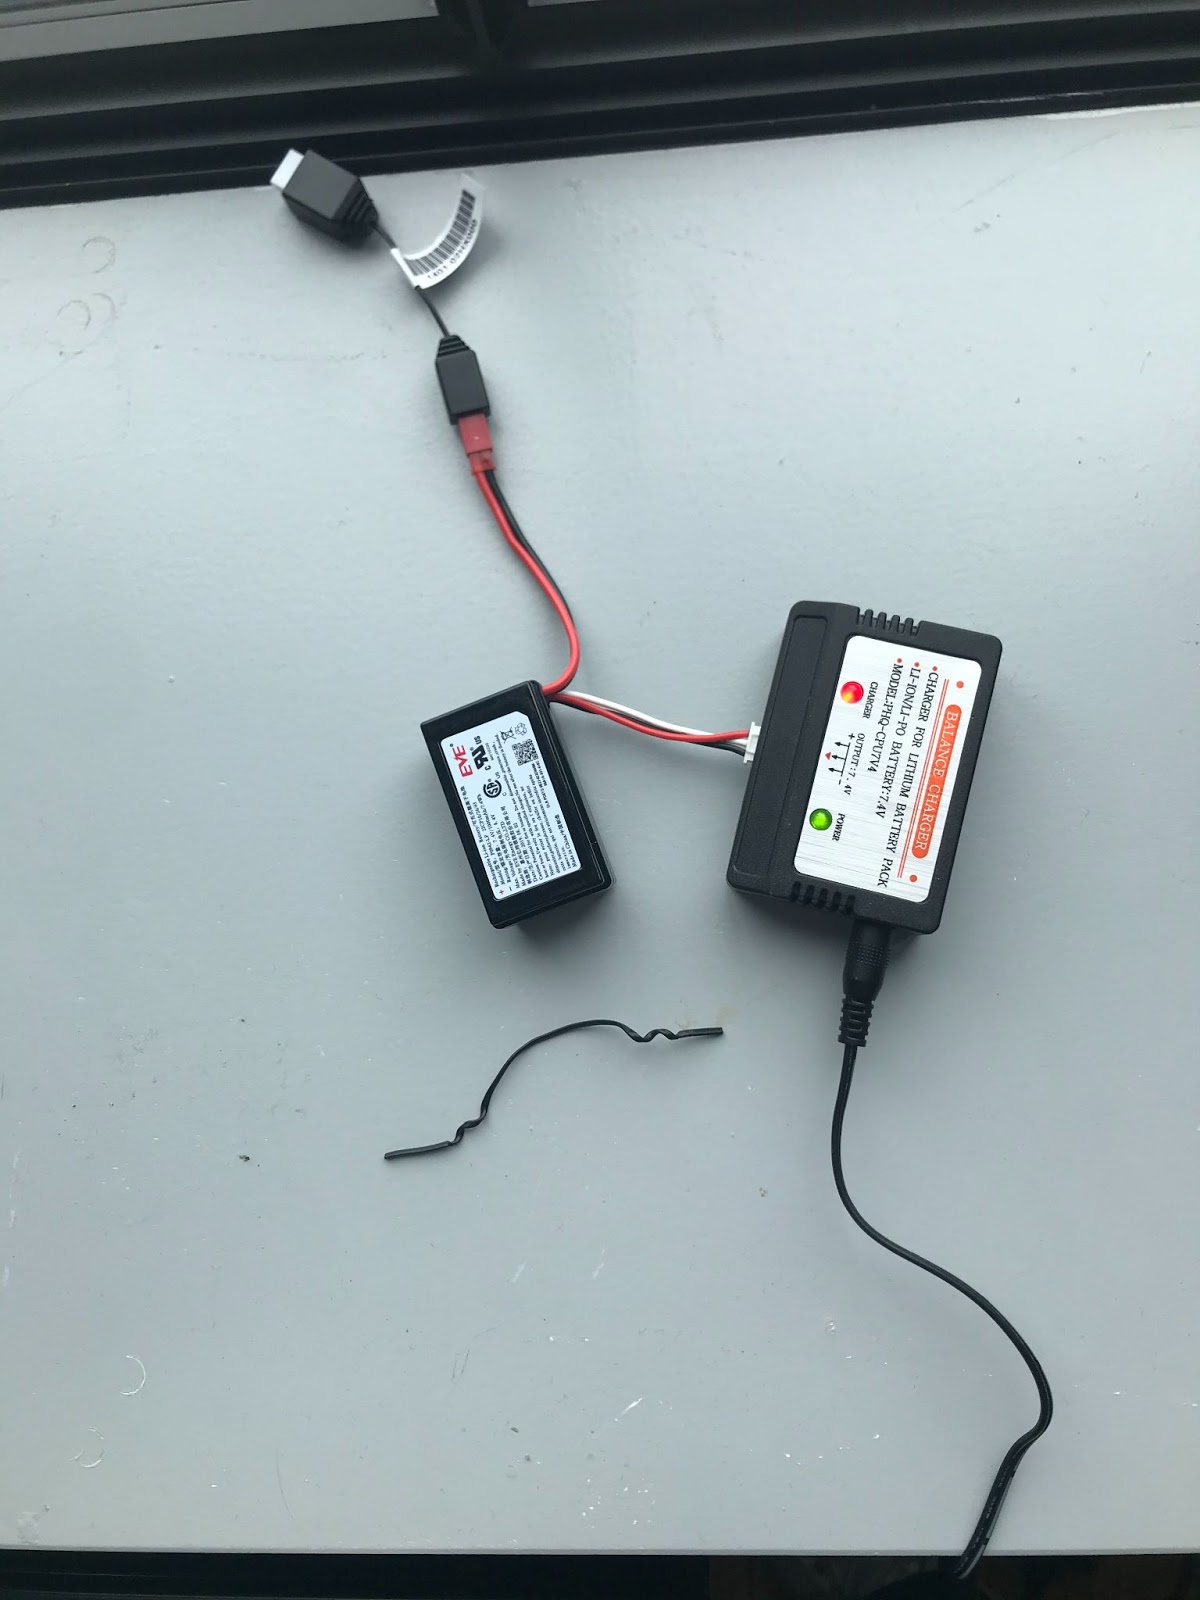
Locate the car’s battery cables. You’ll first want to be able to charge the battery. The below picture shows you how you will be charging the car battery.
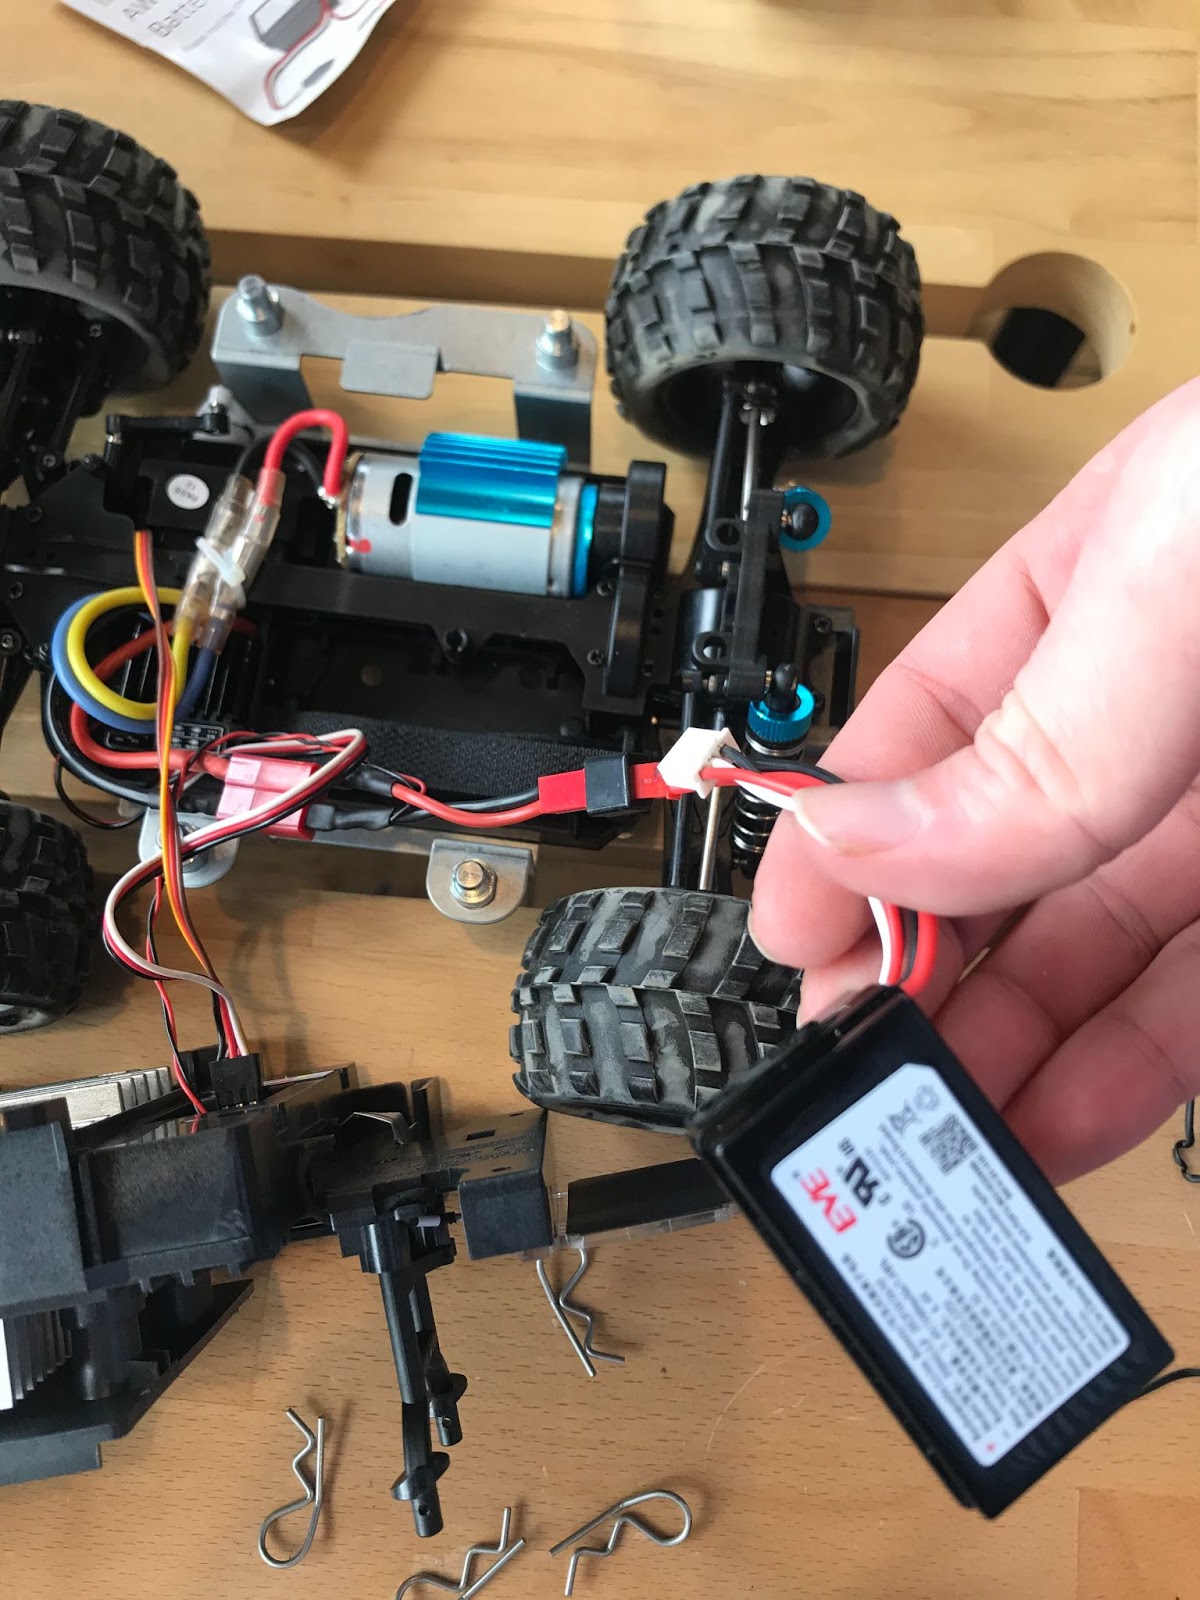
Once you’ve separated the car chassis and charged the battery it’s time to plug in the car’s battery. Go grab the battery and connect the plugs to the correct colors. Red with red, black with black.
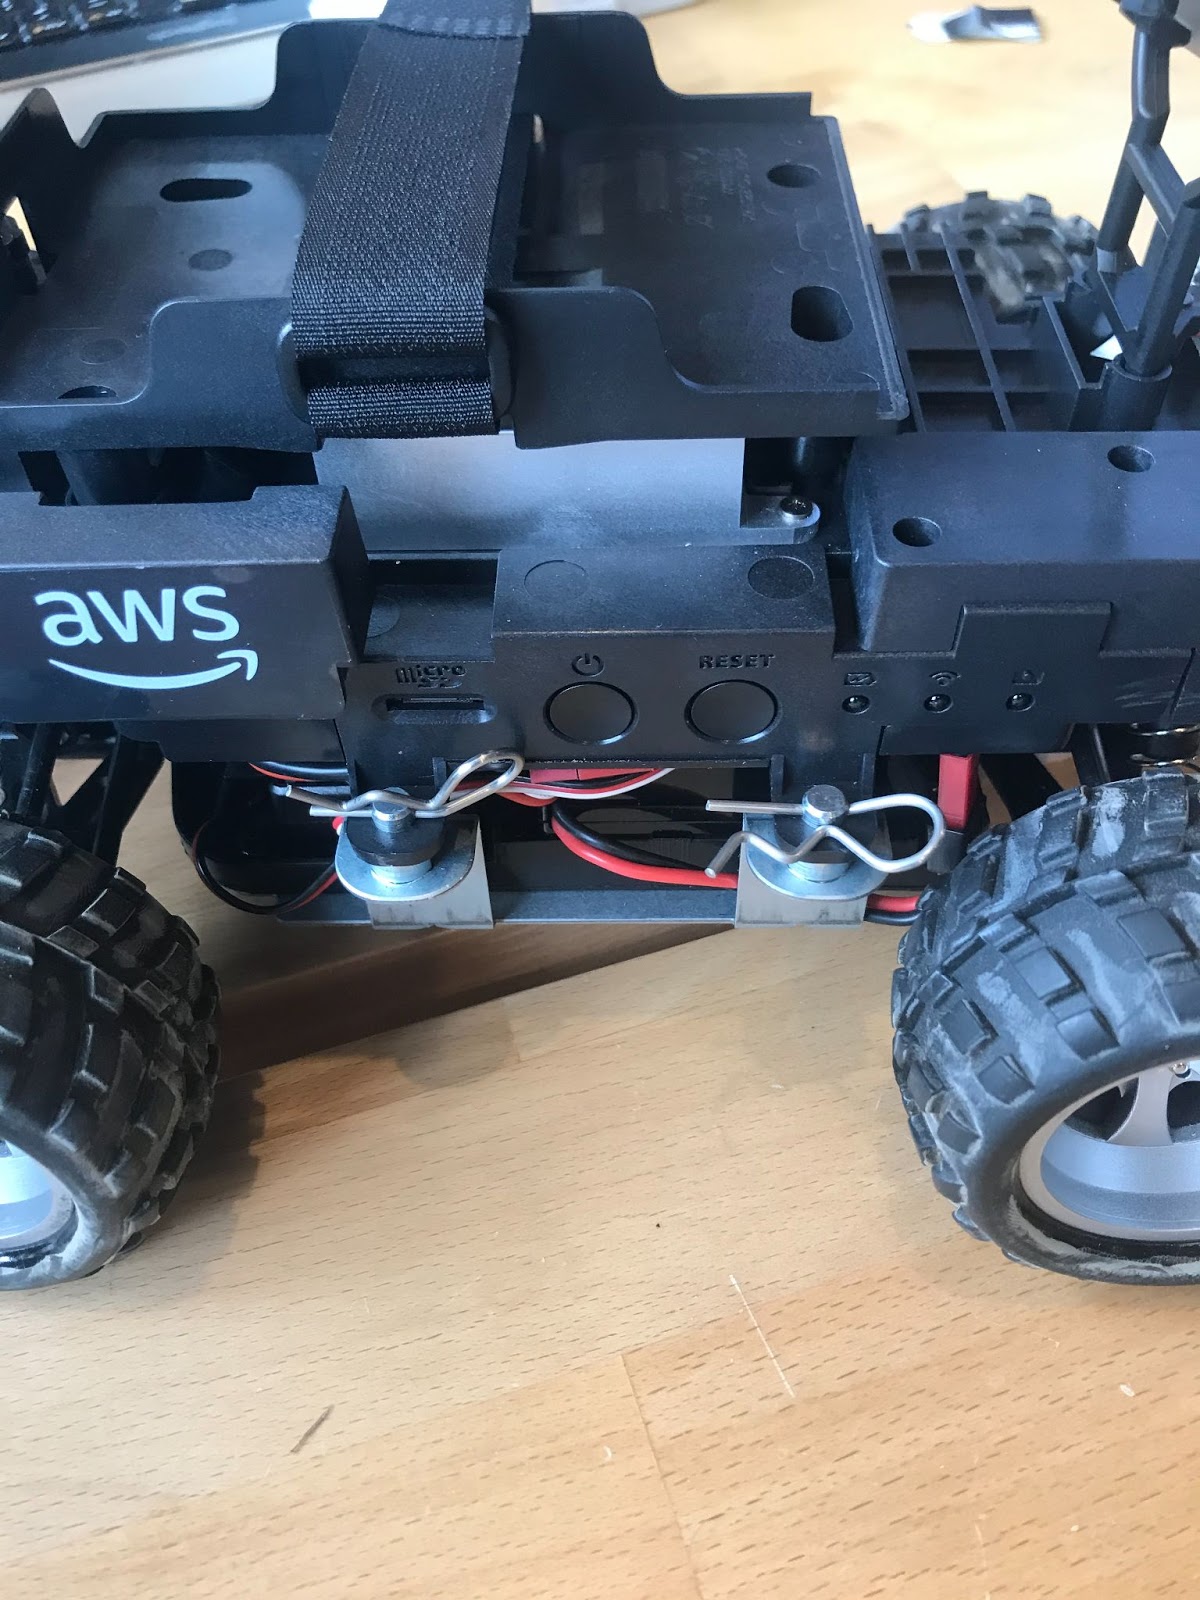
After you’ve connected the battery, find the straps surrounding it to secure the car battery into the car. Organize them under the car chassis and keep all the cables inside the car. Then use the pins we detached previously and reattach the car chassis over the car battery to secure the battery. Look at how we’ve attached the pins as this is the way to secure the car top.

We then need to grab the power bank - pictured below.
Place the power bank onto the vehicle. Make sure the ON button and USB ports are facing the back of the vehicle. Double check to make sure the USB ports and the power button are nearest the chassis at the rear of the car. Then use the straps provided to tightly secure the Power Bank to the car chassis.

Next, we’ll make sure you can charge your car. Grab the power cord and plug it into your nearest power source. With the other end, use it to plug into the USB-C power port on the car. Then, find the Compute power button on the car's side and press it.
The left blue LED should turn solid blue. Once blue it means you are successfully powered on! Congrats! Here is where the power button is.
Installing Lidar Sensor
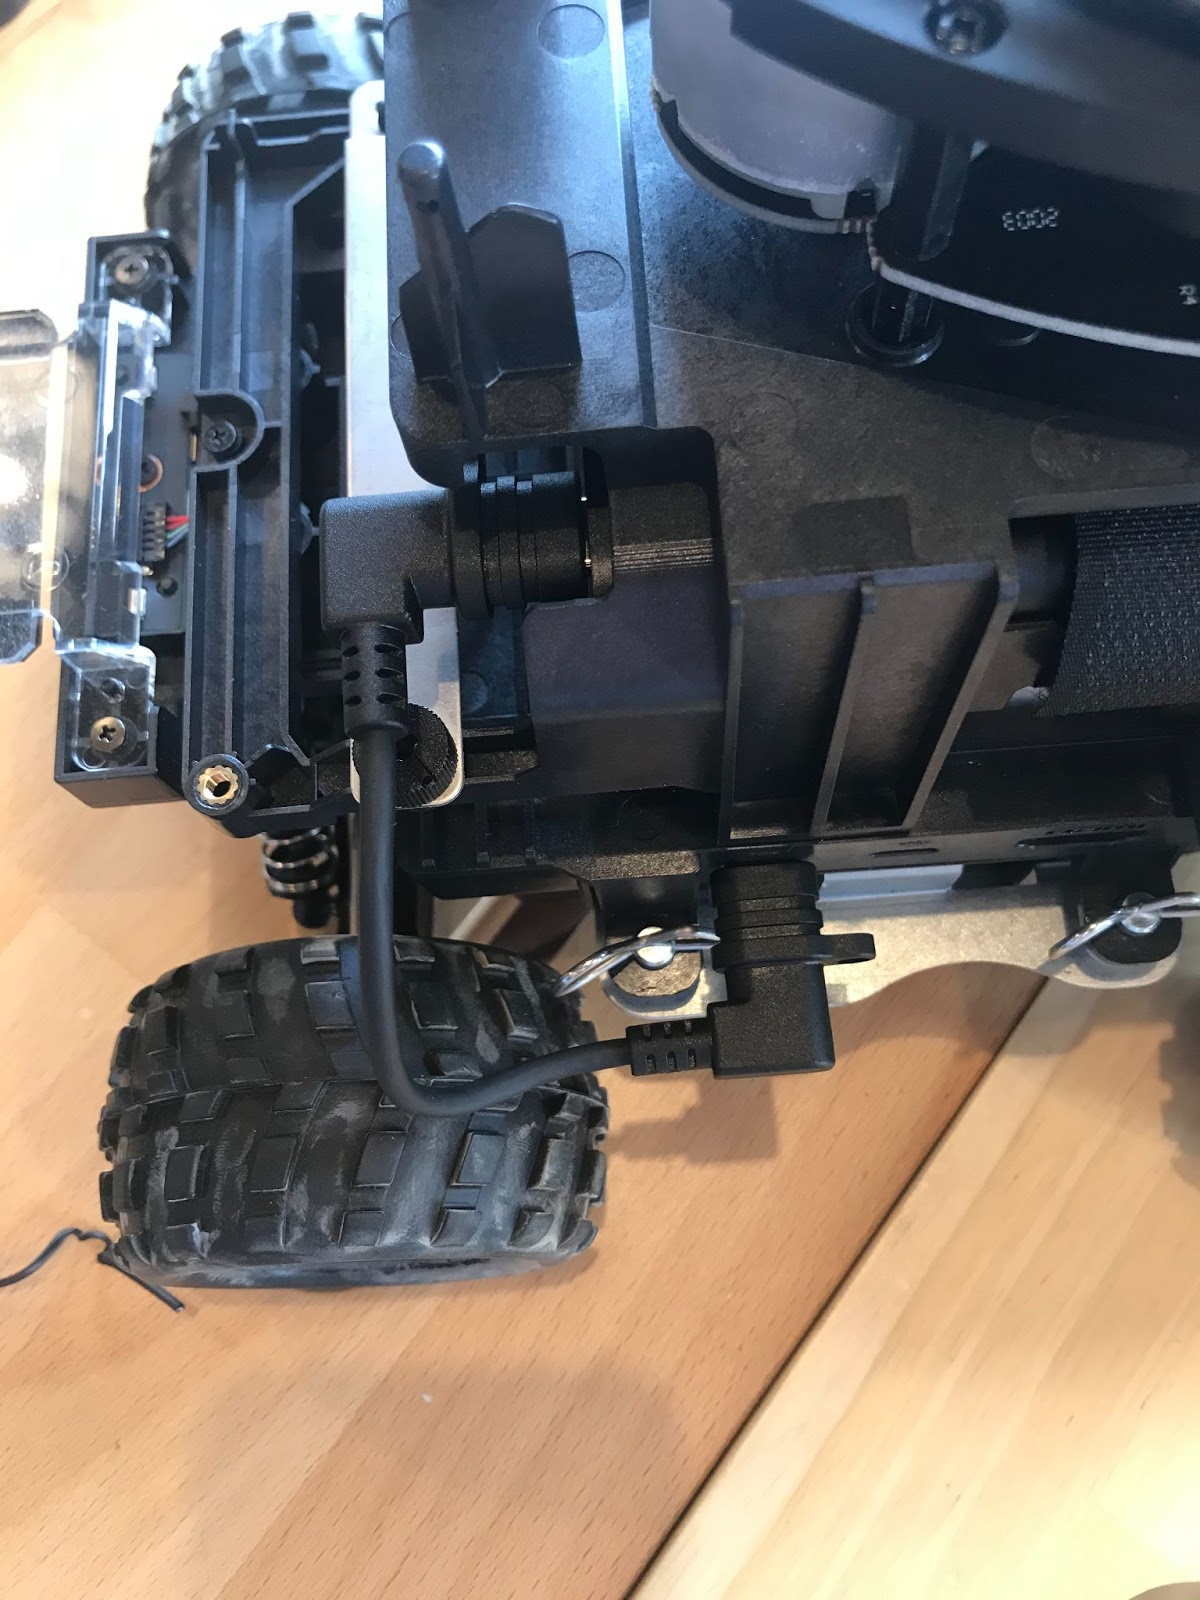
If you haven’t already taken out the camera from the USB port. Then unplug the USB-C cable from its side if it is connected. Then place the Lidar sensor on top of the car. Make sure to fasten it in with the screws provided in the Lidar kit. After securing it, plug in the USB-A cable (shown below).

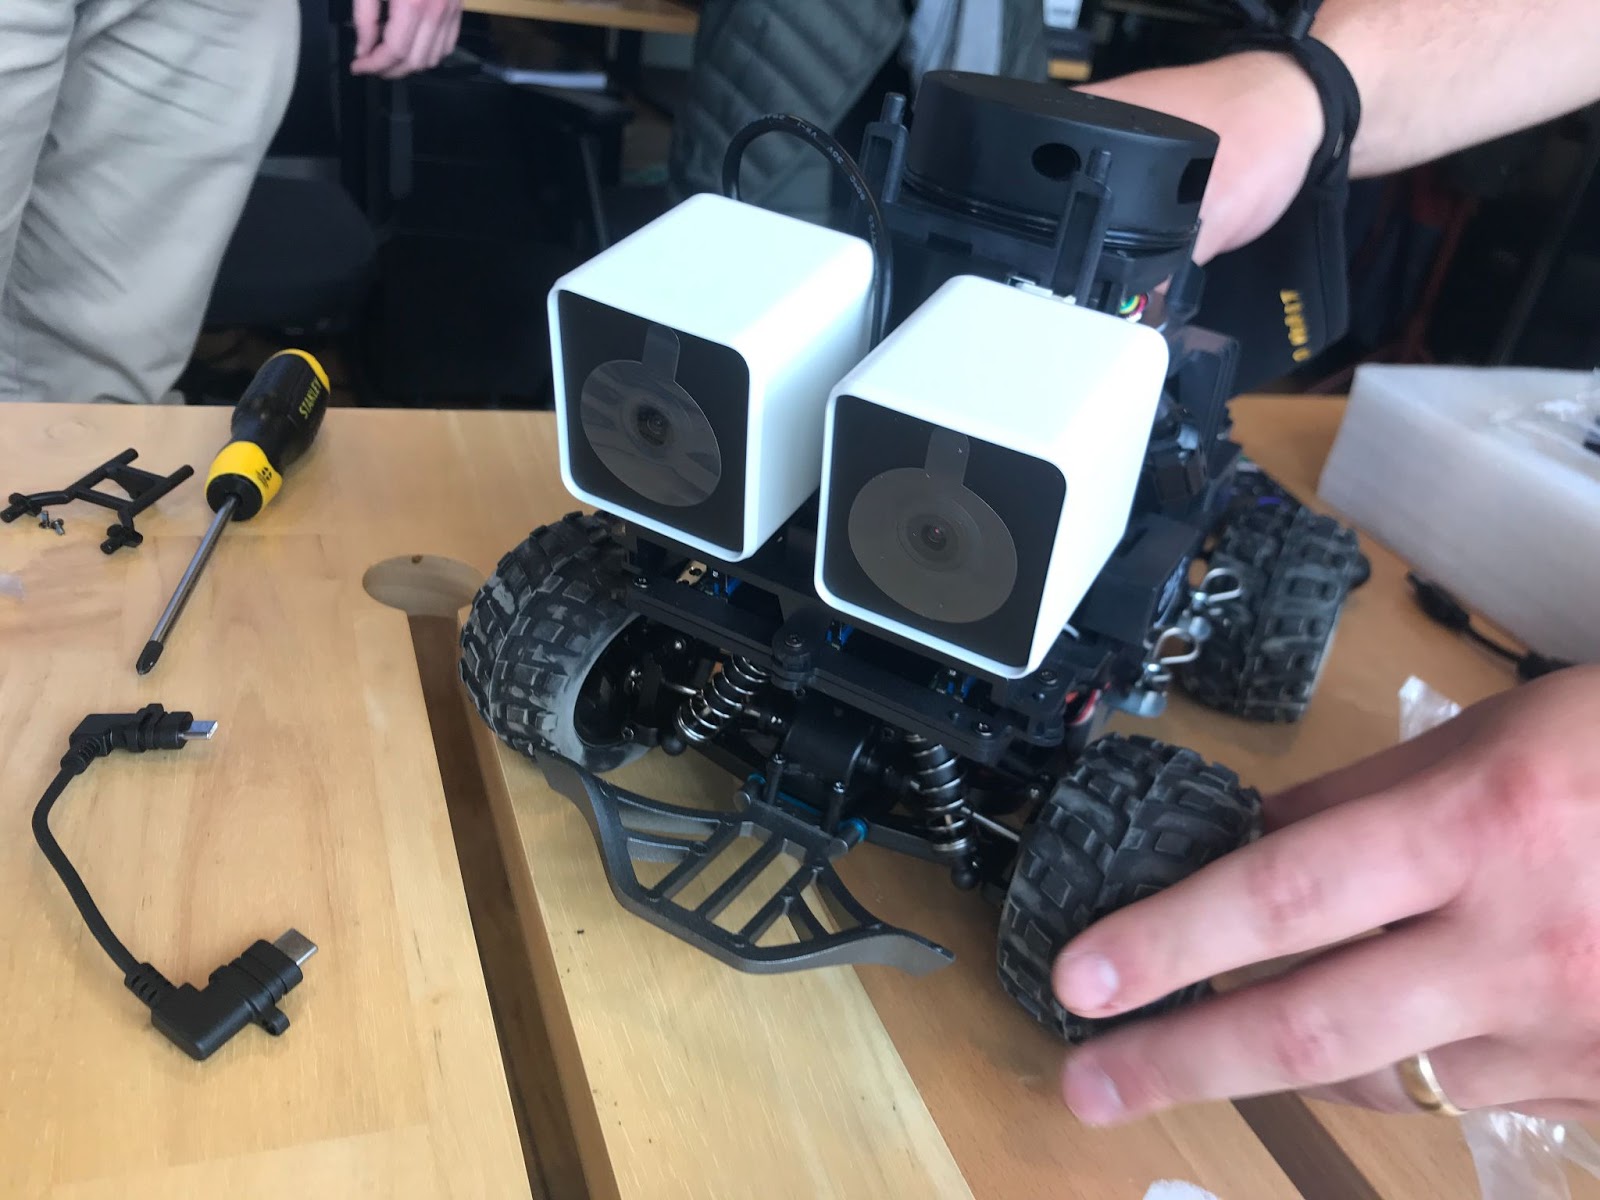
Now we can install the cameras! Get both and simply place them onto the front of the car and they will fit right in!
Next, we need to connect that USB-C cable we previously unplugged back into the car.
Ok we are ready to turn on our Deep Racer! Go to the compute battery towards the back of the car. On the left side there is a power button. Click it and you should see 4 green lights to the right of it.
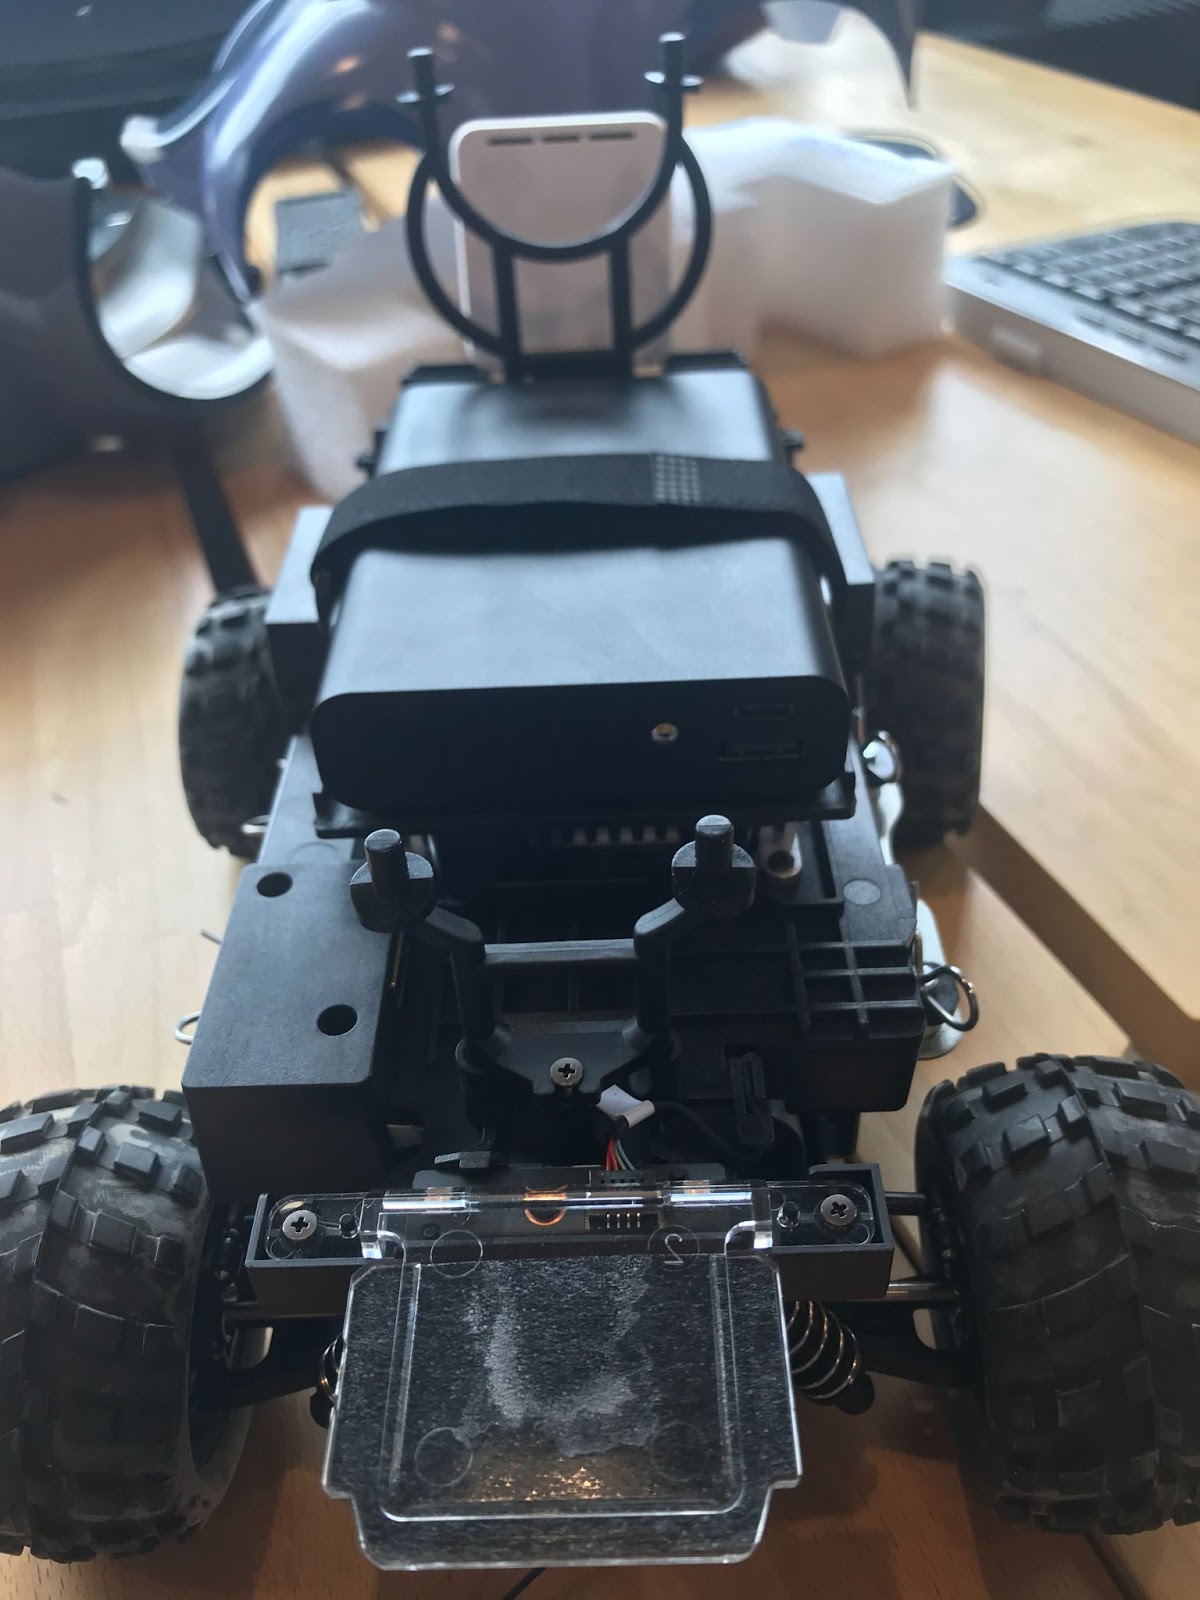
Then we need to turn on the actual vehicle. Press this power button right below. It takes a little while for it to turn on. Startup can take up to two minutes. After those two minutes the left most light should flash a light blue. Once the light is blue you have successfully completely powered up your Deep Racer vehicle!
WiFi Connection
Next, let us get our Deep Racer connected to the WiFi.
Our first step is to make sure we are using Firefox browser. Other browsers are not supported. If you have not installed Firefox on your computer, do that now.
Grab the micro-USB provided and connect it to your computer. Then, open up your Firefox browser and go to deepracer.aws
A page will come up saying “Your connection is not private”. Click on the button that says advanced then click “Proceed to deepracer.aws”. It will ask you to type in your password. To find your password simply turn over your vehicle. Underneath you will see a section with a barcode and a couple of labels. Underneath the bar code there should be a Host Name and Password. Write down the password, type it into the password section, and click access vehicle!
Ok, now look at your Deep Racer and make sure everything is up and running. Go to the compute battery on the back of the car and check to see that all four green lights are turned on. Once confirmed, go and check the side of the car where the led light was and there should be two blue lights shining nice and bright! The other light is telling you that your car is connected to WiFi.
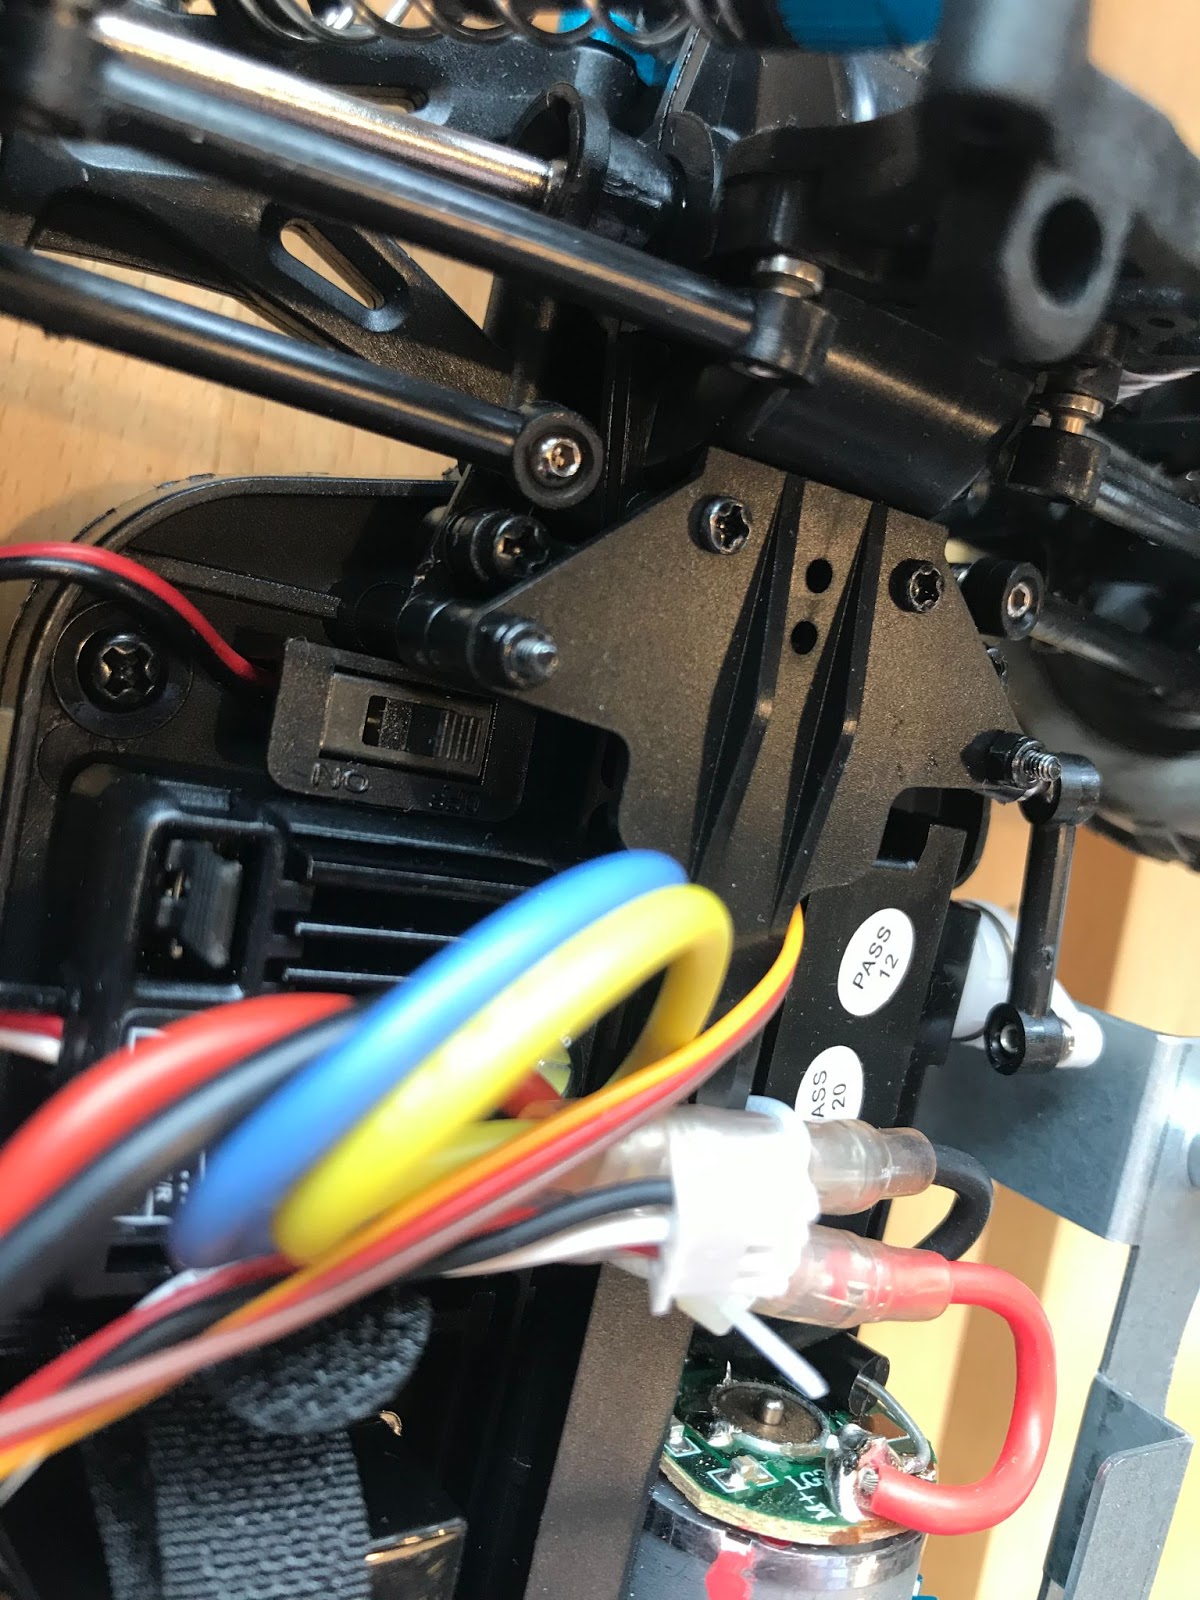
Last but not least, find the car’s on switch (shown below) and turn it on! As a heads up, it’s a little squeeze to turn it on. Listen for two short beeps and one long beep.
Congratulations! Your Lidar should be spinning, and the back of your car should be lit up like a Christmas tree with a wonderful LED light blue. You are now all set to take your Deep Racer for a ride.
Thank you for walking through this set up of Deep Racer with us! We can't wait to start driving this thing. Look out for our next post where we will walk you through driving our deep racer and all of the interesting features you can accomplish with this car.