.svg)

Invoice OCR: Turning Manual Invoice Checks into an End-to-End Automated Workflow using Amazon Quick Suite’s Quick Automate

Invoice OCR: Turning Manual Invoice Checks into an End-to-End Automated Workflow using Amazon Quick Suite’s Quick Automate
About this tutorial:
In this walkthrough, you’ll learn how to build a fully automated invoice review workflow using Amazon QuickSuite. We’ll show you how to go from a simple PDF invoice to a complete review system that extracts key details, creates cases, and routes them for human approval. You’ll get hands-on experience connecting S3, Textract, and QuickSuite’s case management tools to automate repetitive tasks without losing control or accuracy.
Pre-requisites:
For this tutorial, Quick Automate needs access to your account’s S3 and Textract.
For that we need to configure the service connectors in Quick Automate. We will need the following role and permissions for the Quick Automate workshop to access Amazon S3 and Amazon Textract services.
Setup IAM Roles to access Amazon S3 and Amazon Textract services
- In the AWS Management Console, navigate to IAM → Roles → Create role.
- In Roles Page, click on the Create role button. On the next page, let's select Custom trust policy radio button.In the trust relationship, give the assume role permission to quicksight.amazonaws.com. Copy and paste the code below in the Custom trust policy and click next.
{
"Version": "2012-10-17",
"Statement": [
{
"Sid": "Statement1",
"Effect": "Allow",
"Principal": {
"Service": "quicksight.amazonaws.com"
},
"Action": "sts:AssumeRole"
}
]
} - Assign a managed policy AmazonS3FullAcccess to invoke Amazon S3 service and AmazonTextractFullAccess to invoke Amazon Textract service. Click next

-
Give the role name invoice-automate-role. Verify all the changes and click on Create role.
-
As your last step, upload a pdf invoice of your choice in any S3 bucket in the same account.
Integrating S3 with Amazon Quick Suite:
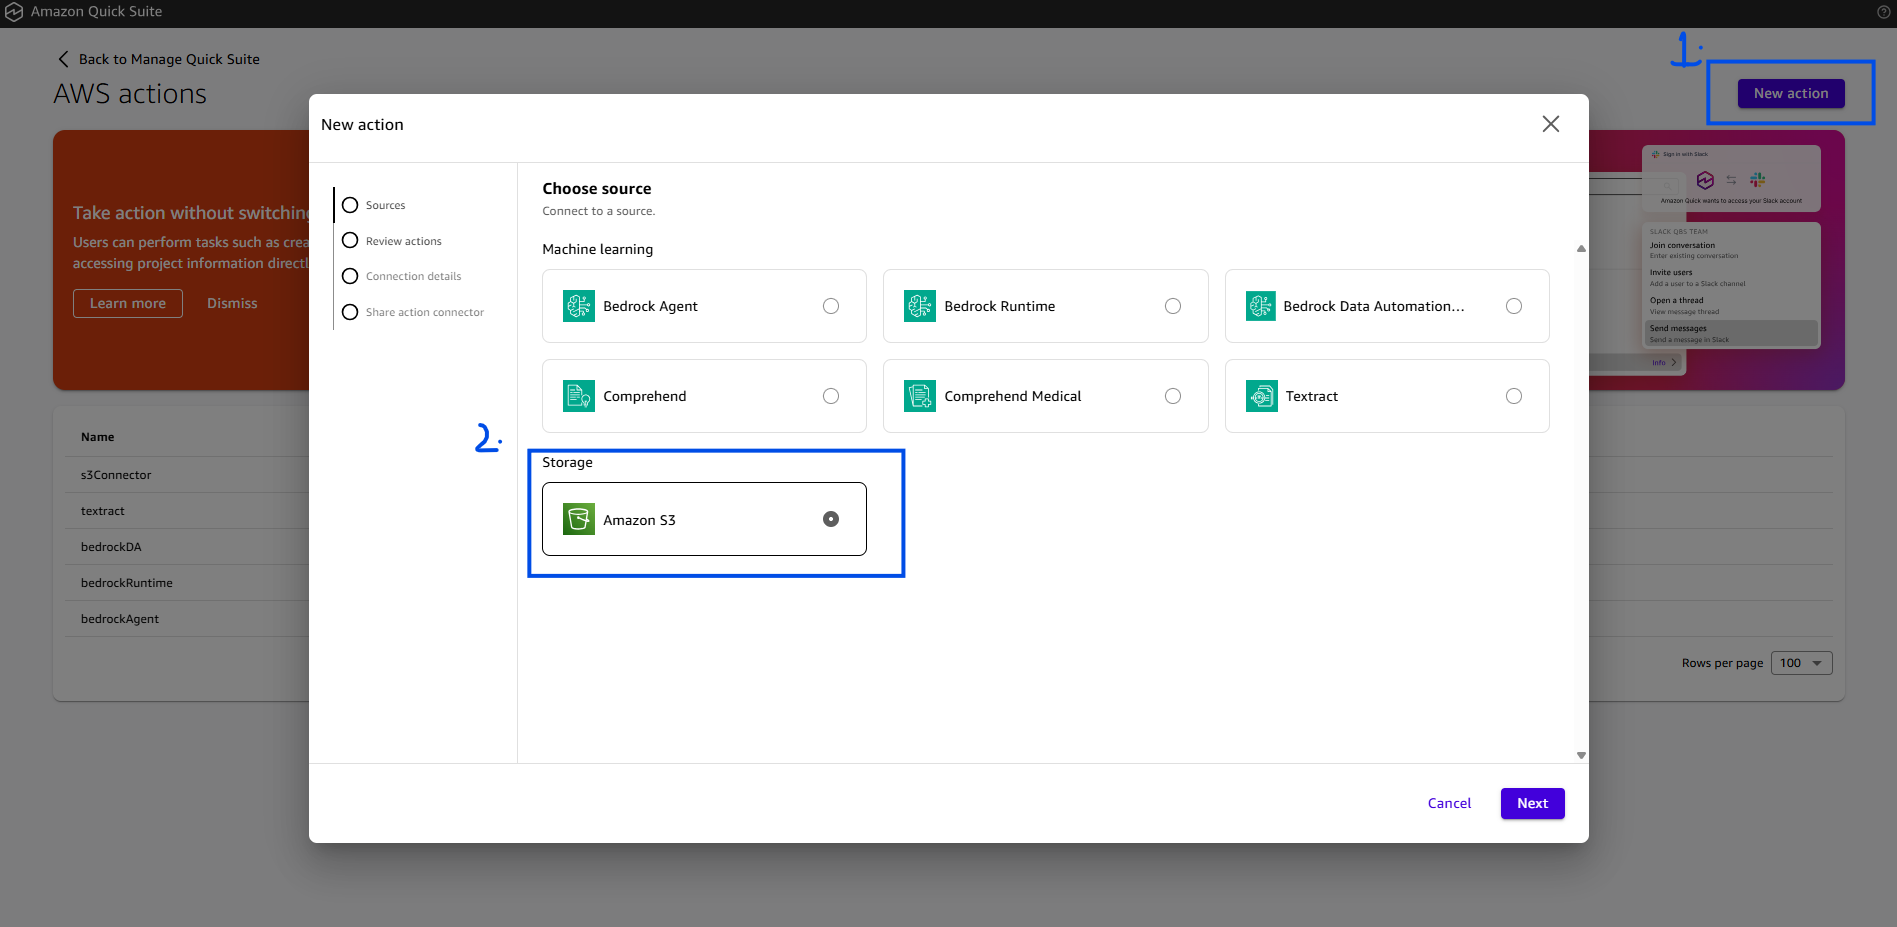
- Navigate to “Manage Account” page on Amazon Quick Suite. Click "AWS Actions" options in the Explore menu.

- Click “New Action” which opens a modal with options of different Amazon services you can integrate with your Amazon Quick Suite. Click the “Amazon S3” option. Then click “Next” in bottom right of this modal
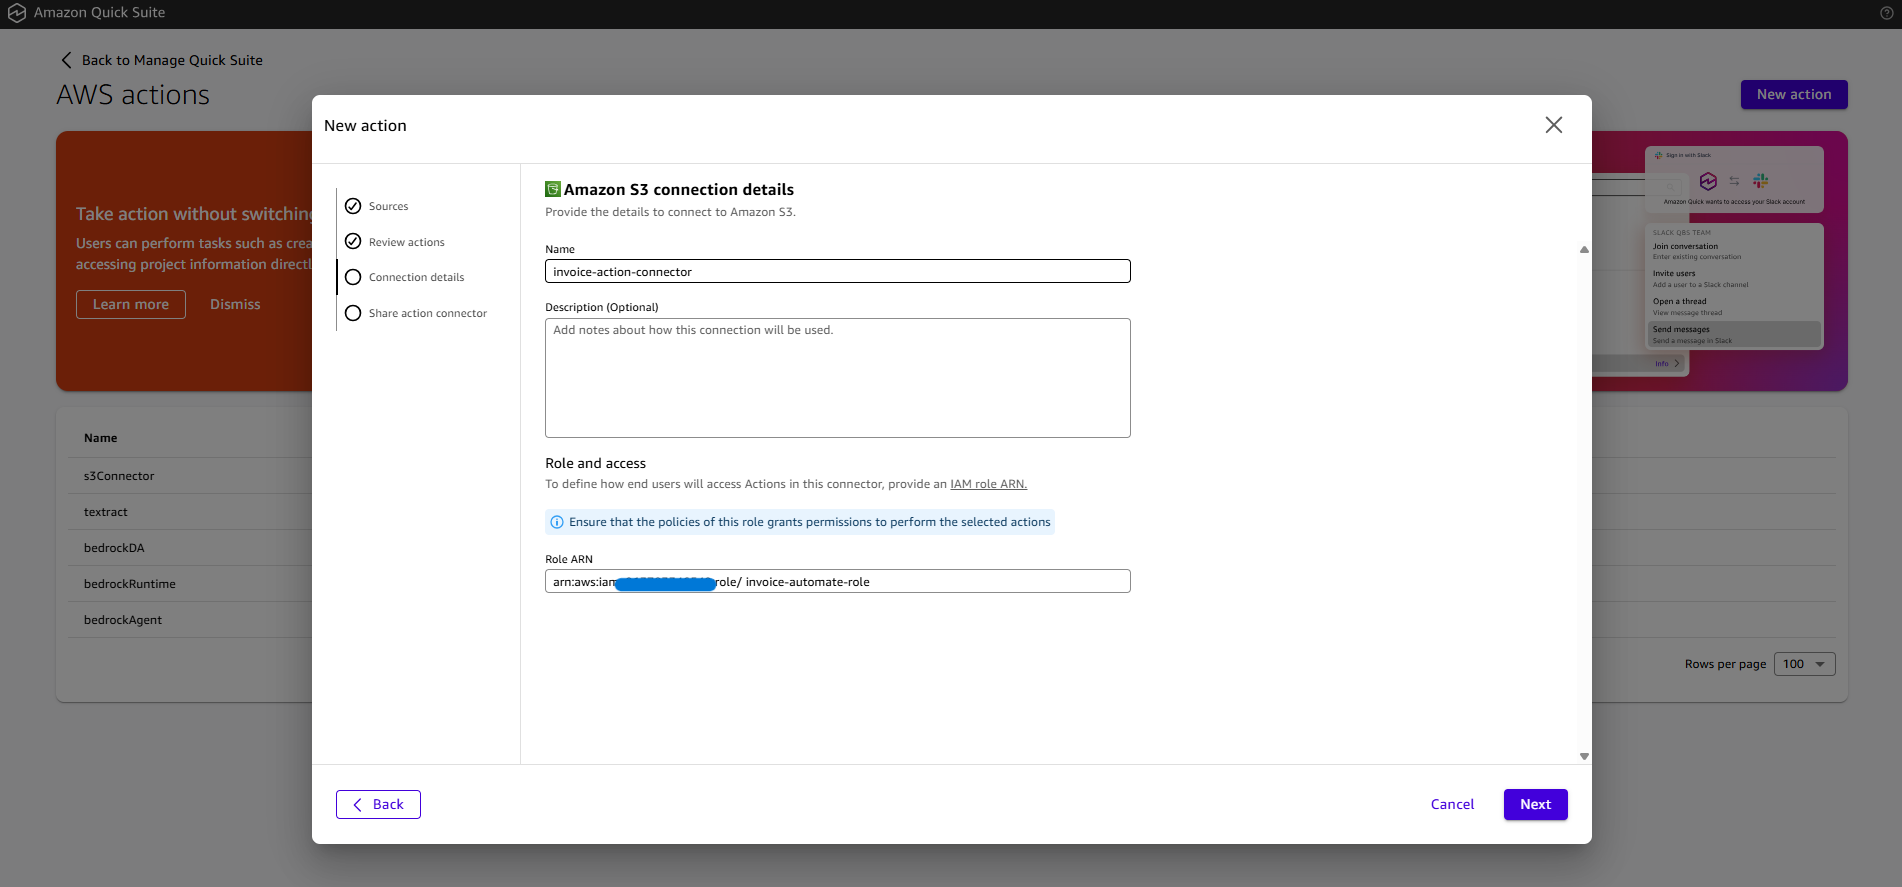
- Click “Next” in bottom right of this modal again.

- Fill in the details on this page. Copy role-arn of the invoice-automate-role created earlier here.
- Share the connector to at least one user or group to share the connector with. Click Share to add the user to the list. Then, select either Owner or User permissions. Click the “Add” button

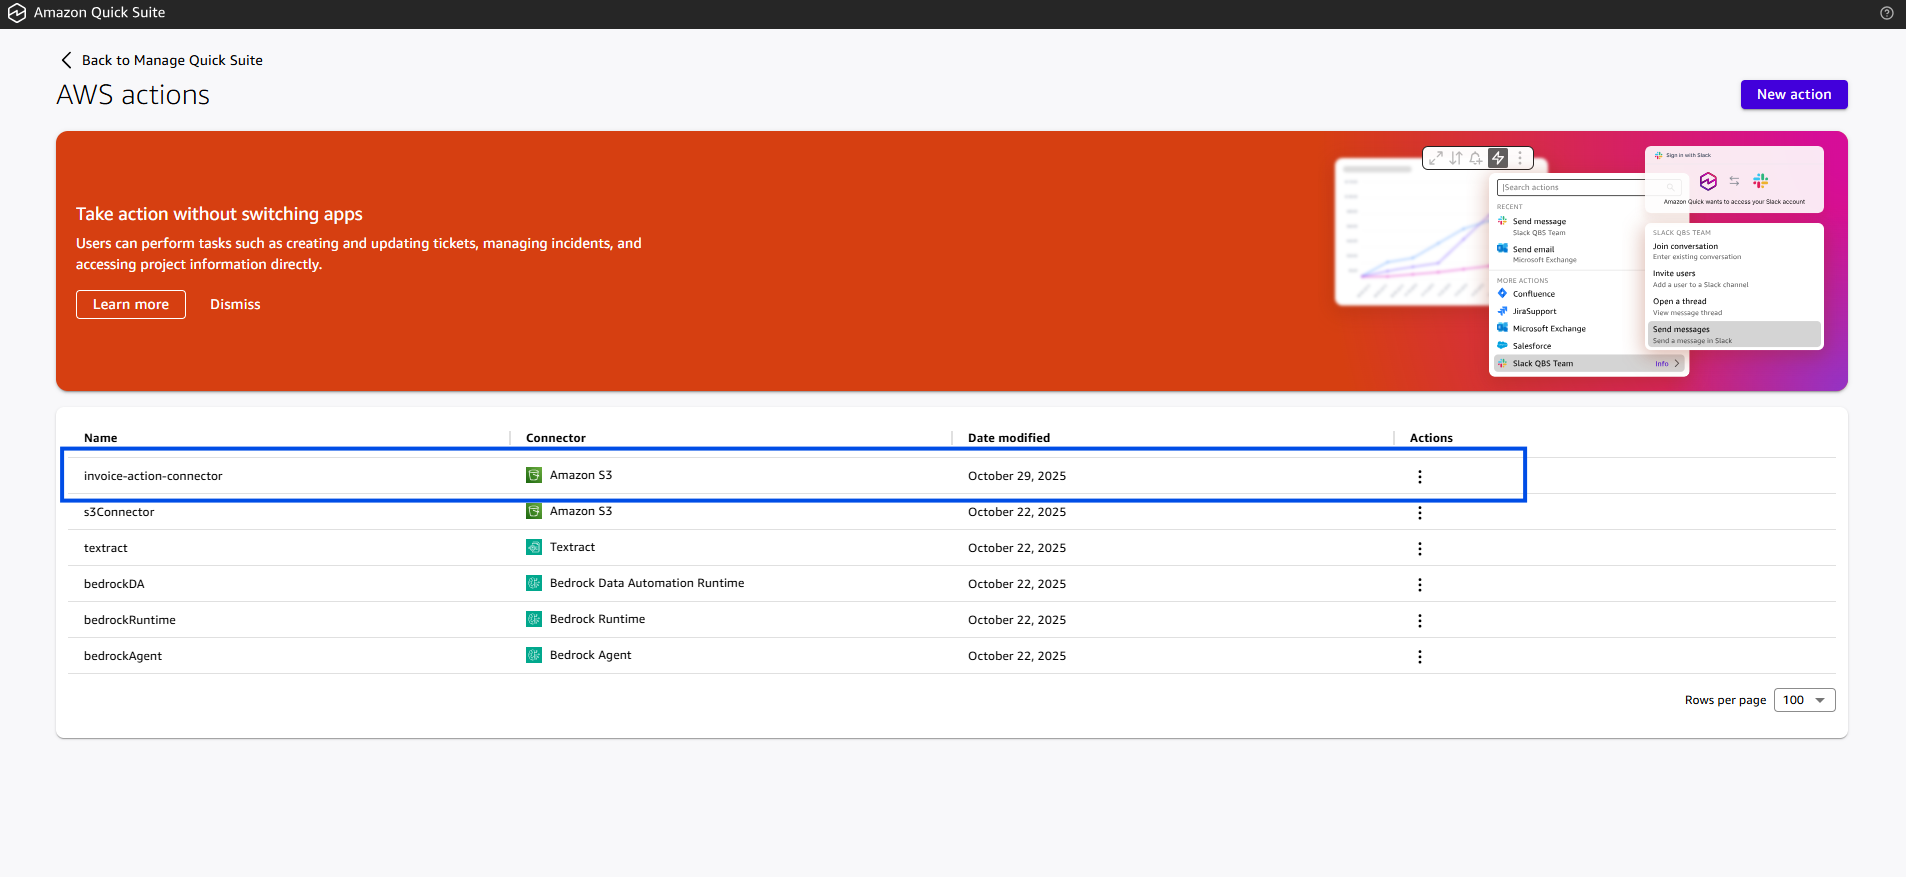
- The newly added action should now be visible on the Actions page (may take a few minutes, reload the page after addition).
Integrating Amazon Textract with Amazon Quick Suite:
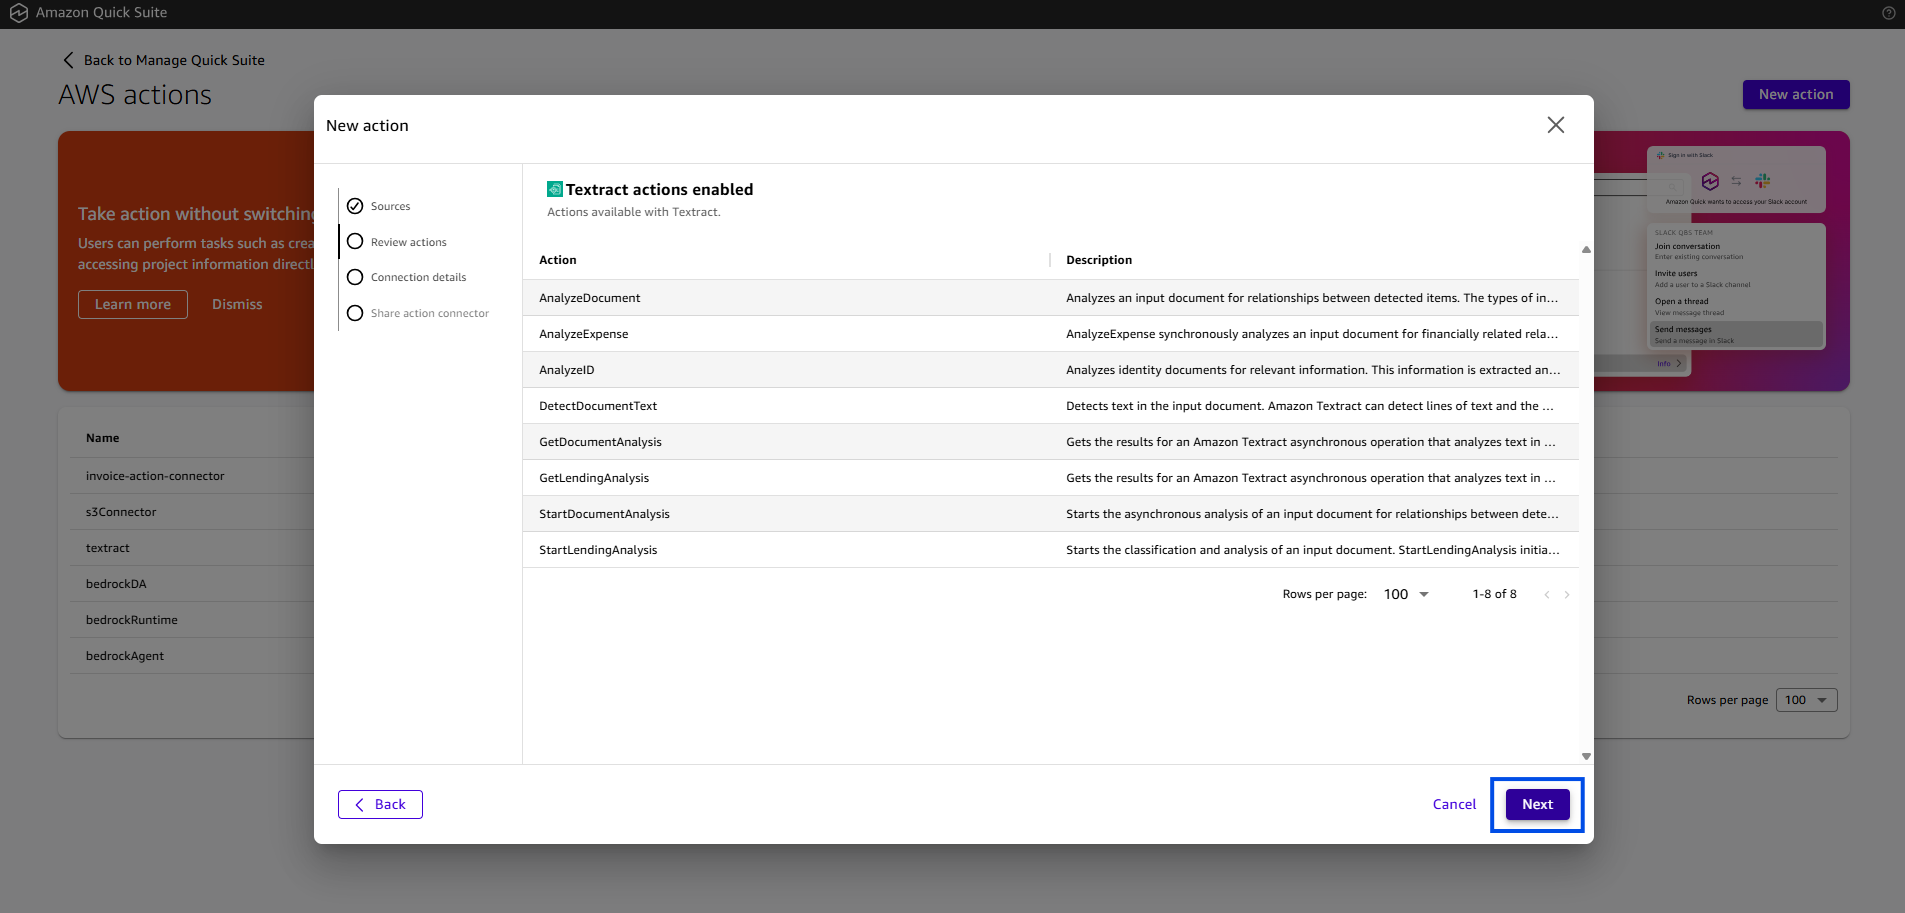
- Click “New Action” which opens a modal with options of different Amazon services you can integrate with your Amazon Quick Suite. Click the “Textract” option. Then click “Next” in bottom right of this modal.
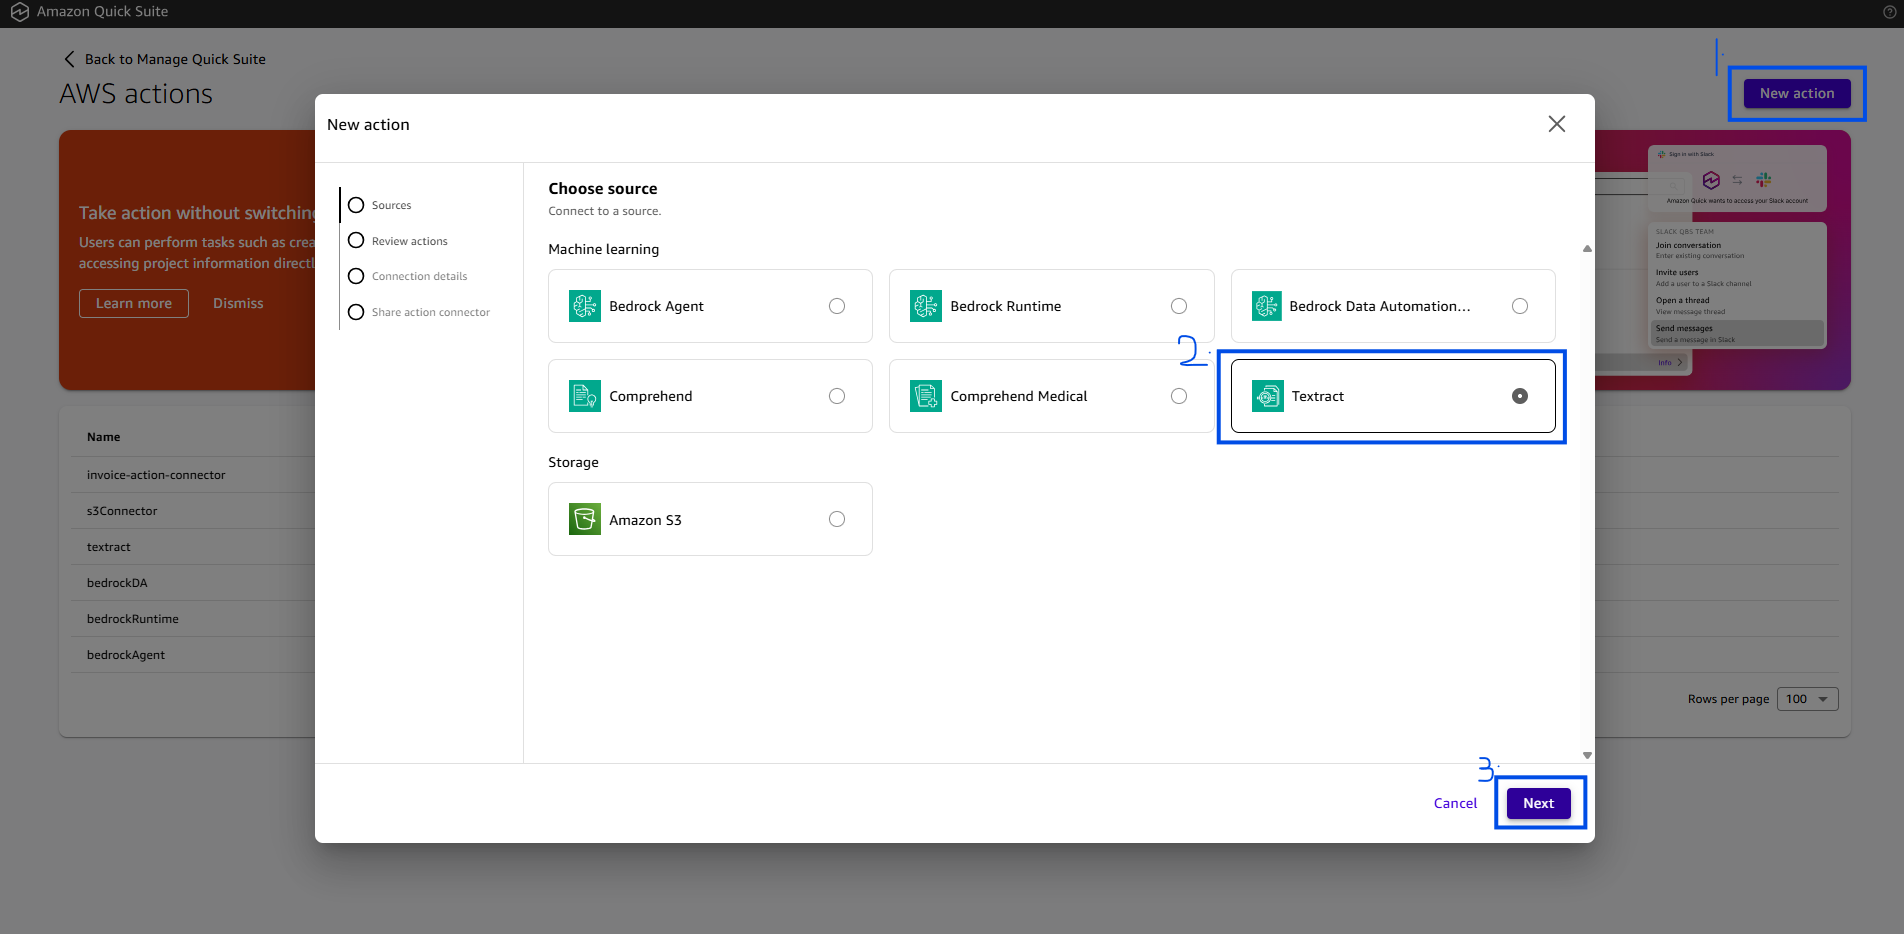
- Click “Next” on this modal again.
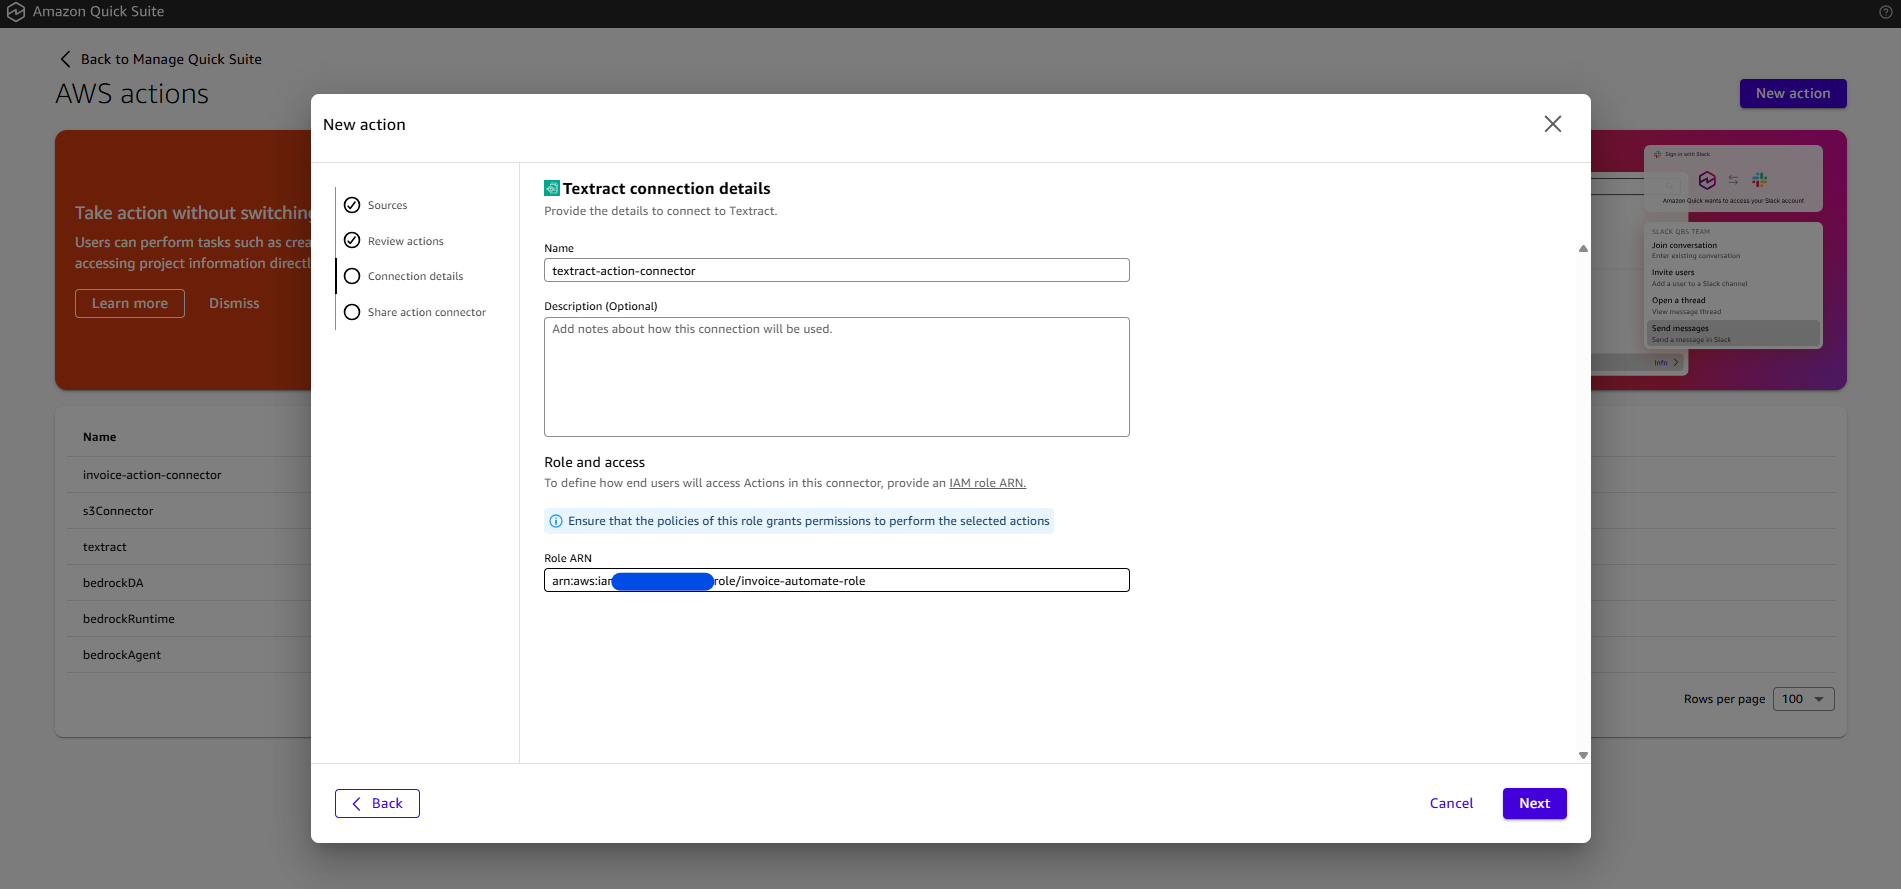
- Fill in the details on this page. Copy the role-arn from the invoice-automate-role created earlier here.
- Share the connector to at least one user or group to share the connector with. Click Share to add the user to the list. Then, select either Owner or User permissions. Click the “Add” button
- The newly added action should now be visible on the Actions page (may take a few minutes, reload the page after addition).

Connecting these action connectors with the automation project:
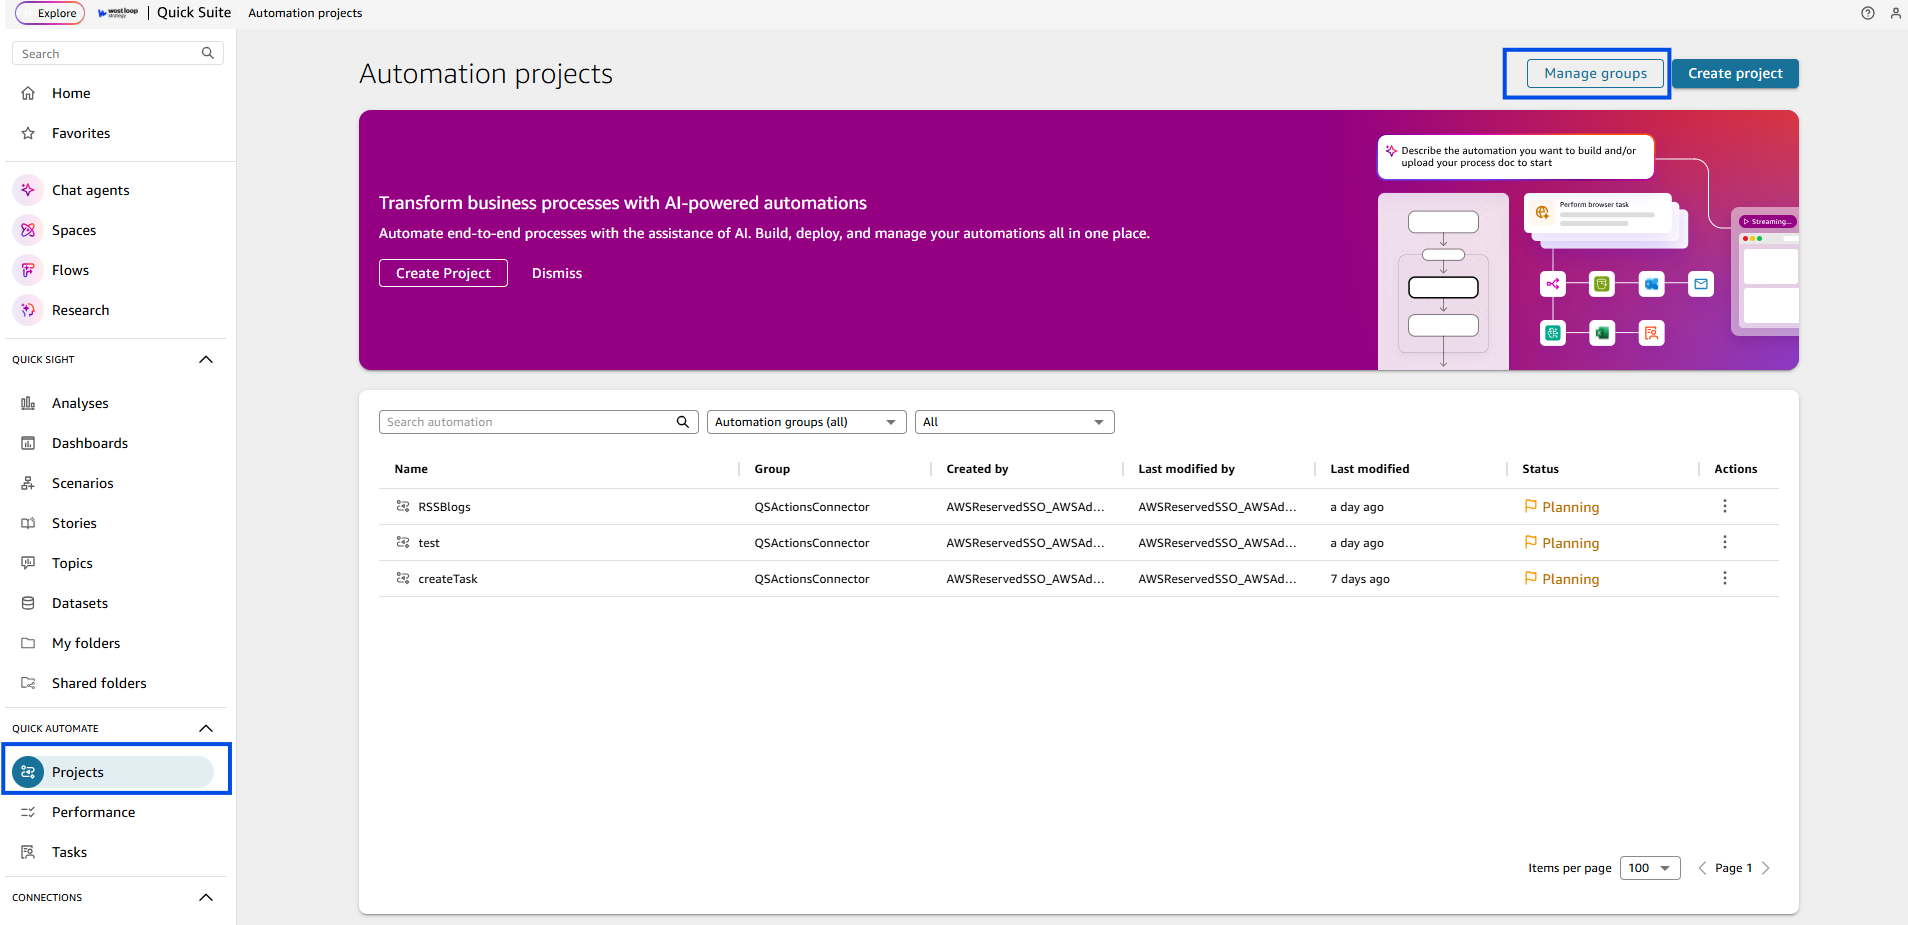
- Navigate to the “Explore” Menu on the Quick Suite page. Click on the “Projects” option under “Quick Automate” sub-section of the Explore menu. Next click “Manage Groups” in top right of the screen.
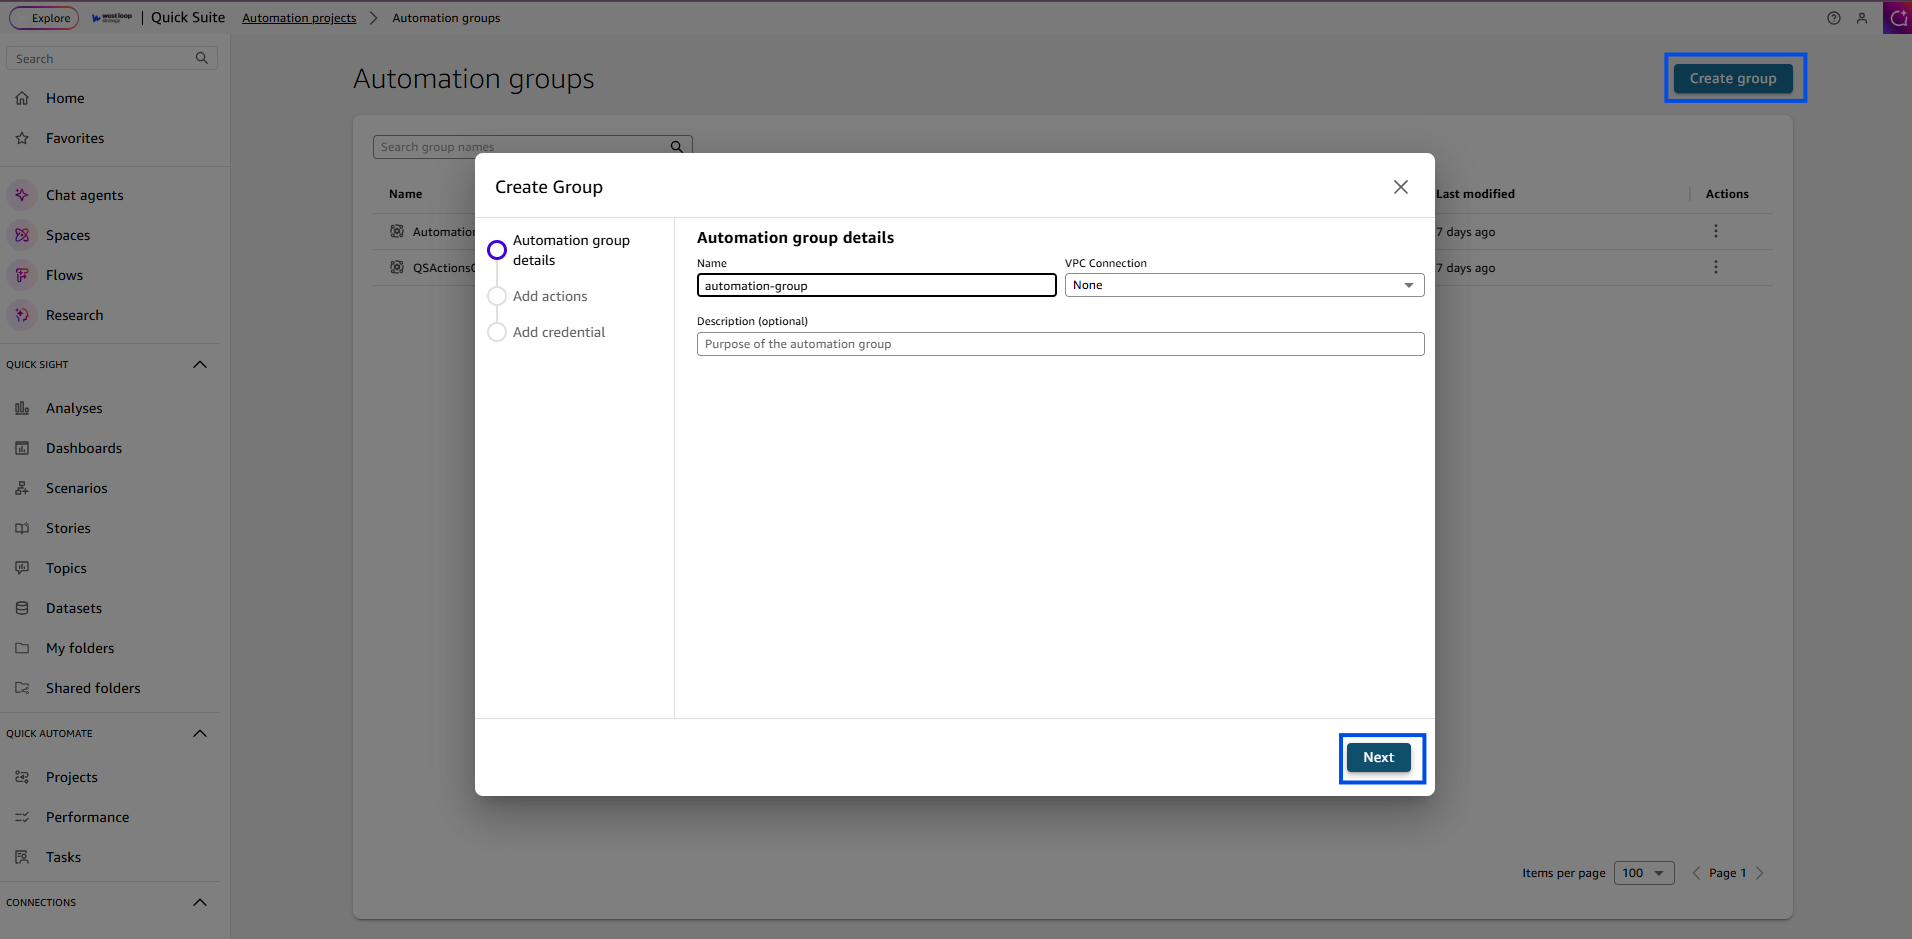
- On the next page click “Create Group” in top-right corner of the screen. Name your group as automation-group, hit “Next”.
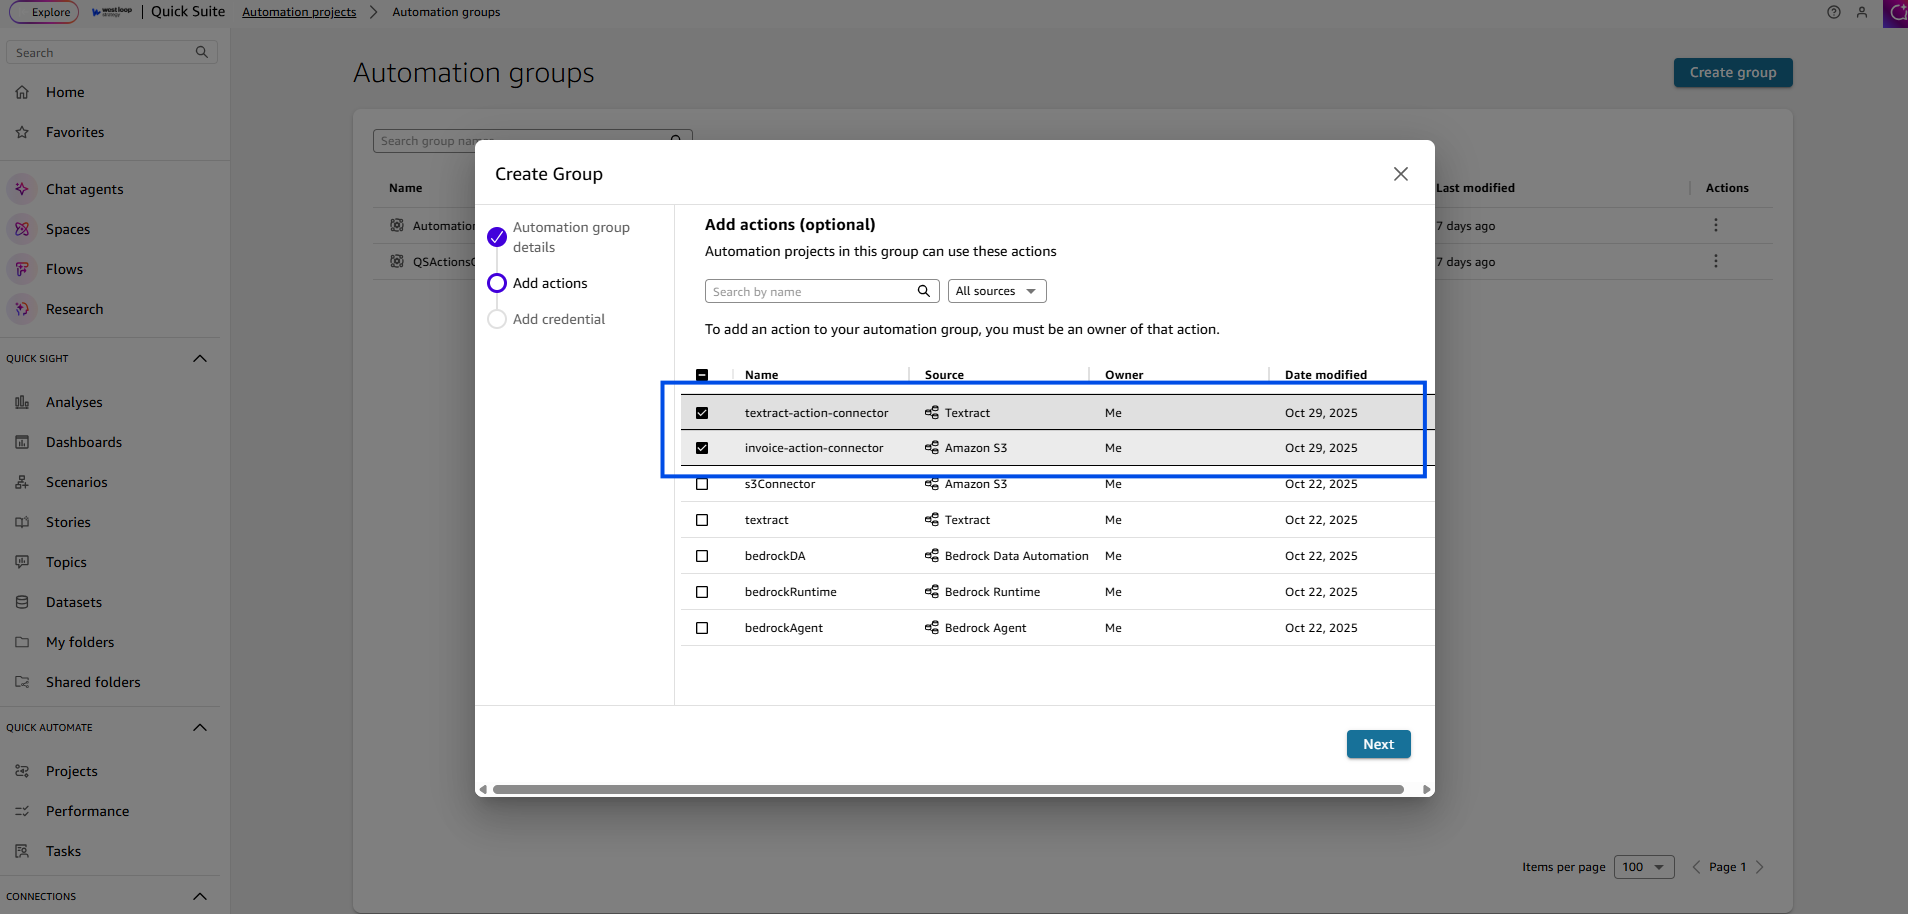
- Select your created actions that show up in the list on the next page. Click “Next”.
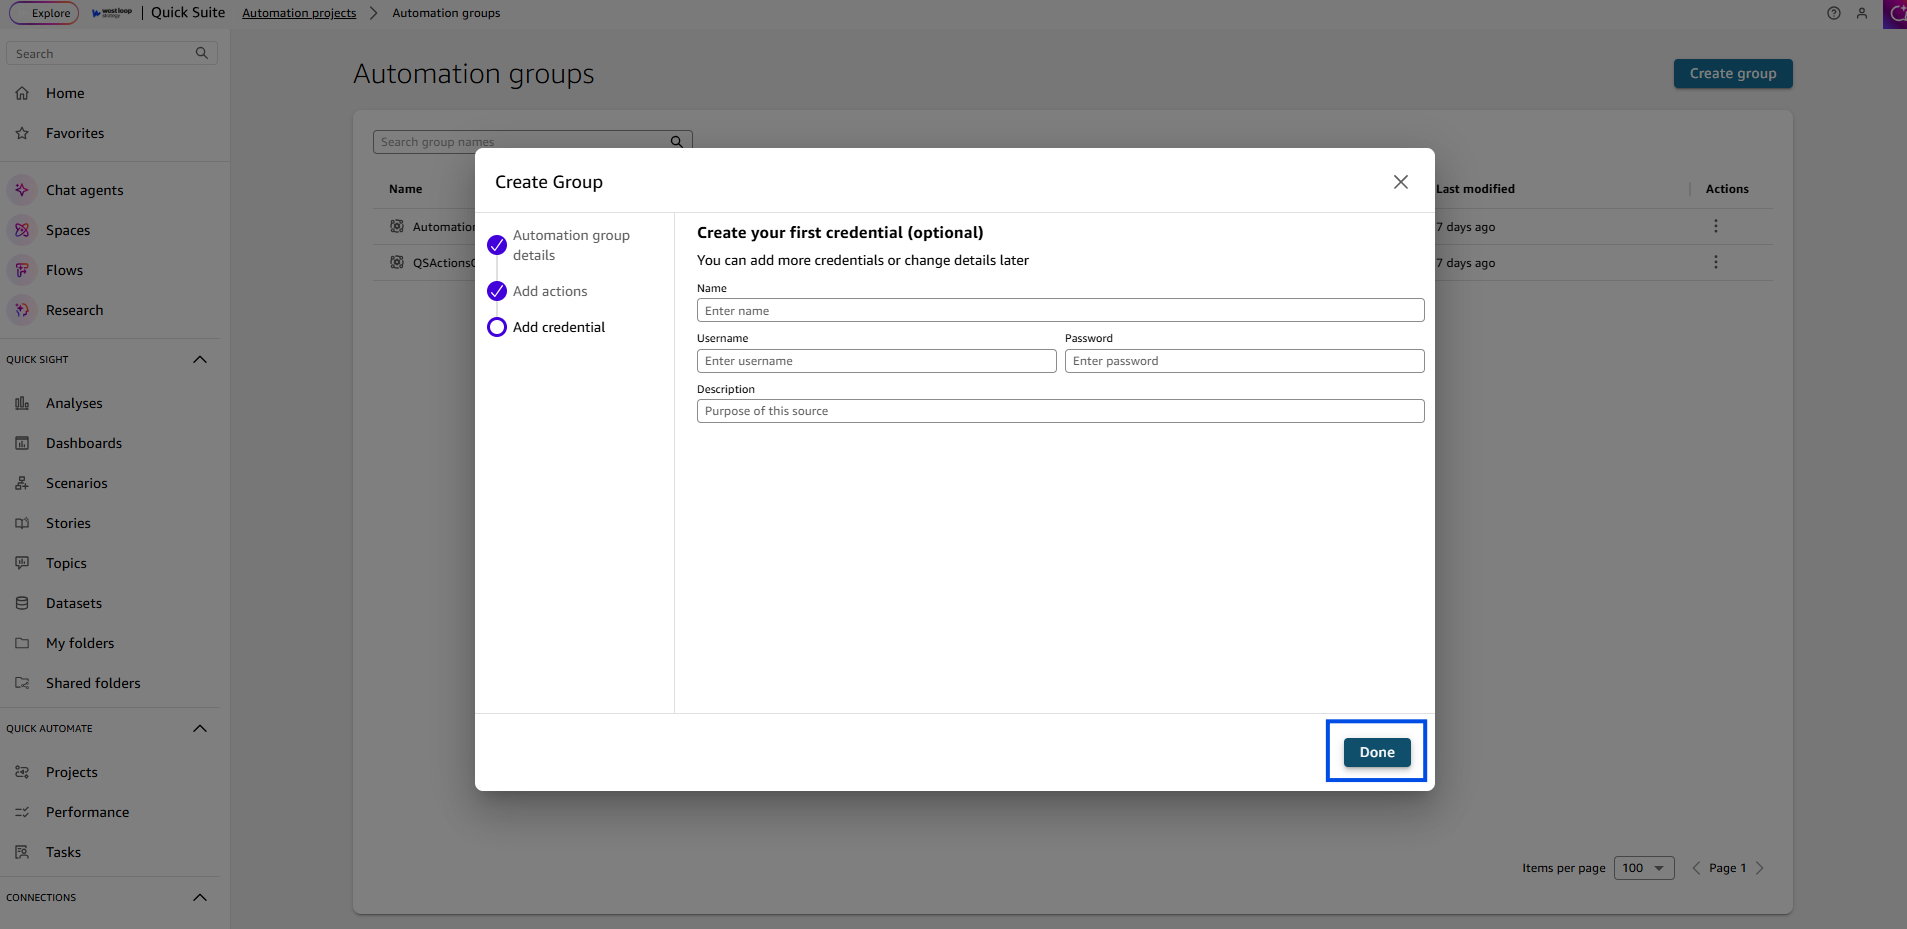
- These fields can be left empty. Click “Done”.
Bringing it all together – Building Invoice Approval Automation:
- After you are done creating the group. Click “Create project” button on the top-right corner of the page. Name your project, click “Create” on the modal.

- Click “Start building”. Skip to the manual building interface by clicking “Skip”.


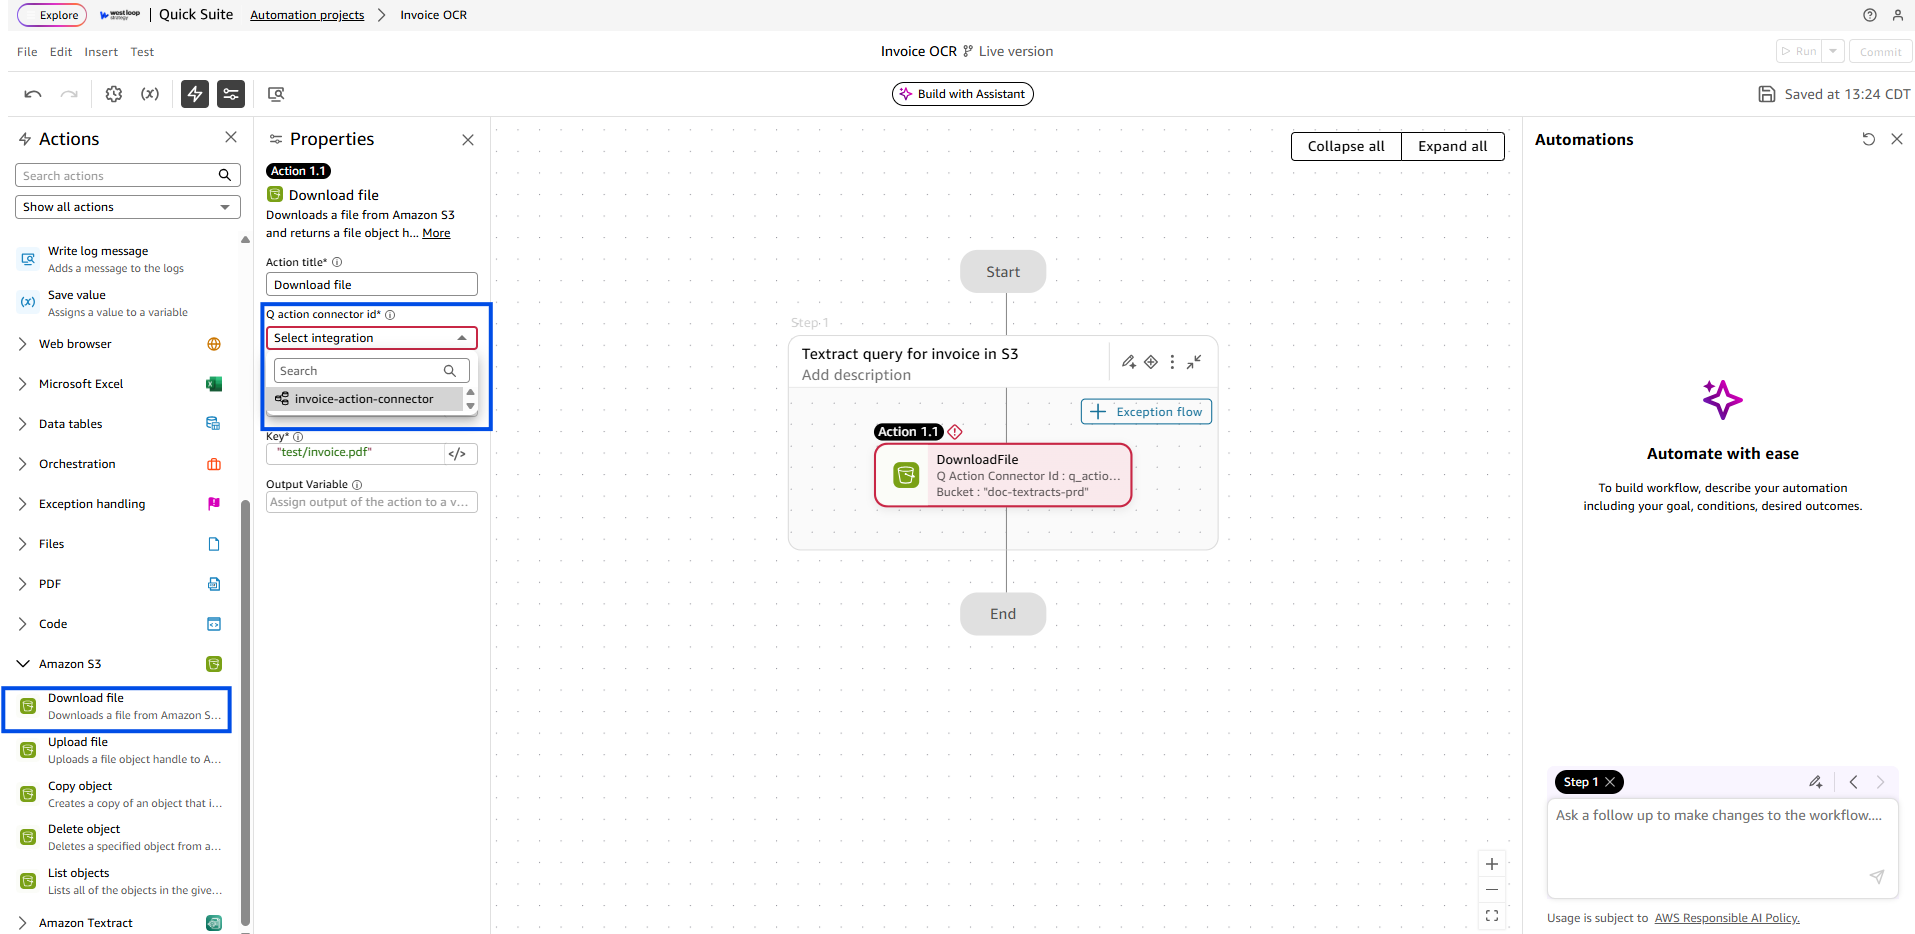
- As your first step, download the invoice pdf uploaded in the beginning of this tutorial. Drag and drop “DownloadFile” action in Step 1. Select the action integrated, fill out bucket name and file key details. Name output_variable as input_file.
- Drag and drop “QueryDocument” action in Step 1 just below “DownloadFile”. Fill in the required details. For this particular case and invoice file the textract query looks something like this (for the “Queries” field ):
[{"QueryText": "What is the Customer Number?", "FieldName": "customer_number"}, {"QueryText": "What is the Total Amount Due (Amount Due in USD)?", "FieldName": "total_amount_due"}, {"QueryText": "What is the Invoice Date?", "FieldName": "invoice_date"}, {"QueryText": "What is the Invoice Number?", "FieldName": "invoice_number"}, {"QueryText": "What is the Order Number?", "FieldName": "order_number"}]
The query you use depends on your specific use case and the level of detail available in the invoice. The one shown here is a general template that should work with most standard invoice receipts.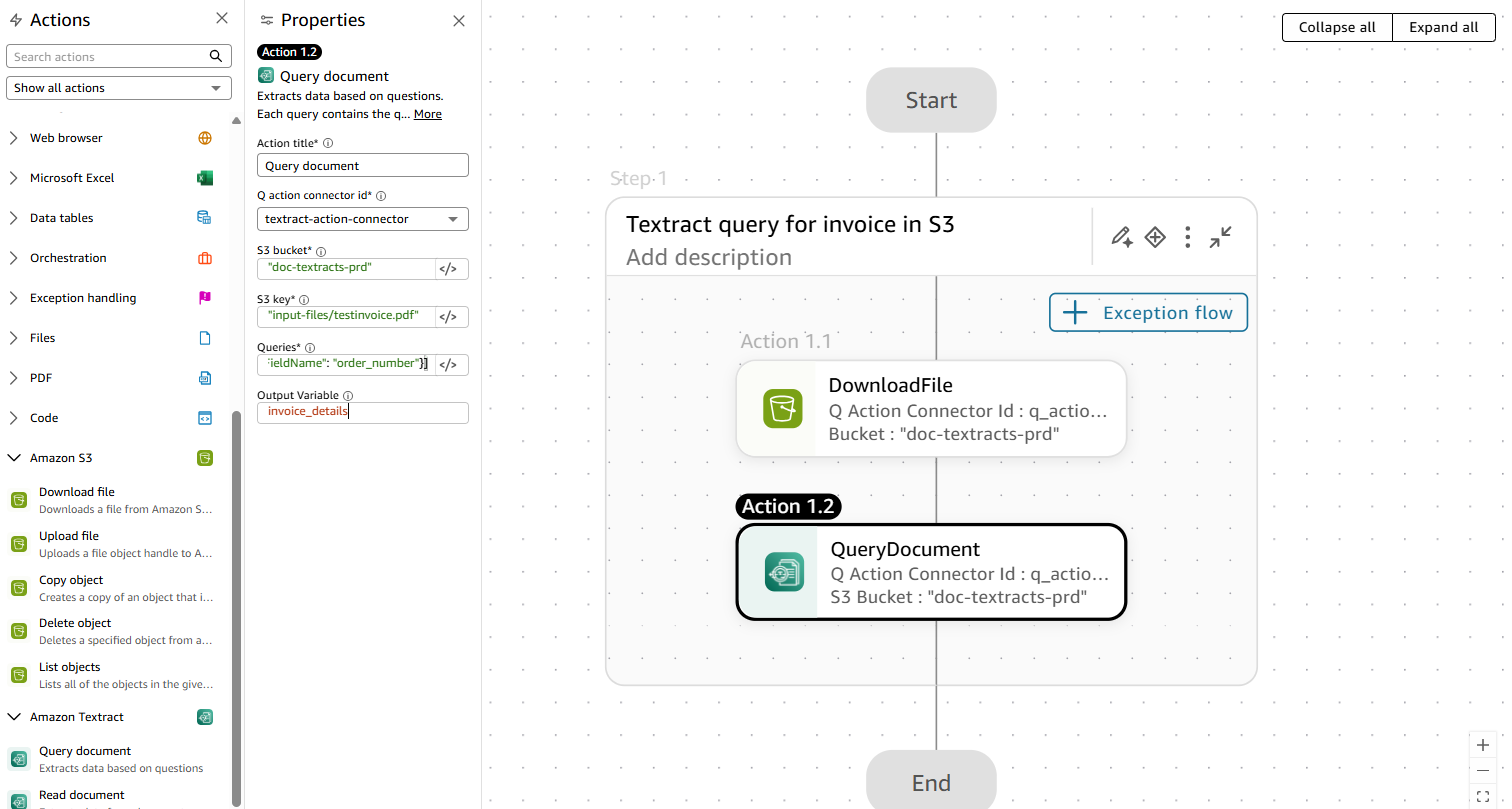
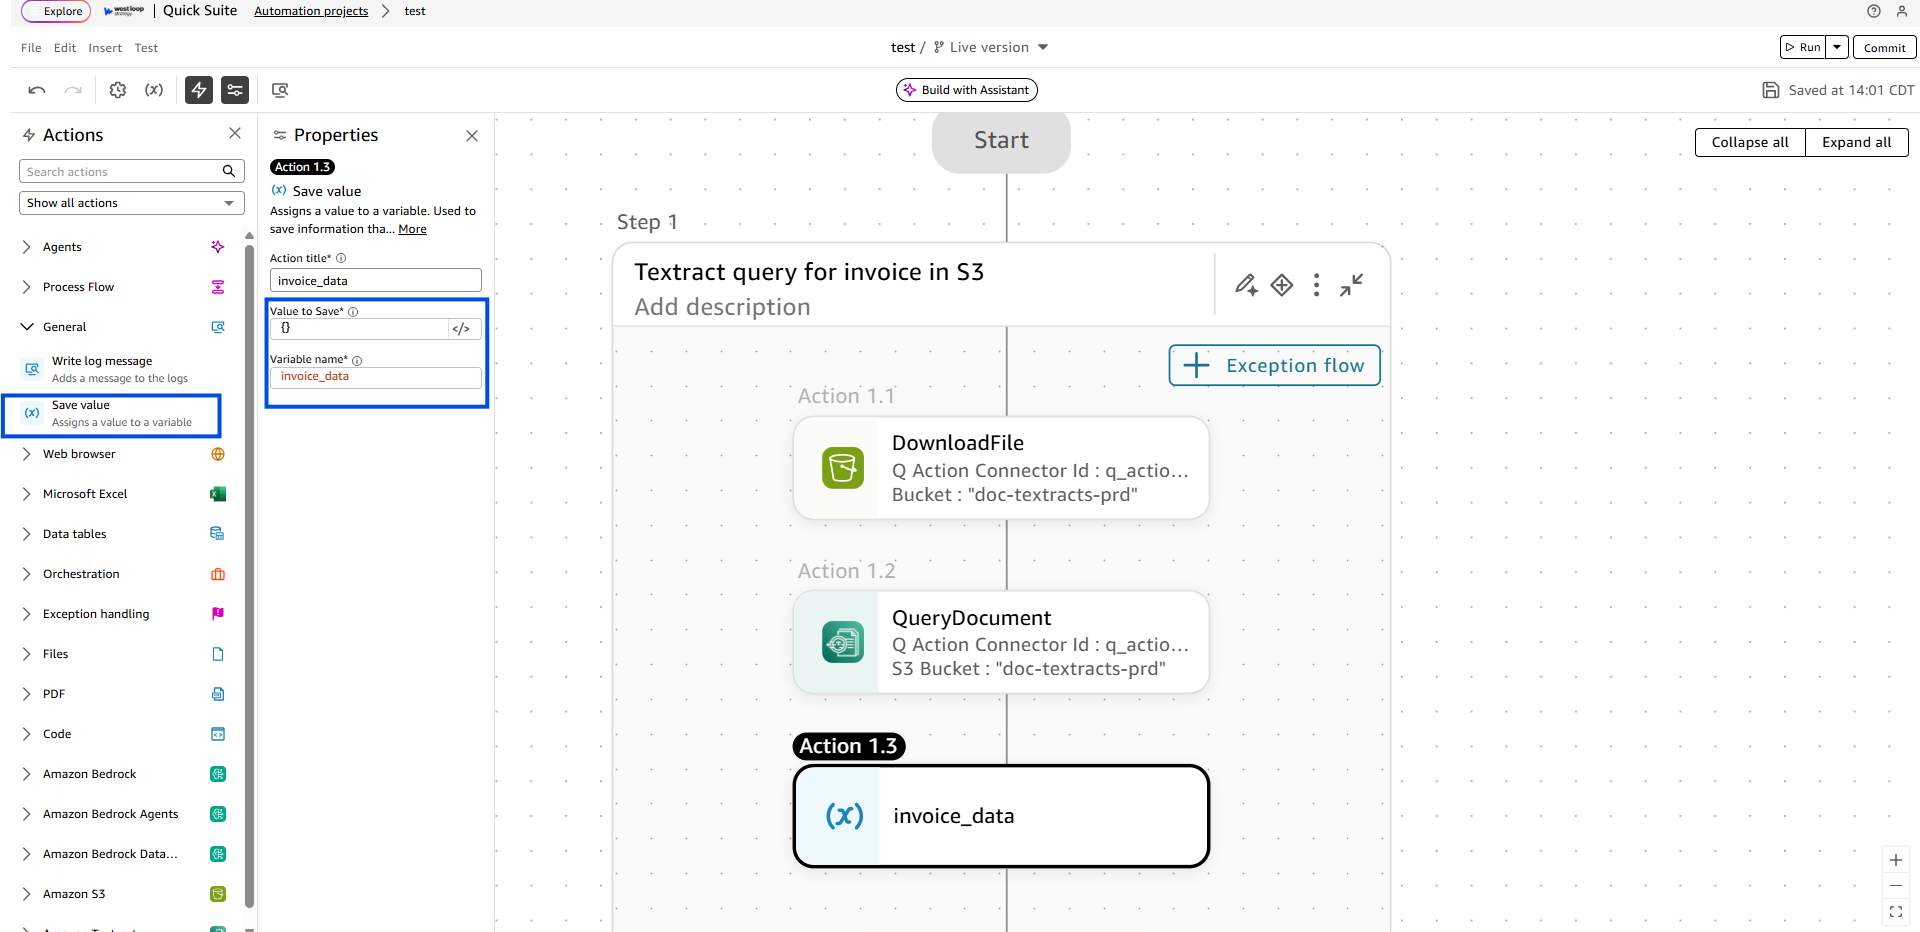
- Drag and drop the “Save Value” option under general in Actions below the QueryDocument step. Fill in the fields exactly as in the image i.e. invoice_data = {}
- Add “Loop through items” action after saving the value for invoice_data. Loops through invoice_details, each item is called an invoice_item in the loop.
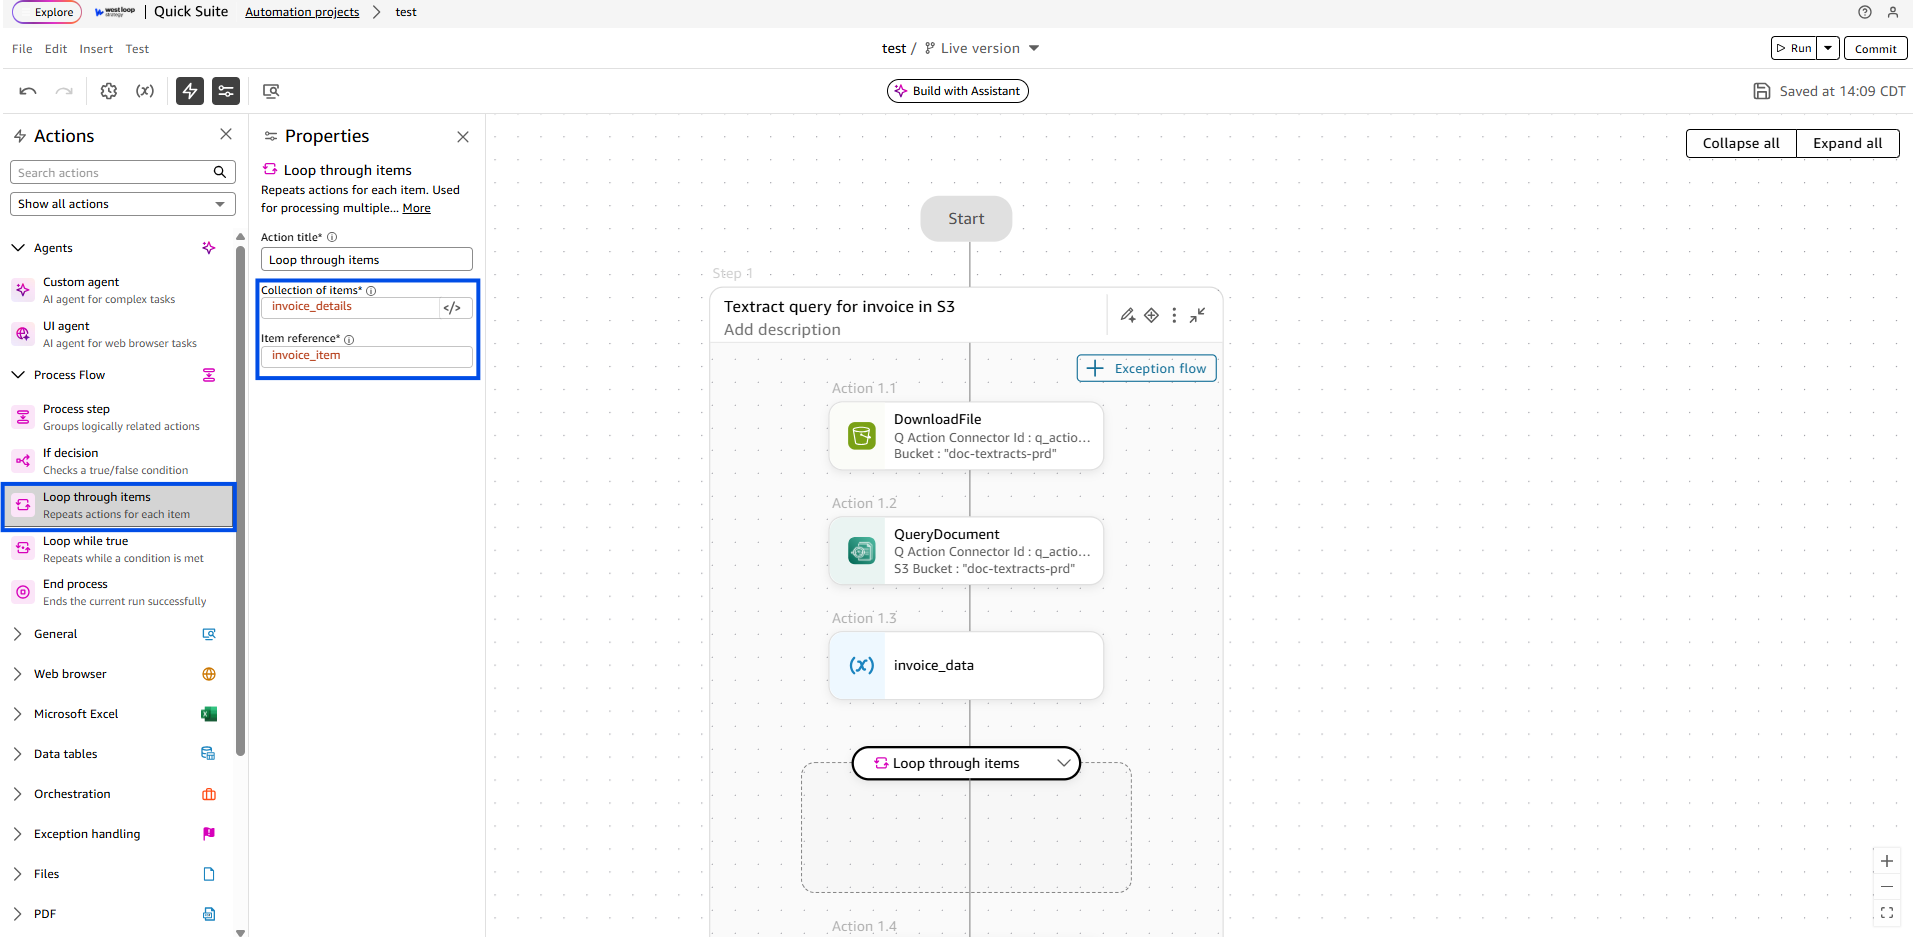
- Add another “Save Value” action inside the “Loop through items” action. Where value to save is invoice_item["Value"] and the Variable name as invoice_data[invoice_item["FieldName"]]. This loop is looping over the output received from the textract query, loops over each field received and populates the invoice_data dictionary that will later be used in this tutorial.

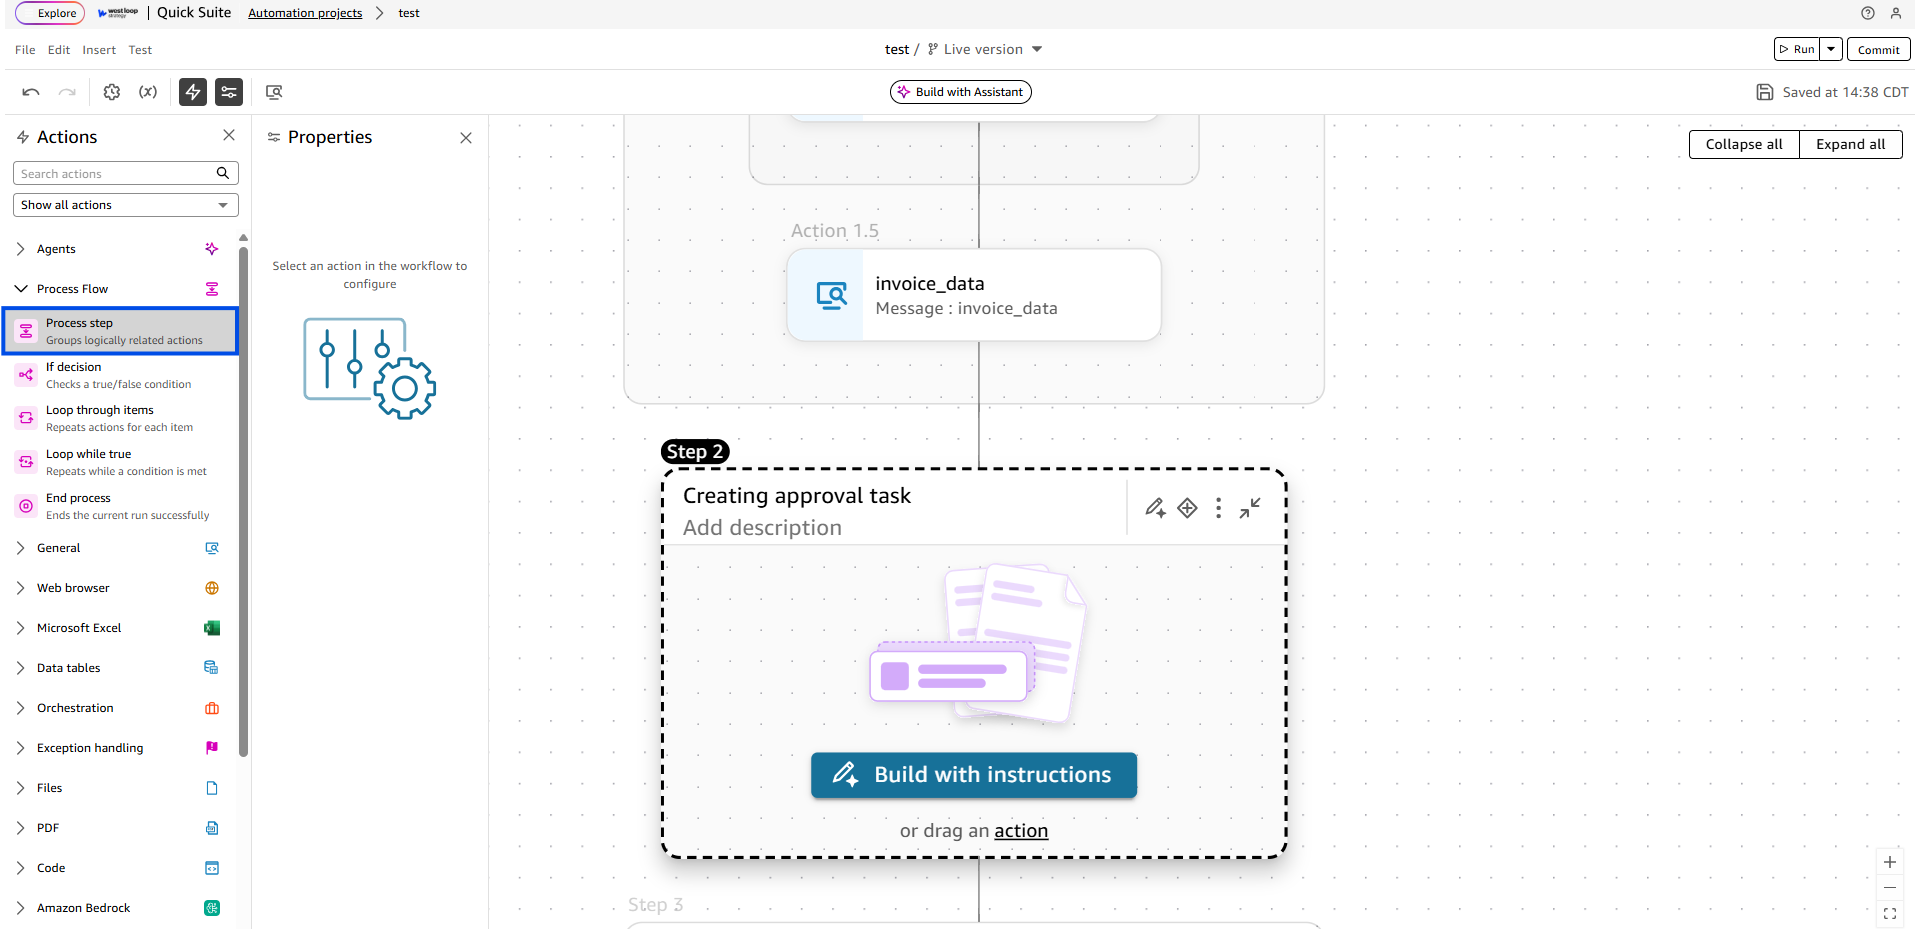
- This is what entire ProcessStep 1 should look like, at the end just add a “Write log message" option outside the loop’s scope that logs the invoice_data dictionary. The log should look something like this:
{'order_number': 'D865270', 'customer_number': '2757500', 'invoice_date': '07/05/2021', 'invoice_number': '34048864', 'total_amount_due': '$ 283.86'}
- Add a second Process Step outside of the firat one, this is where we will be creating new cases, name it “Creating Approval Task”
- At this point, create a runtime variable, click the gears icon here:

Click "Add", fill in the details as shown in the image. With alias as case_type and Value could be anything you want the cases to be identified with.
- Add “Create new case” under Orchestration as the first action in Process Step 2. Create a new case with the runtime variable as your case type and other information could be based on your specific use-case (or just replicate it as is).
Optional: use “Write log message” action as earlier to print your case object, which in this case looks something like this:{'case_id': 'e551fd57-01c2-4ee3-8181-4264caa3e5ff', 'case_status': 'READY', 'case_type': 'textract-case', 'custom_data': {'test_id': '12345'}, 'latest_task_resolution': None, 'reference_name': 'test-id'}

- Next, add “Process cases” scope, and use the same Case Type value as in the previous step.

- Now, add “Create user task” action inside the Process cases action. as a note, the Case Id field here should be the “case_id” field of the output variable you defined in the Create new case step over in Step 11. (refer to the image below). Severity would be the level of priority this task should be assigned with. “Sla” field is a numerical field that indicates how many hours/day until the created task is due.

- Next step is building a form for human-in-the-loop approval. Click “Edit Task Form” to navigate to the form building interface.

- This form outlines all the fields extracted from the query in separate text fields which are editable if any changes are needed. Also add the original invoice pdf on the form to make it easier for the person to compare the extracted fields. At the end, add a dropdown for the final approval decision to process the approved form later based on the approval decision.
Adding the dropdown field: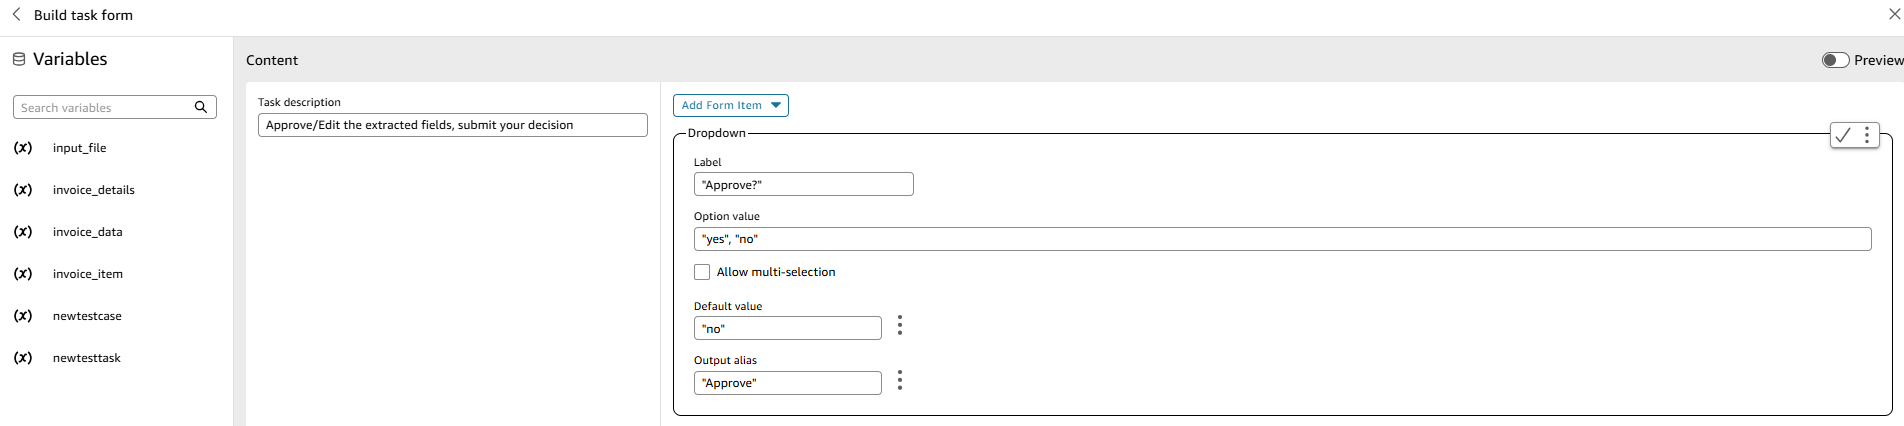
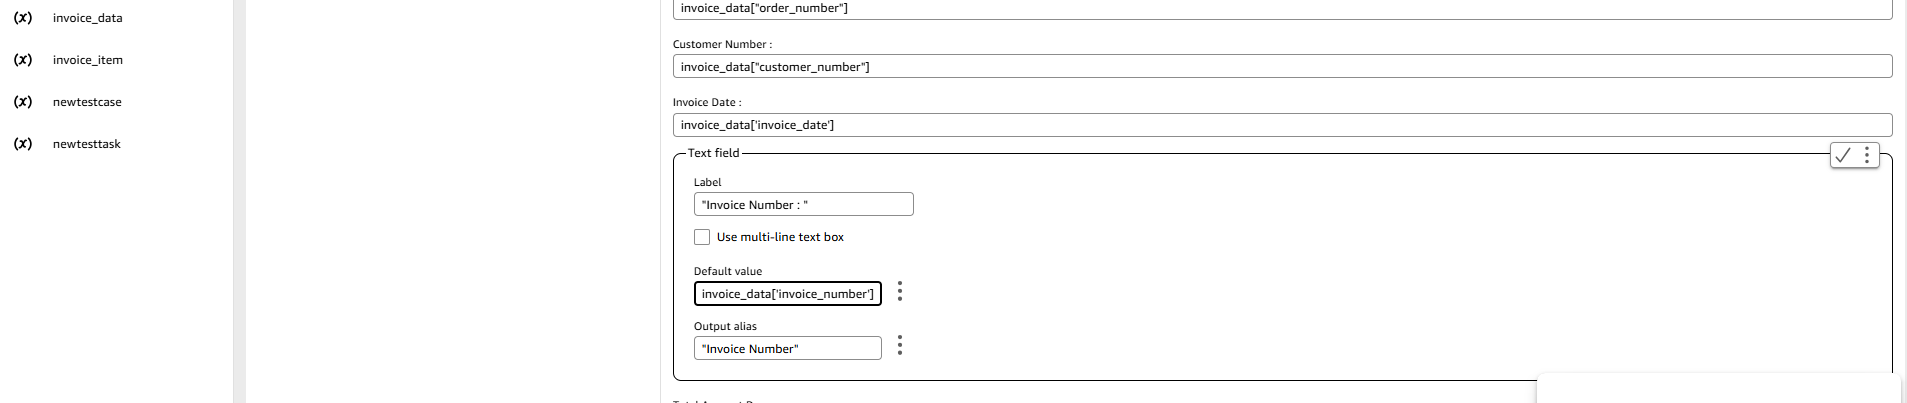
Adding a text field for each of the keys in the invoice_data dictionary(you can copy the text in the images as is or modify based on your set-up of the variables):


Adding the original invoice pdf for user reference:
- The form is automatically saved, now navigate back to the automation page and run the flow which will go through the whole flow and create the task form for approval.
Click “Run” to start your automation.
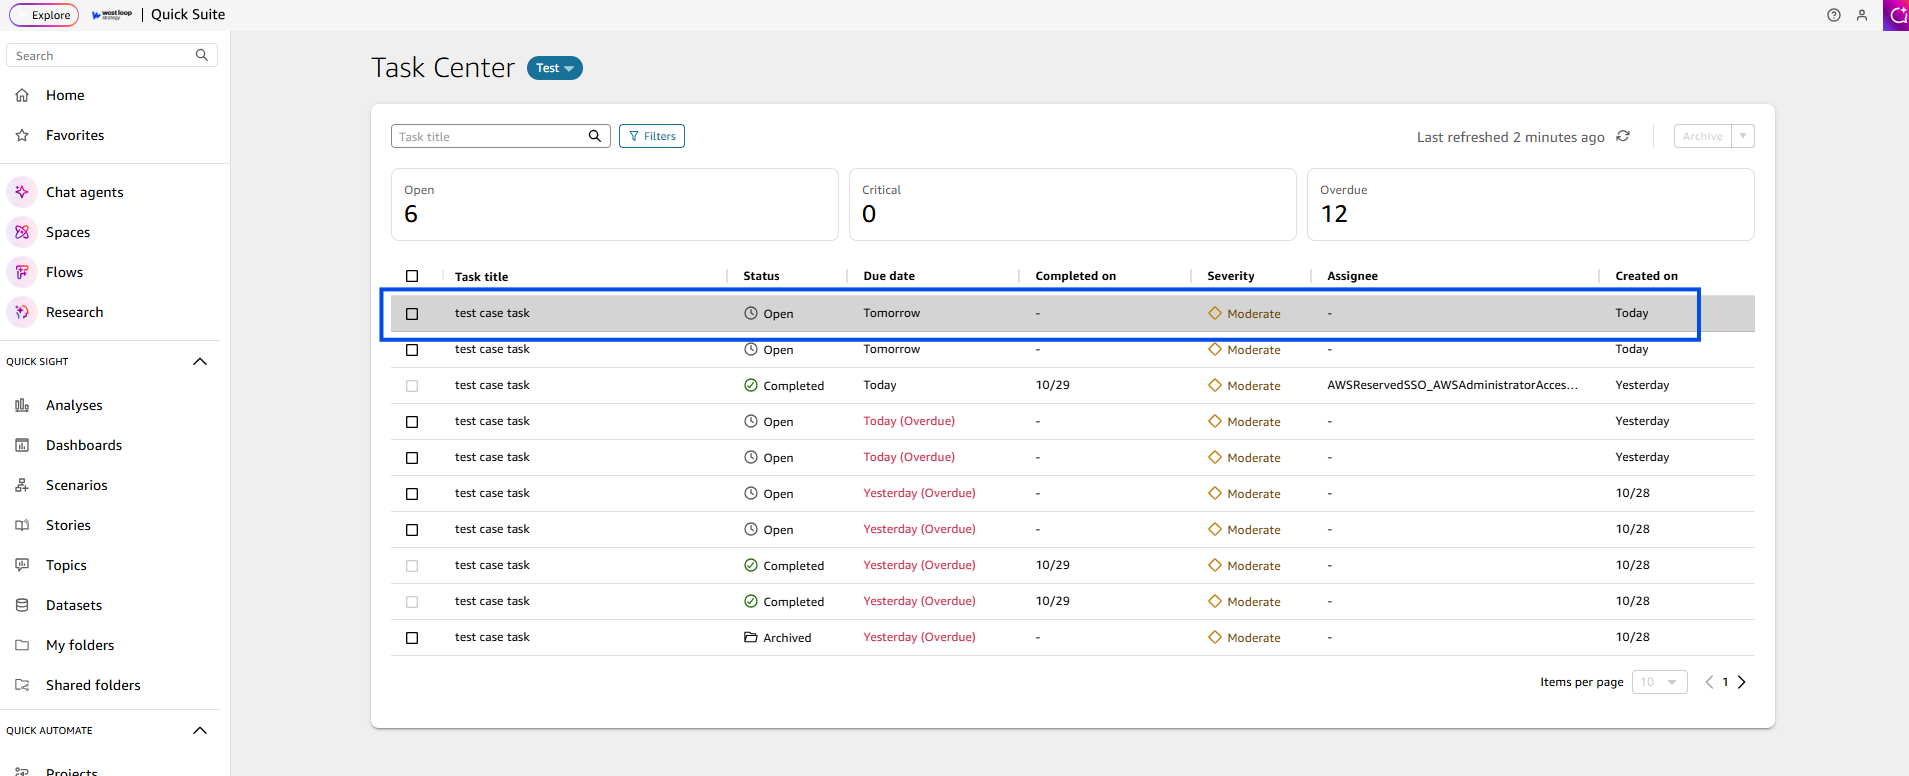
As the automation is running you can see the logs, at the end the logs should indicate that a task was created, click ”View Task” yo view your created task: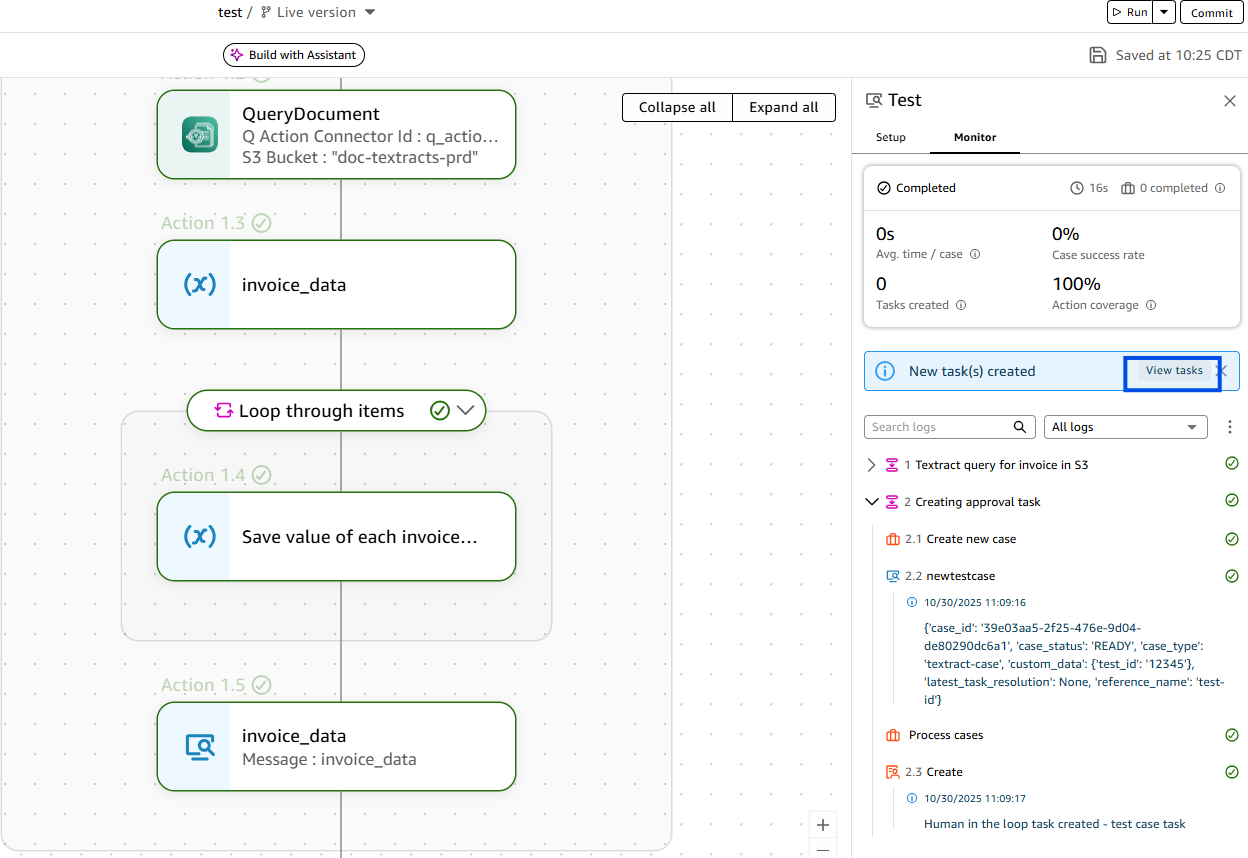
- The previous step takes you to the tasks page, Click the top one, that’s your most recently created task.
Now you can select a decision from the dropdown, assign it to someone on your team, and submit a decision. You can also browse through multiple tasks using the left right arrows on top right corner of the form panel. Additionally, the text fields are editable if any changes are required.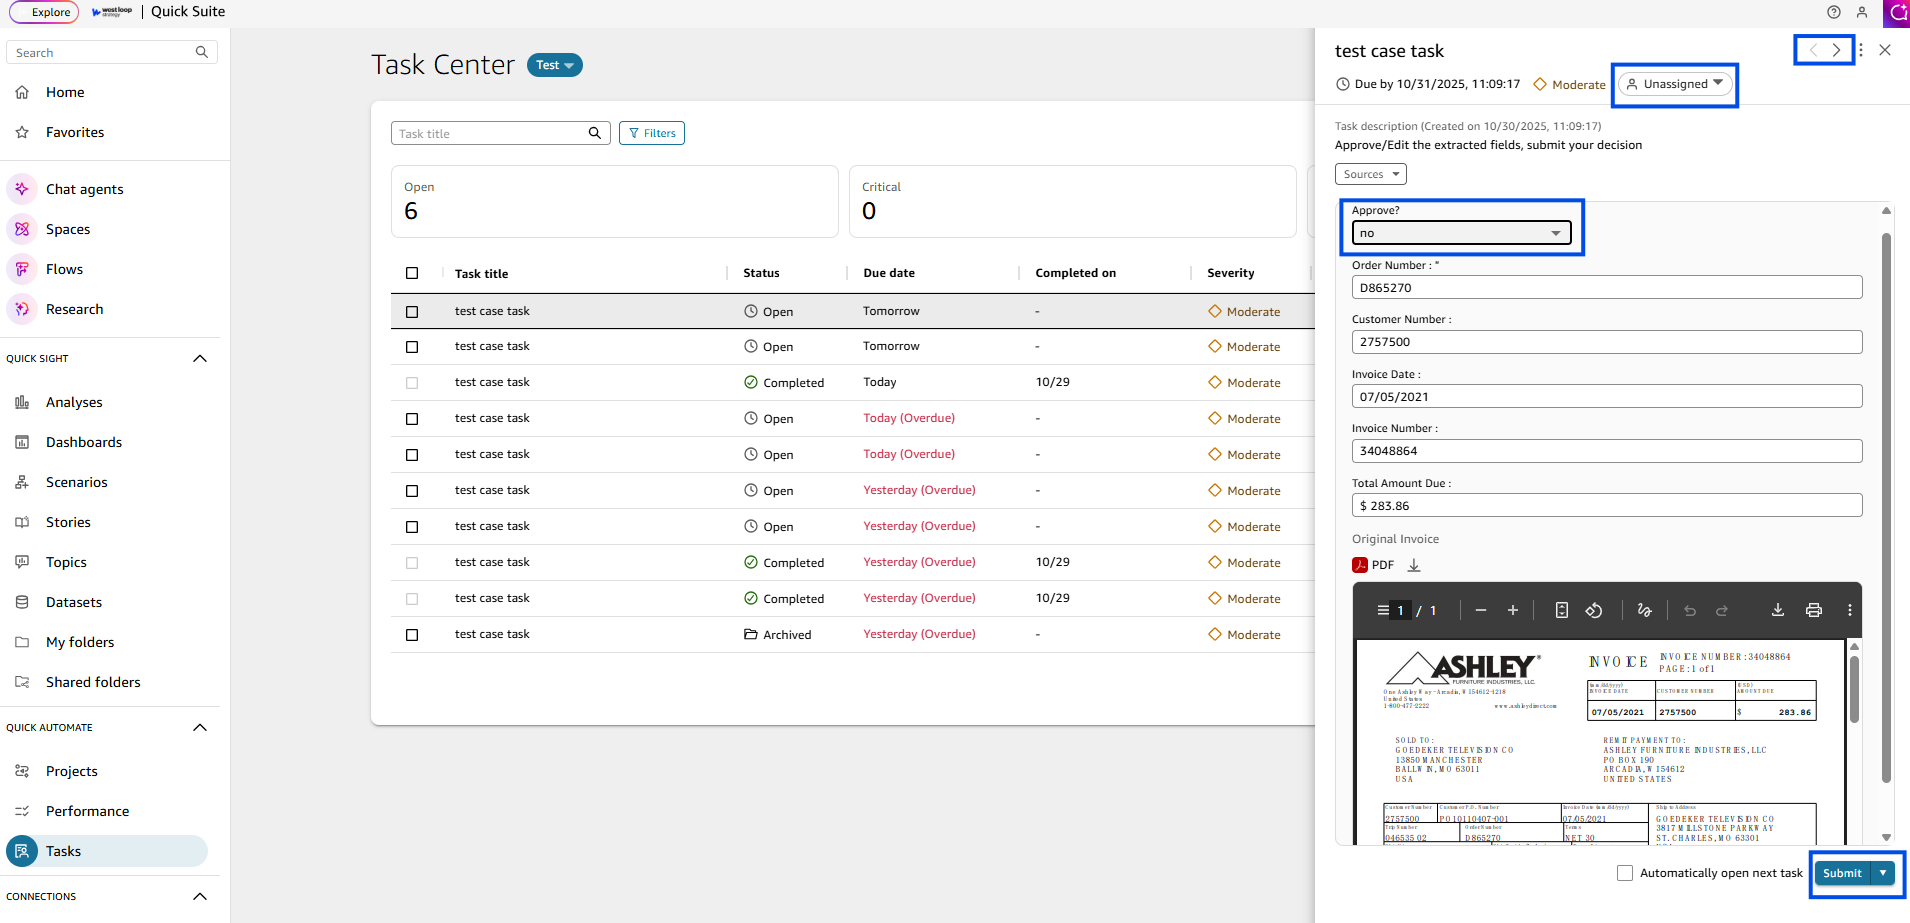
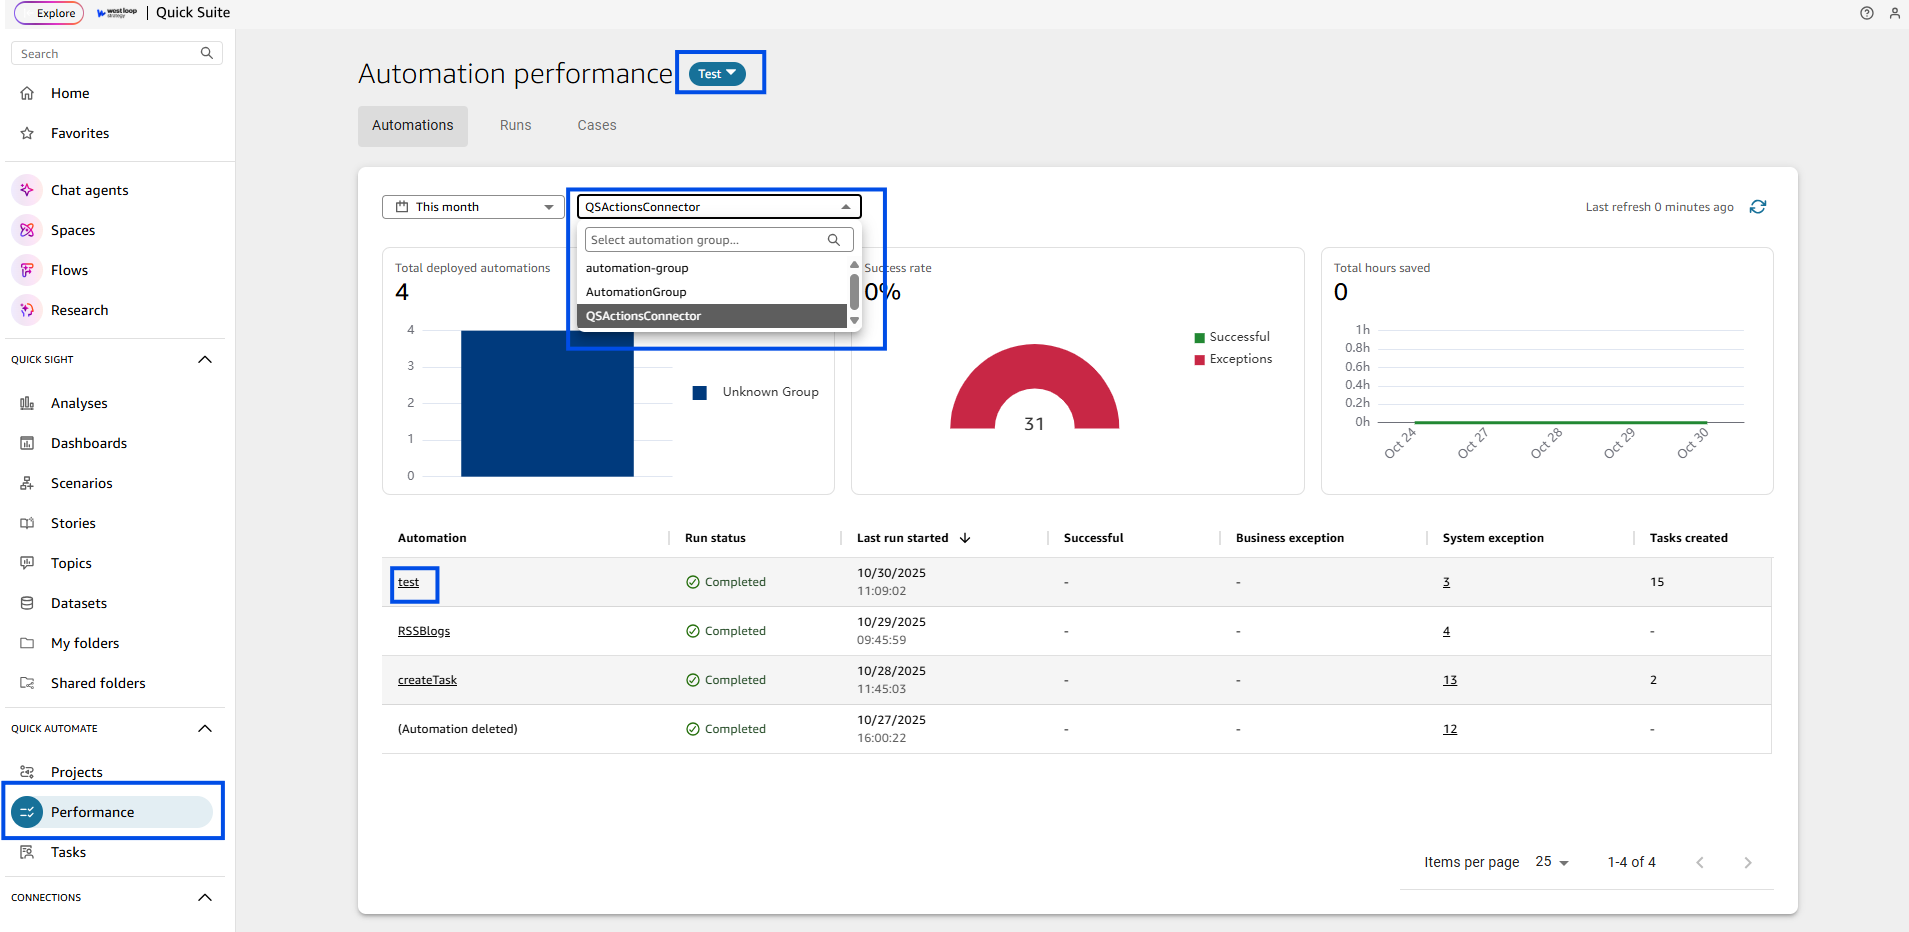
- The runs and logs for each could be viewed in the performance tab for future reference. Switch between deployed or test versions of your projects. Make sure you have the correct group selected to view your project. Click on Automations, Runs or Cases view the run history, task status and run status.
If you need further guidance on AWS, our experts are available at AWS@westloop.io. You may also reach us by submitting the Contact Us form.