.svg)

Outlook Integration with Amazon Quick Suite
.png)
Pre-requisites:
Before setting up the connection for outlook in your Quick Suite account, make sure you have:
- A Microsoft 365 organization with Outlook/Exchange Online.
- Permissions in M365: Global Admin and Azure permission to Add App Registrations.
- An Amazon Quick Suite account with Author/Admin role.
Set up acess to outlook API in your azure portal:
- Navigate to https://portal.azure.com/#allservices. Click "App Registrations" option under "Identity" services.
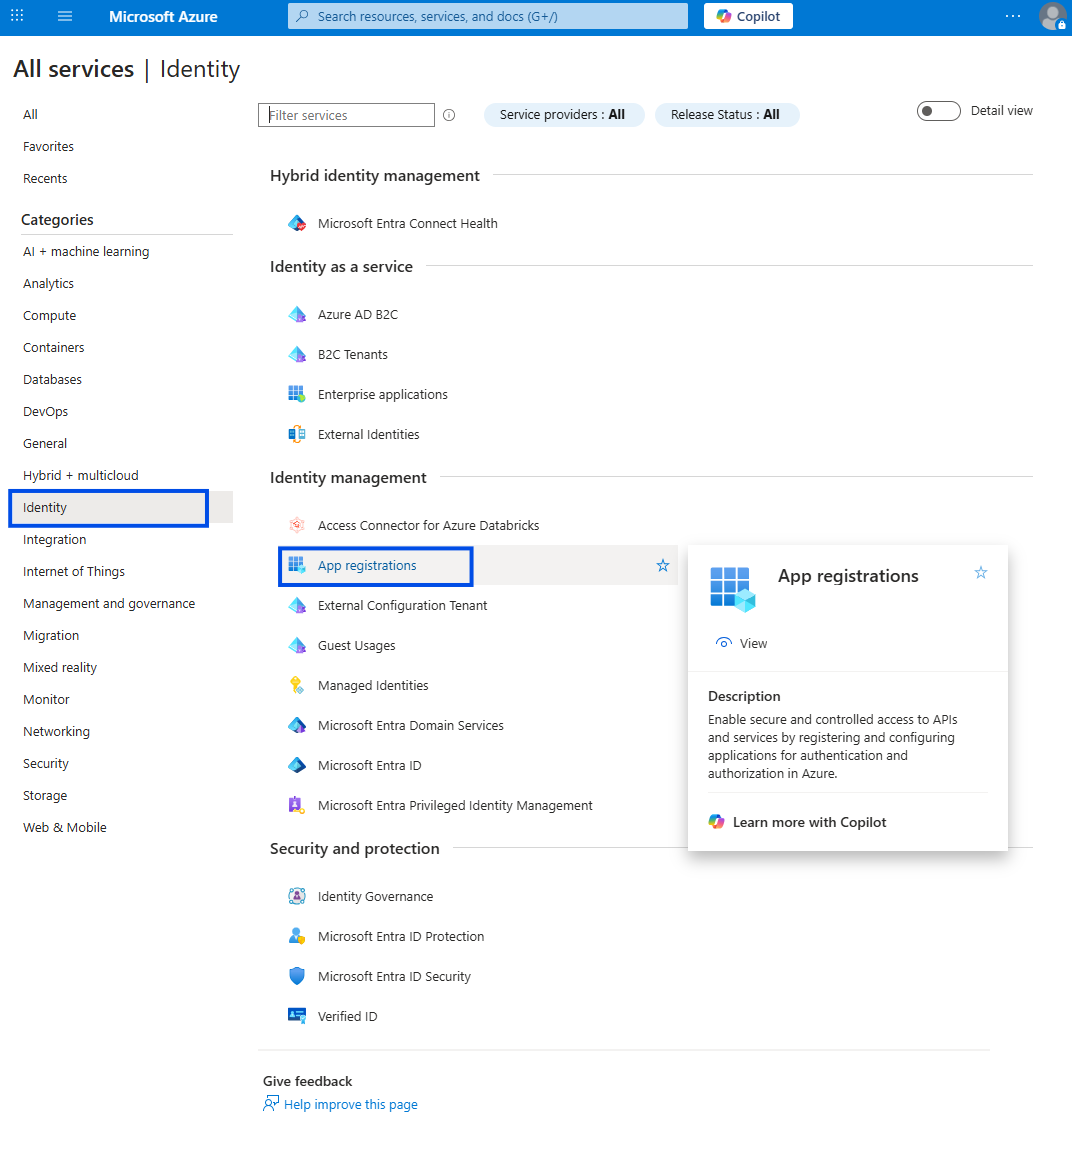
- Click "New Registration" on the App Registrations page.

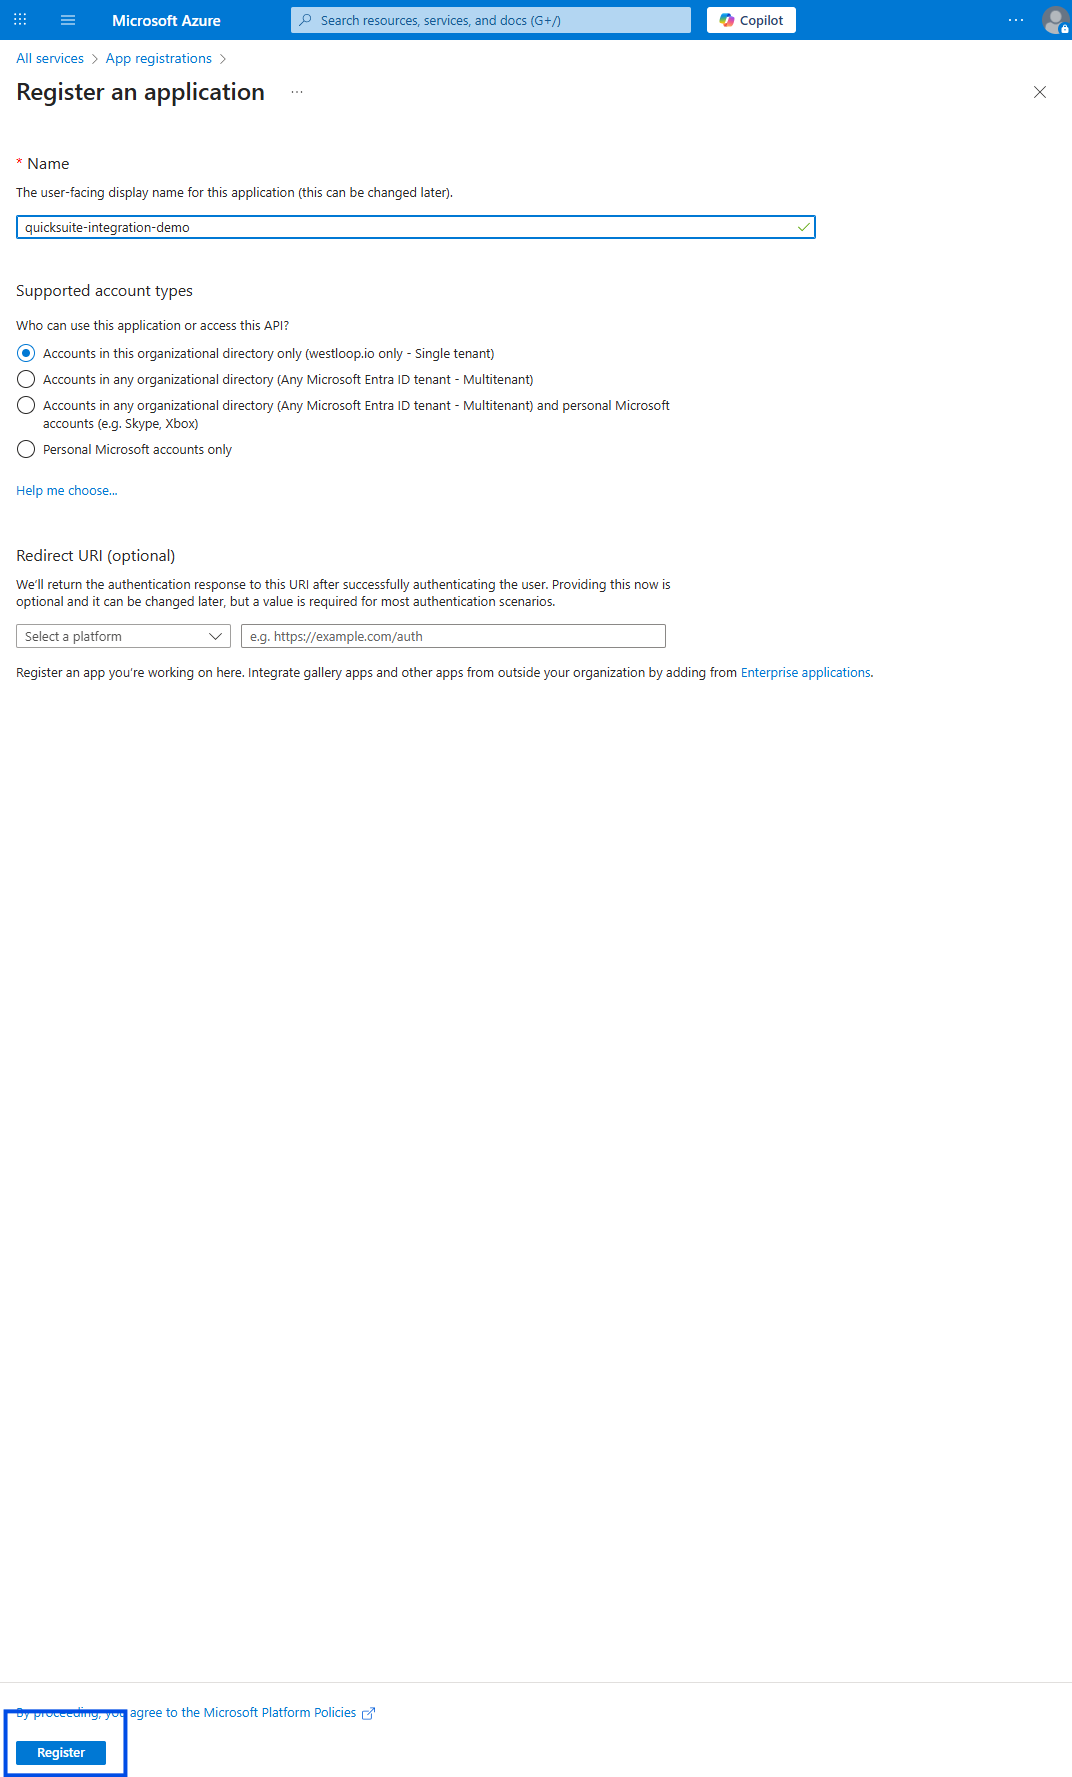
- Name the App and click Register in bottom-left.
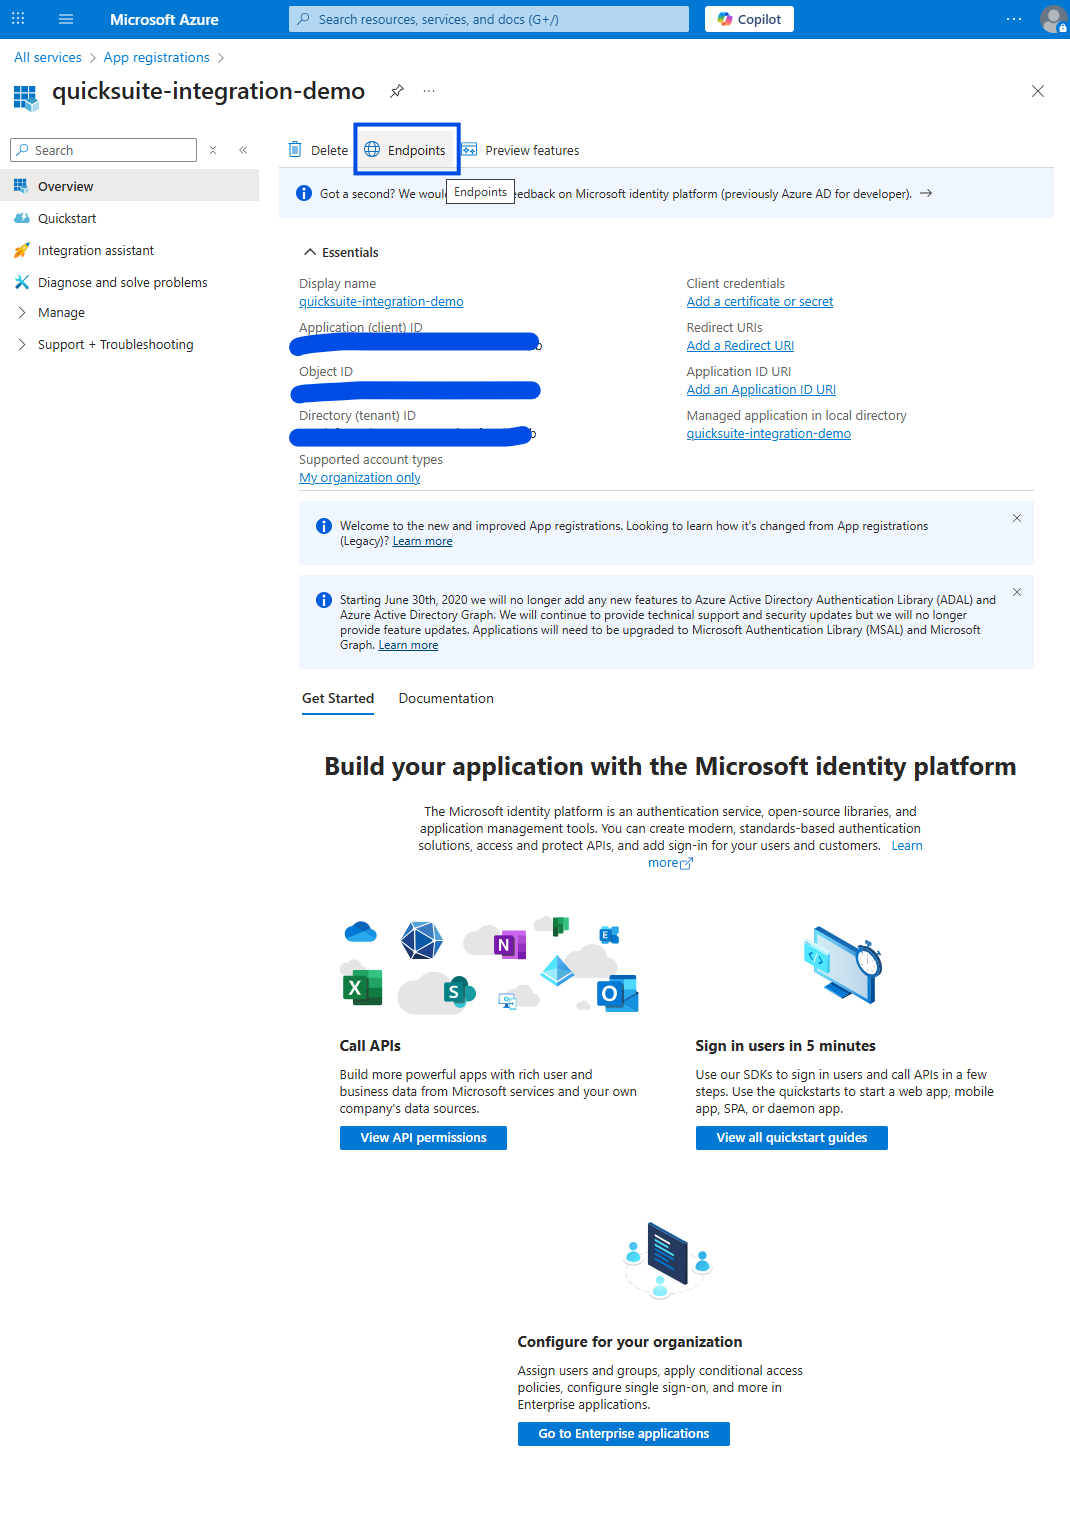
- Once your App is registered it navigates you to this page. Click "Endpoints", this has all the urls needed in your Quick Suite integration page to connect your outlook into.
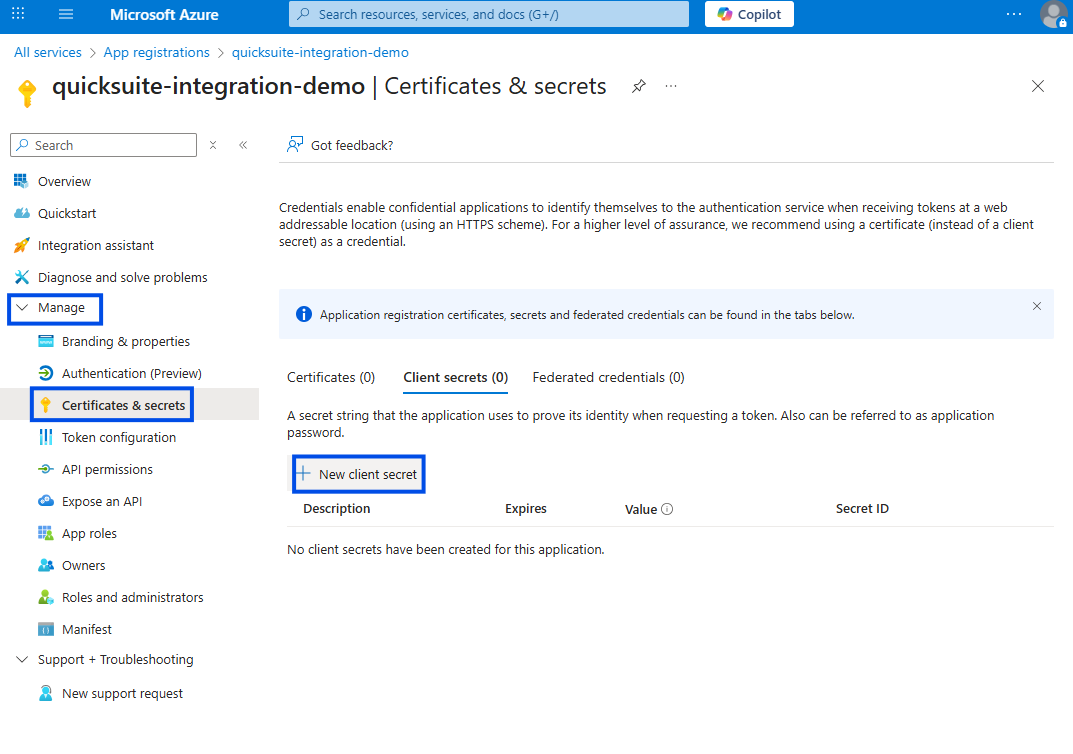
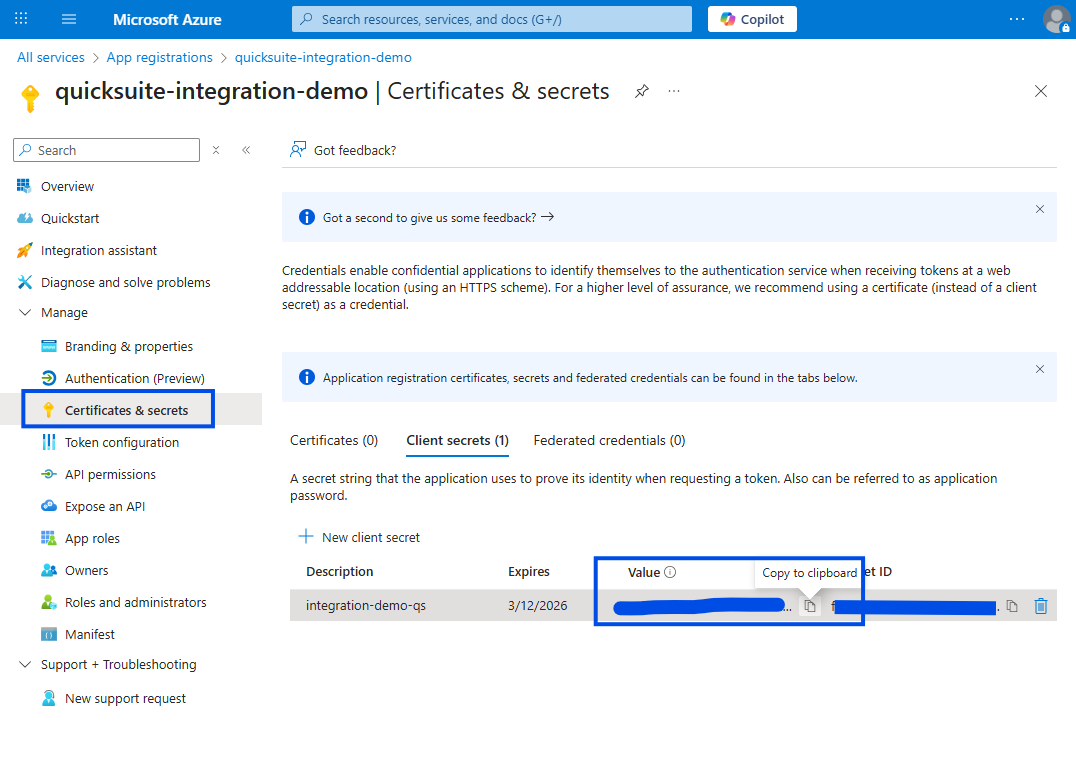
- Next, under the "Manage" dropdown navigate to "Certificates and Secrets" option. Click "+ New Client Secret".
- Name the key and give suitable expiration duration, add the key.

- Save the Value and Secret ID somewhere safely, you will need it later for integration into Quick Suite.
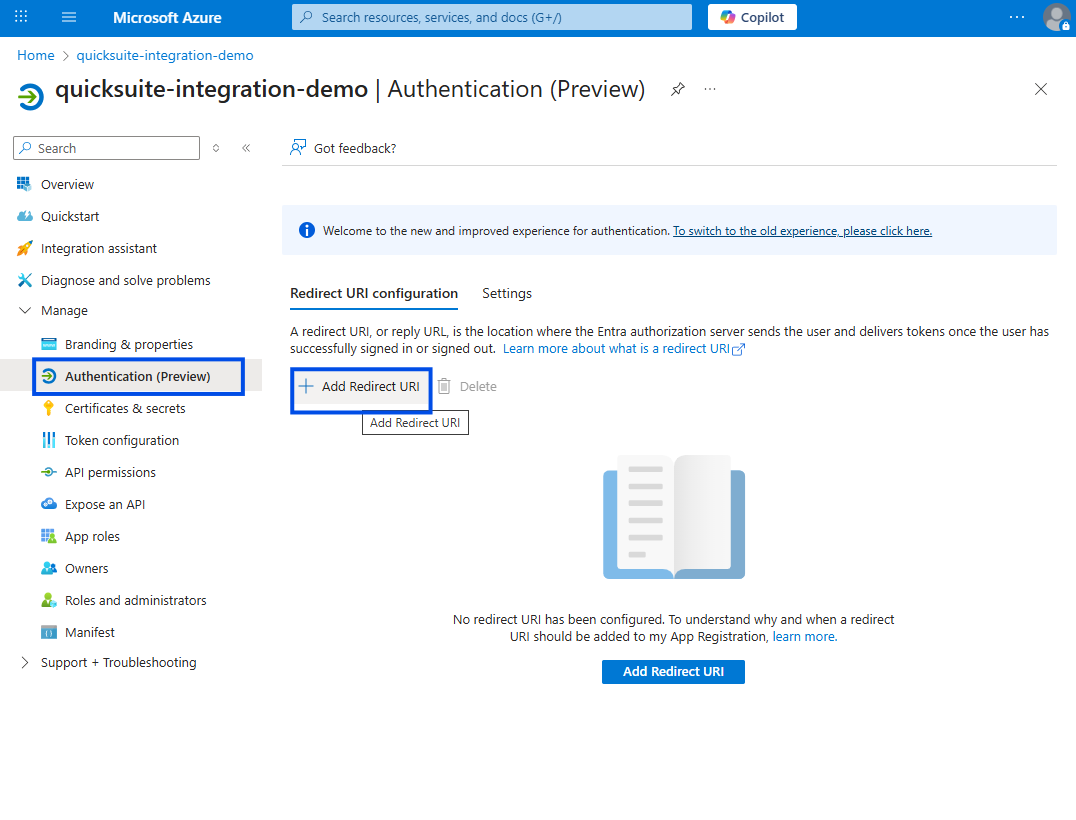
- Next, add a redirect URI. Under Authentication as shown here. Add https://us-east-1.quicksight.aws.amazon.com/sn/oauthcallback as your Web Application redirect URI. Click "Configure" at the bottom.
- Last step would be to add permissions to this API. Navigate to "API permissions". Click '+ Add a permission'. These are some of the permissions added for this demo, customize it based on your use-case. The permissions to access your outlook fall under Microsoft Graph's Delegated permissions". Might need permission from Account Admin for some of these actions if you are not the owner/admin of your azure account.

Integrating into Amazon Quick Suite:
- In your Quick Suite account, navigate to "Integrations". Click the '+' on Microsoft Outlook under the "Actions" sub-category of integration options.

- In this form, name your connection and select user authntication as authentication-type.

- You will need values like Base URL, Client ID, Client Secret, Token URL and Authorization URL.
- Use https://graph.microsoft.com/v1.0 as your Base URL.
- For Client ID, use the Application (Client) ID value from the overview page of your Azure App Registration.

- For "Client Secret" field use the "Value" code we saved in step 7 from the Azure set-up.
- For token URL field use the url under "OAuth 2.0 token endpoint (v2)" in your Endpoints of your Azure App (step 4 from Azure set-up). Should look something like https://login.microsoftonline.com/{uiud}/oauth2/v2.0/token
- For Authorzation URL field use the url under "OAuth 2.0 authorization endpoint (v2)" in your Endpoints of your Azure App (step 4 from Azure set-up). Should look something like https://login.microsoftonline.com/{uiud}/oauth2/v2.0/authorize
- Click Create and Continue. You should be able to see the newly created integration under "existing Action" in your Quick Suite Integrations page.

- Click Sign-in here. use the intended account. The integration is now ready to be used in your Quick Suite account.

.png)
