.svg)

Amazon Quick Suite Content Approval Automation - Complete Setup Guide
About this tutorial:
In this walkthrough, you’ll learn how to build a fully automated automation that creates an intelligent document approval workflow that:
- Extracts content from AWS announcement pages
- Summarizes the technical content using AI
- Generates a professional PDF document
- Creates an approval task for human review with yes/no decision capability
Business Value: Streamlines the process of reviewing and approving AWS service announcements by automatically processing web content into digestible summaries for stakeholder approval.
Step I: Extract Website Content
Purpose: Capture raw text from AWS announcement pages
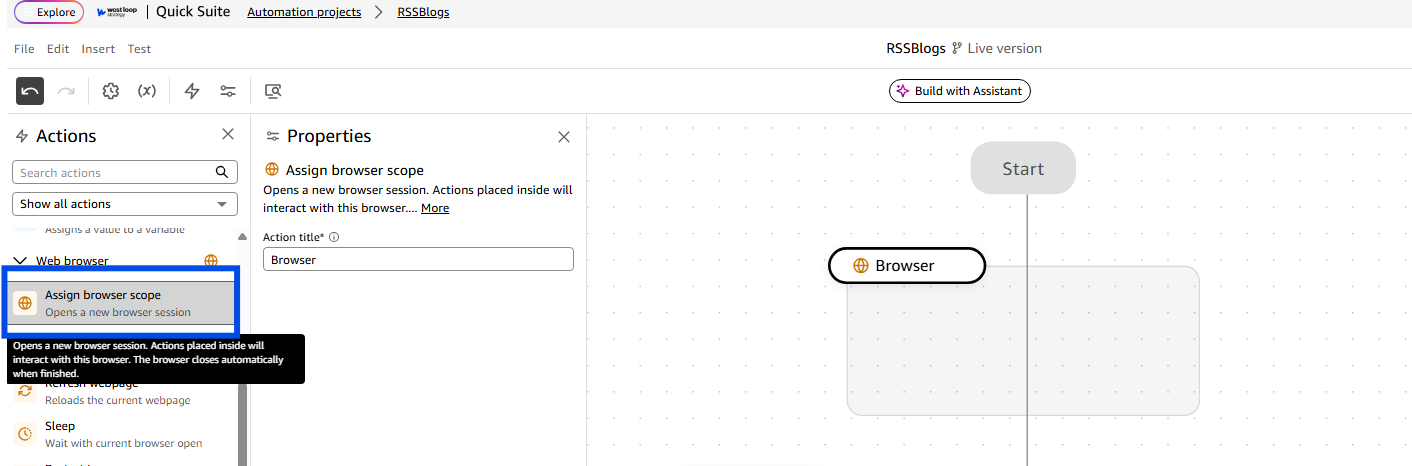
- Assign Browser scope inside your first process step. Name the process step as 'Extract Website Content'.
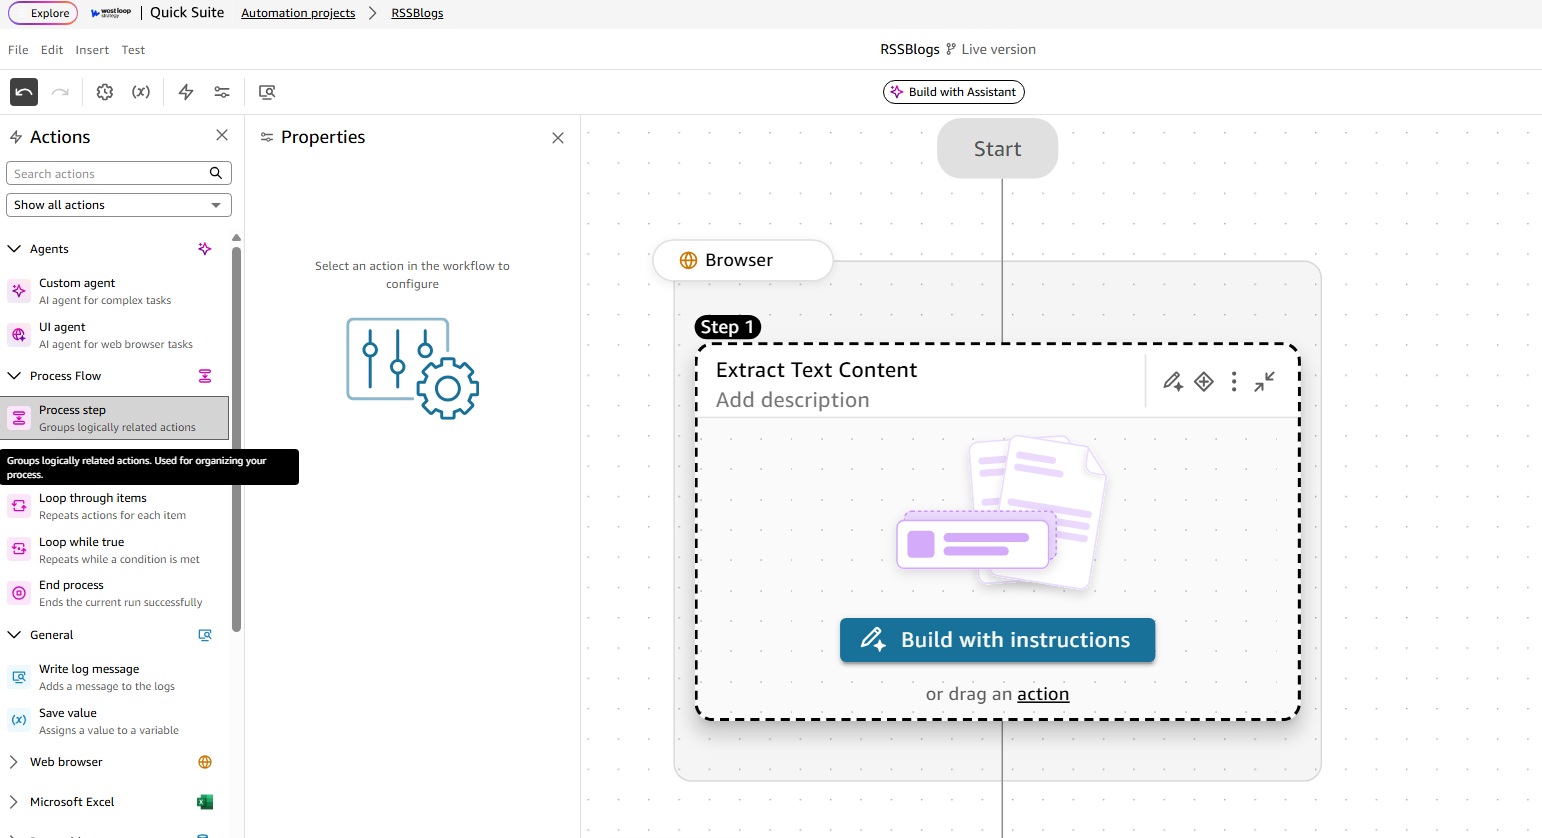
- Inside the browser scope add a new process step 'Extract Text Content'.
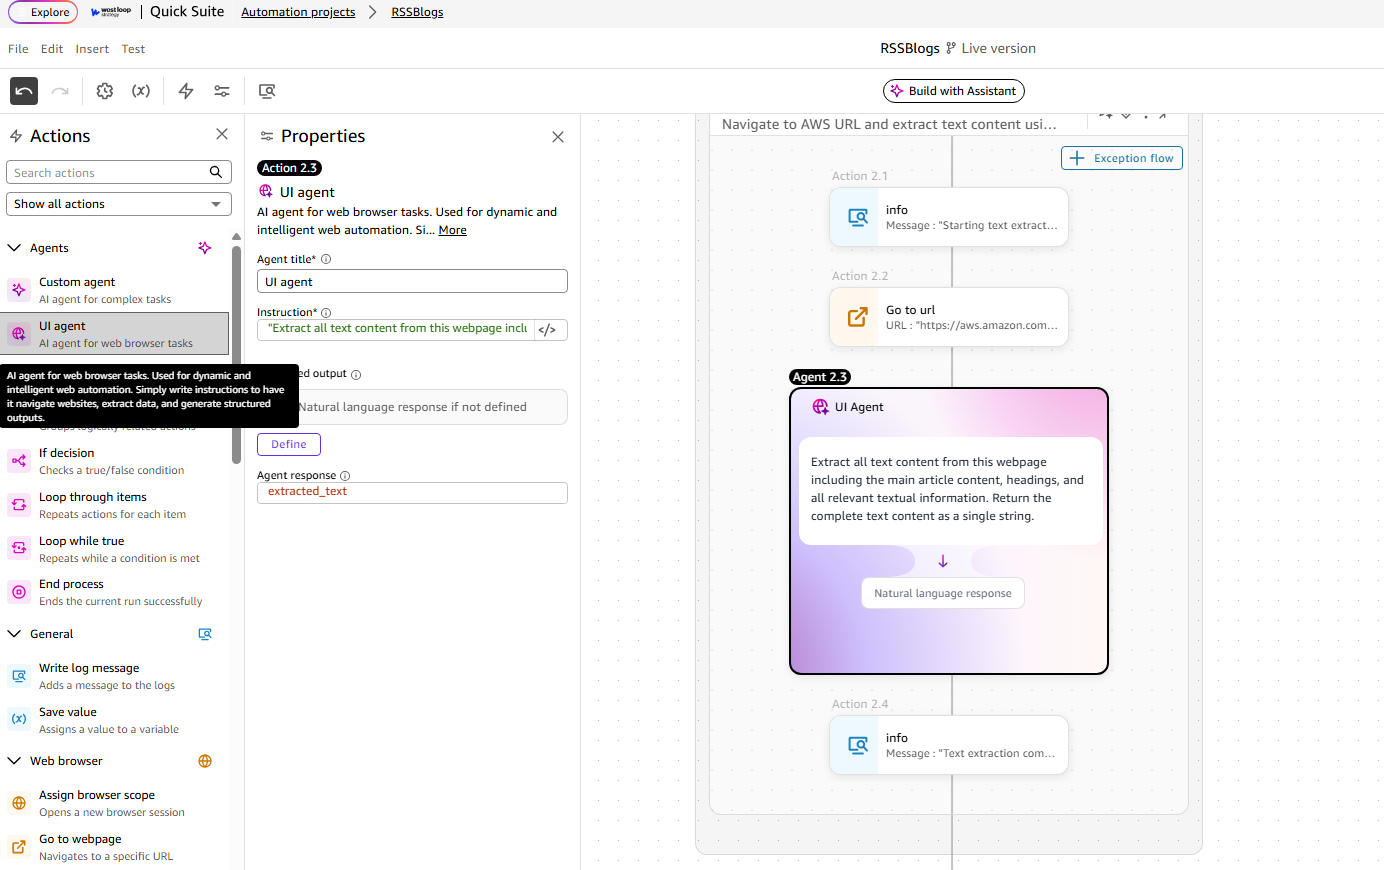
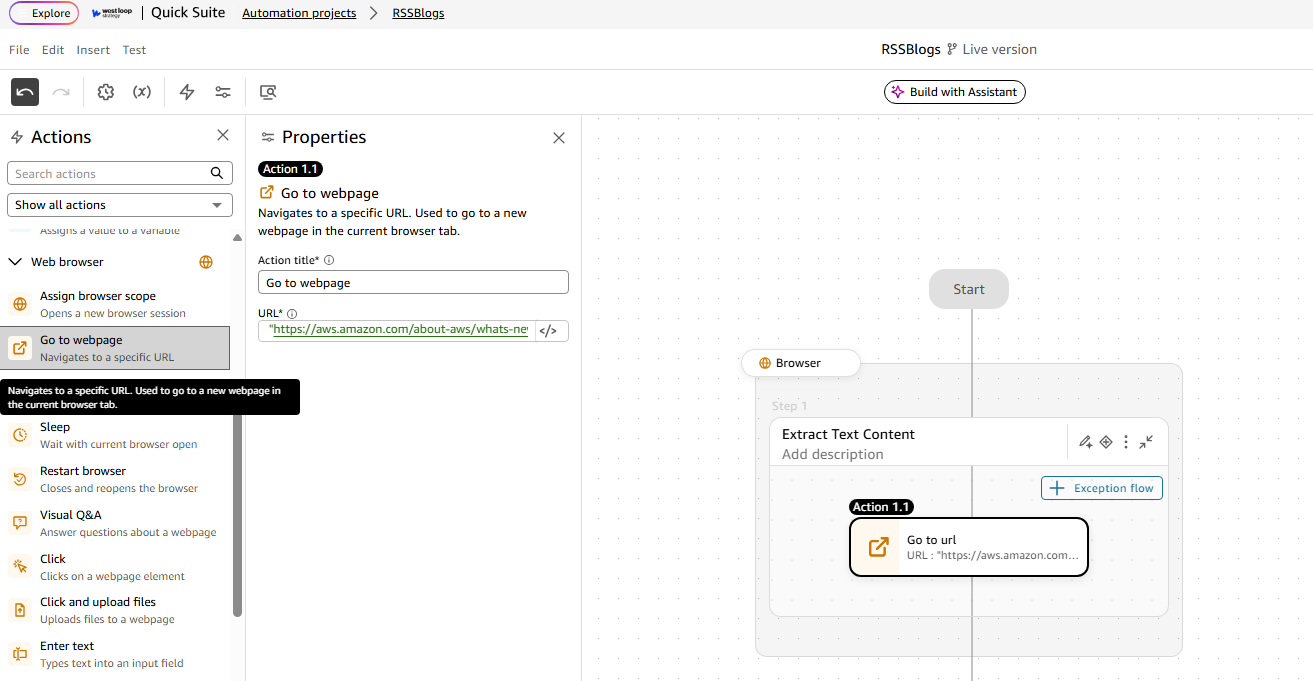
- Navigate to the target AWS URL (https://aws.amazon.com/about-aws/whats-new/2025/11/aws-config-new-resource-types/. Using Go to URL action under web browser actions.
- Use UI Agent to extract all visible text content. Set Agent response variable as 'extracted_text'.
- instruction: "Extract all the text content from this AWS webpage about new resource types in AWS Config. Return the complete raw text content from the page for further processing and analysis."
- In this tutorial the ouput schema for agent response was not defined, but you can fully customize it to output a more complex json body.

Step 2: AI-Powered Content Summarization
Purpose: Convert technical content into executive-friendly summaries
- After Extracting the raw text. add a new process step and call it 'Summarize Content'.
- Add Custom Agent action inside the the above process step. Process the extracted website text using an AI agentCreate a new Process Step - ‘Summarize Content Browser navigation with URL targeting, Use Custom Agent action as your next step.

- instruction: "Analyze and summarize the following text content from the AWS website about new AWS Config resource types. Create a concise summary that captures the key information, highlighting the most important points and main takeaways. Focus on the essential details about the new resource types and their significance: " + extracted_text
- agent_mode: {"mode": "pro"} (Enhanced AI capabilities)
- tools: [] (No additional tools required)
- Agent response: summary_result - You can add log messages at the end and beginning of each process step, to make debugging and following the flow easier.
Step 3: PDF Document Generation
Purpose:Create professional documentation for approval workflows
- Convert the AI summary into a formatted PDF
Add a new Process Step called ‘Generate PDF’ after Summarize Content process step. Add a log message indicating start of this step. (You can add logs at various other steps to confirm saved values, extracted values and more)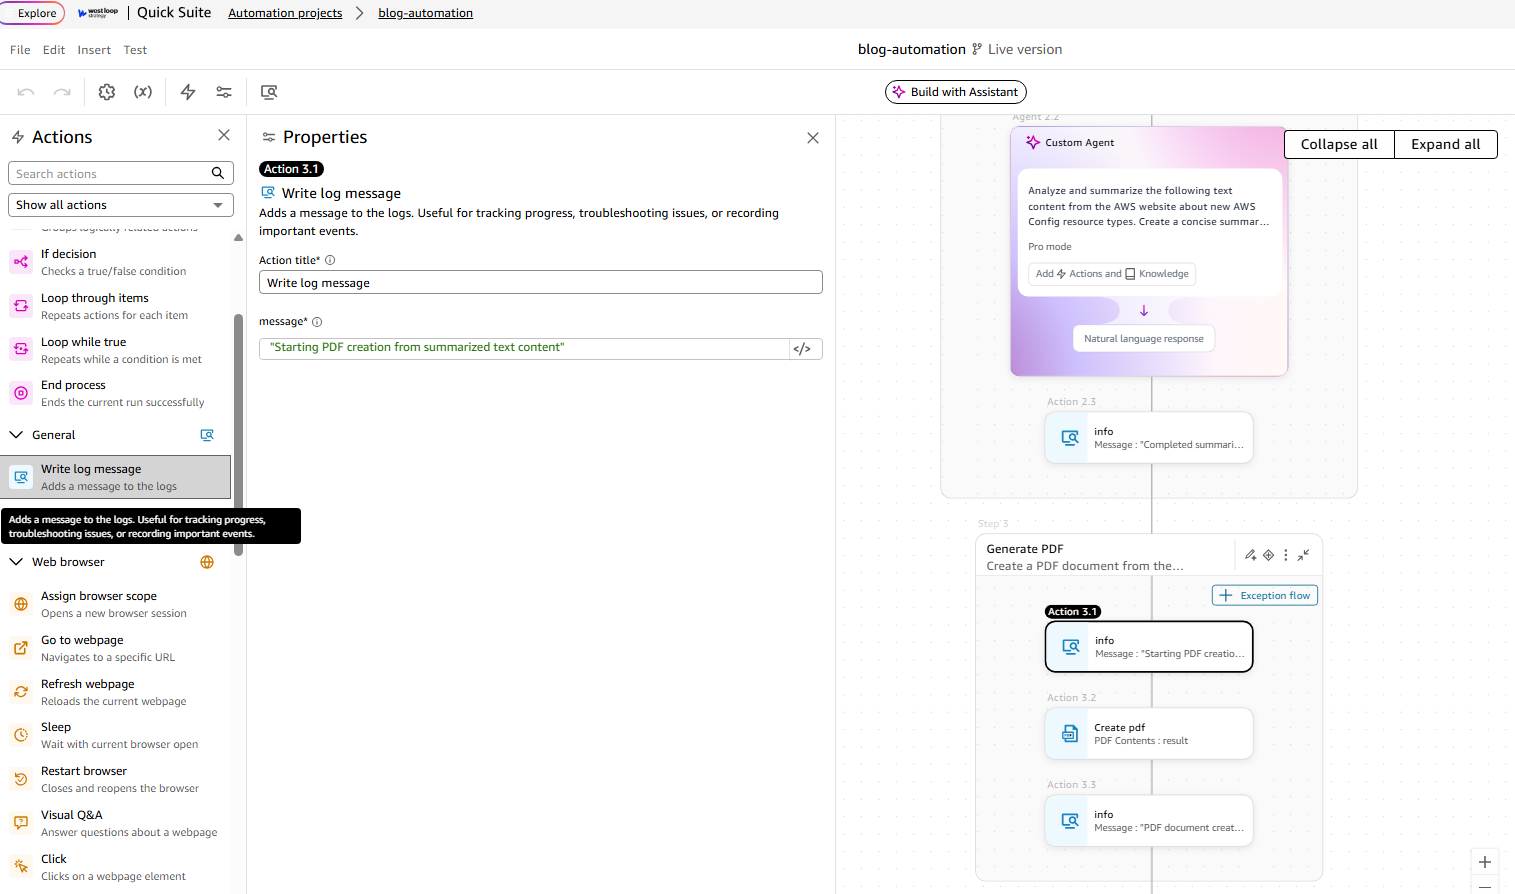
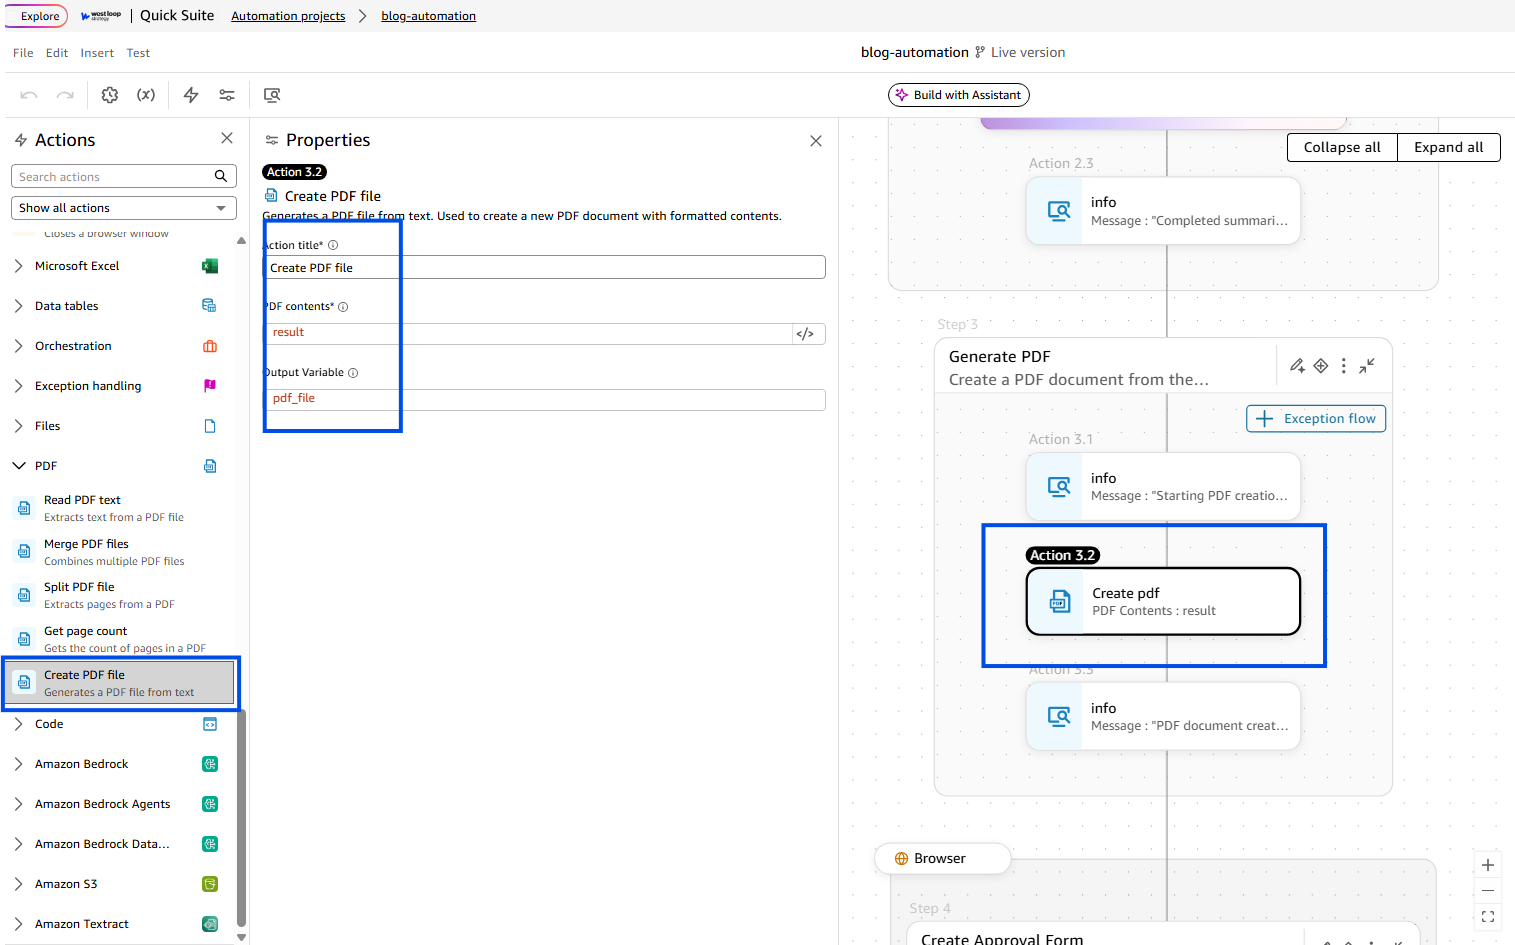
- Add create PDF action after your log message, and fill in the following fields to sve your AI generated summary as a pdf to be used in the approval form. Store your output in variable 'pdf_file'
Step 4: HILO (Human-In-The-Loop) Task Creation
Purpose: Create an aprroval form to view and publish the generated blog
- Add a new process step after pdf genration step, name it as below:
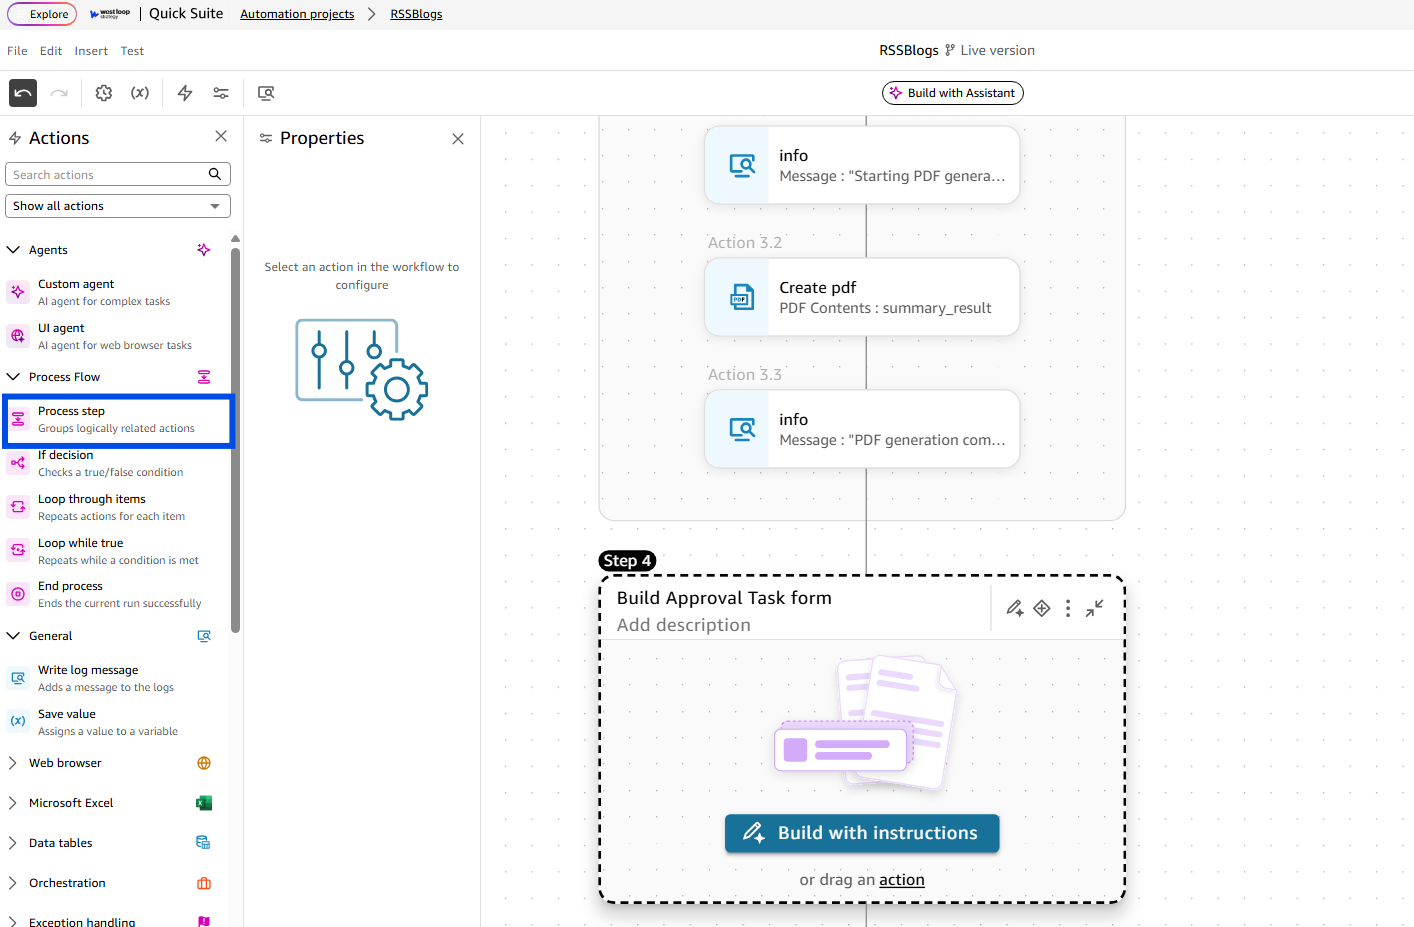
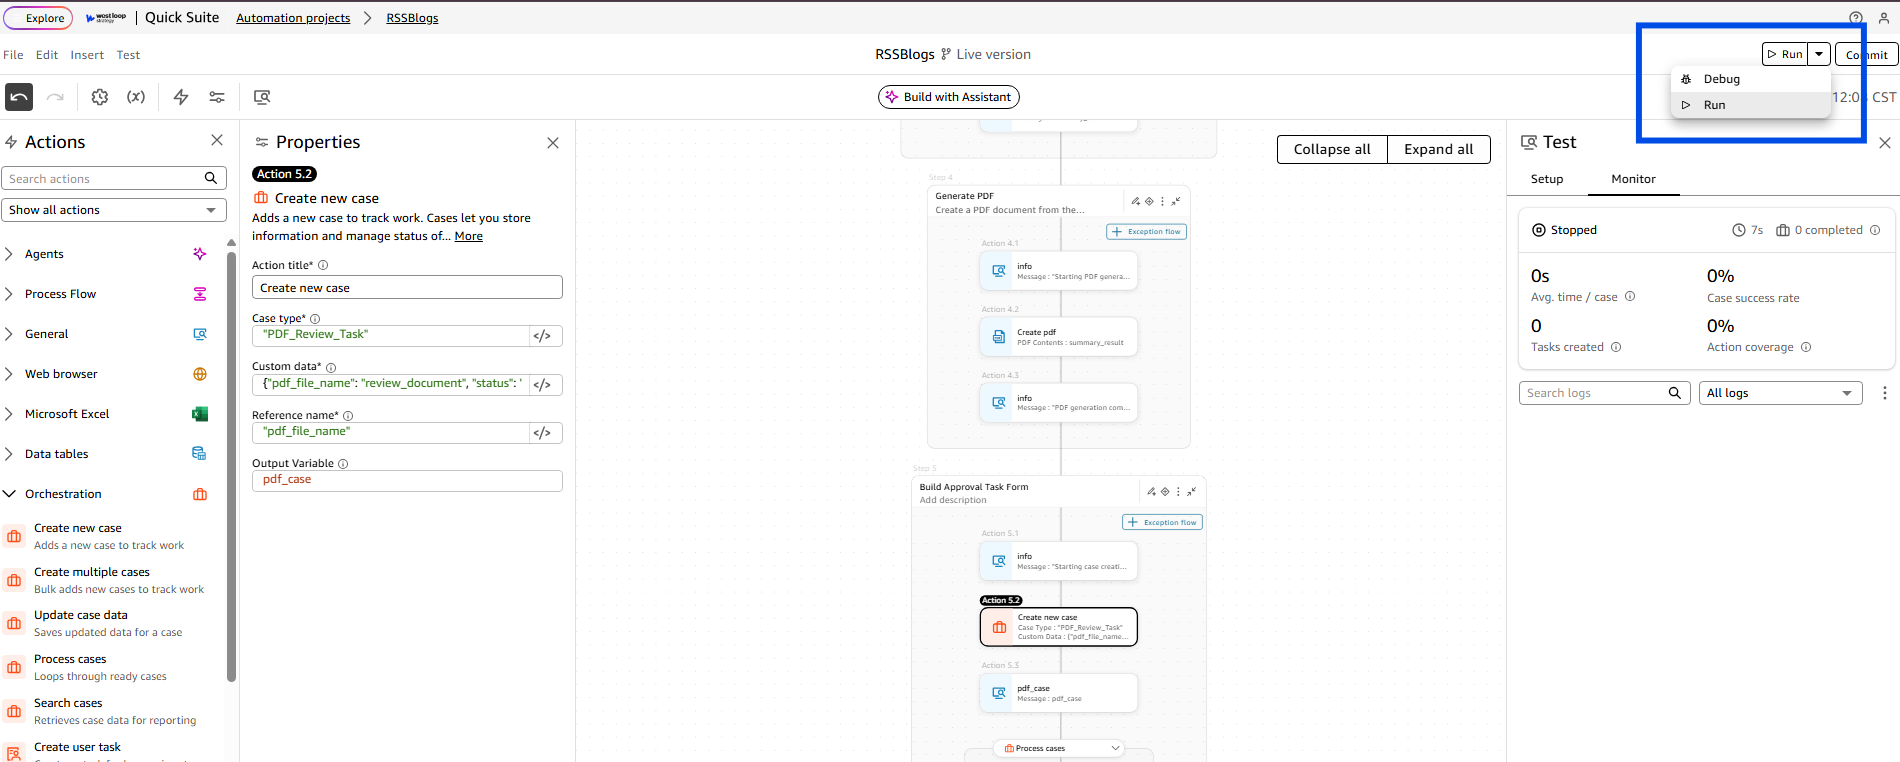
- Next, under 'Orchestration' actions add Create new case action as your first step inside this process step and fill in the required fields as in the image below. Optionally you could log an info message for better debugging at beginning and end of each process step.

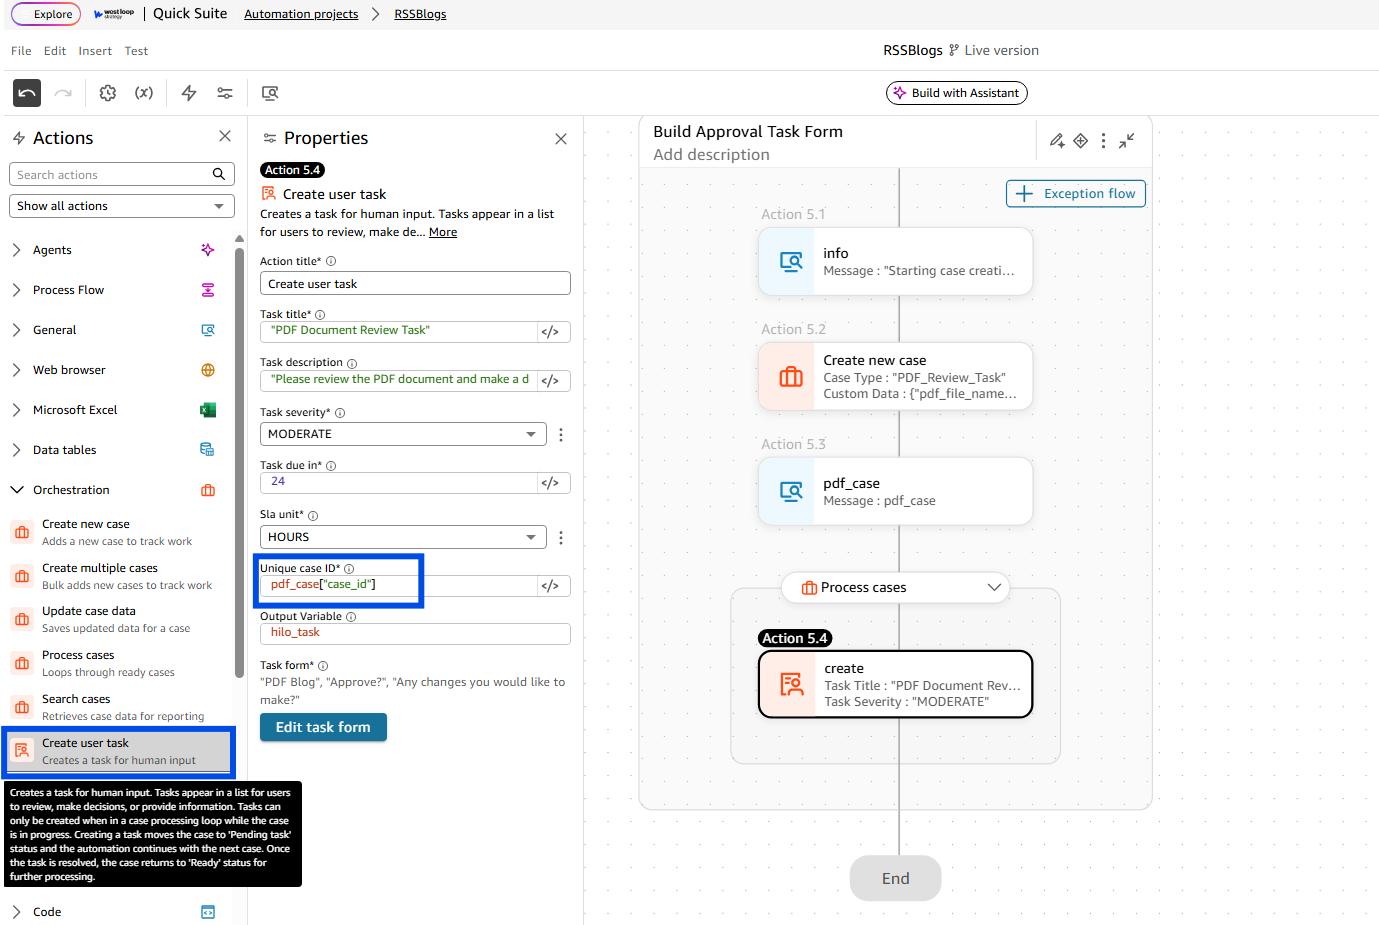
- Add Process cases step after creating a new case. make sure to use the same Case type as used for when you created one.

- Next create user Task inside Process cases. This will create your approval form, make sure to use ["case_id"] key from the output variable of the case created initially. Which looks like pdf_case["case_id"]. Next click 'Edit Task Form
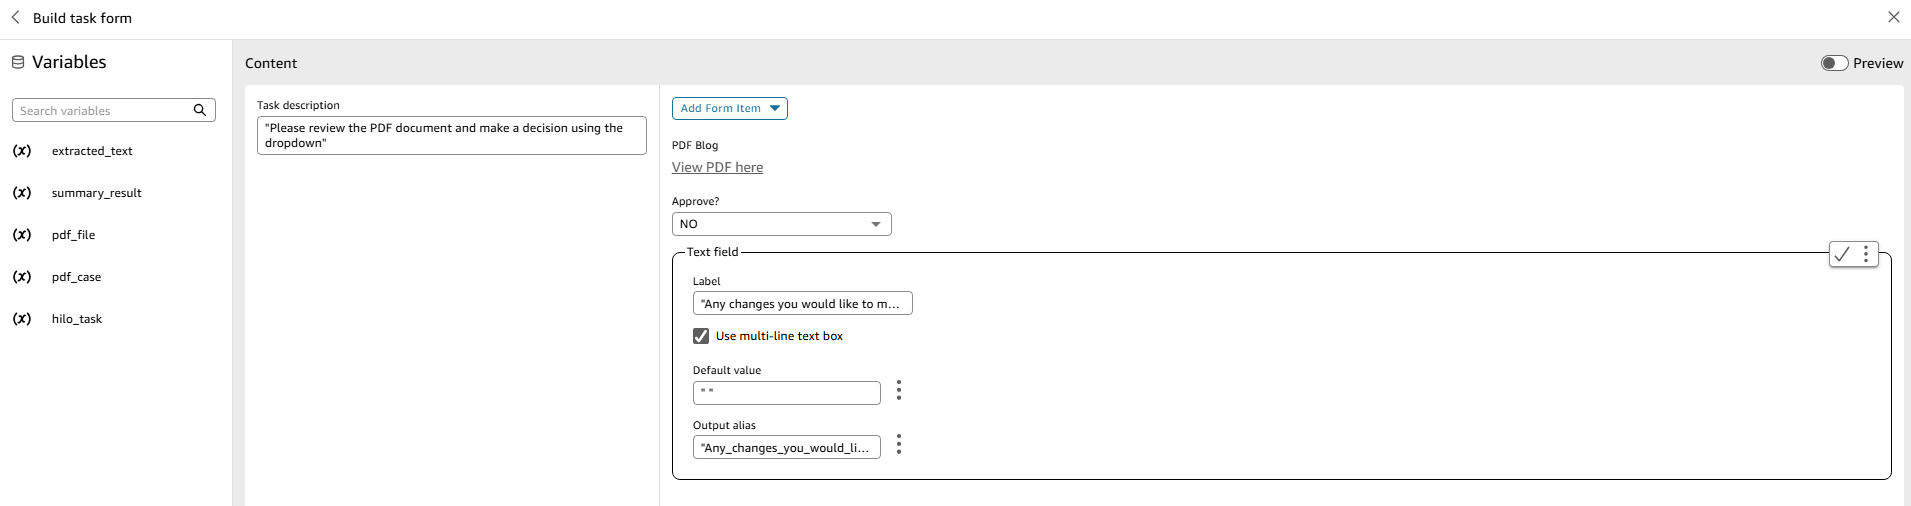
- After clicking edit task form, you have navigated to thecanvas that actually lets you build your form out. Simply copy over the fields from here or adjust according to your specific requirements. The Form items used here were: File, Dropdown and Text field.


- This is the end of your automation building. Next we can run this and look at the form created.
Step 5: Running, debugging and reviewing the approval form
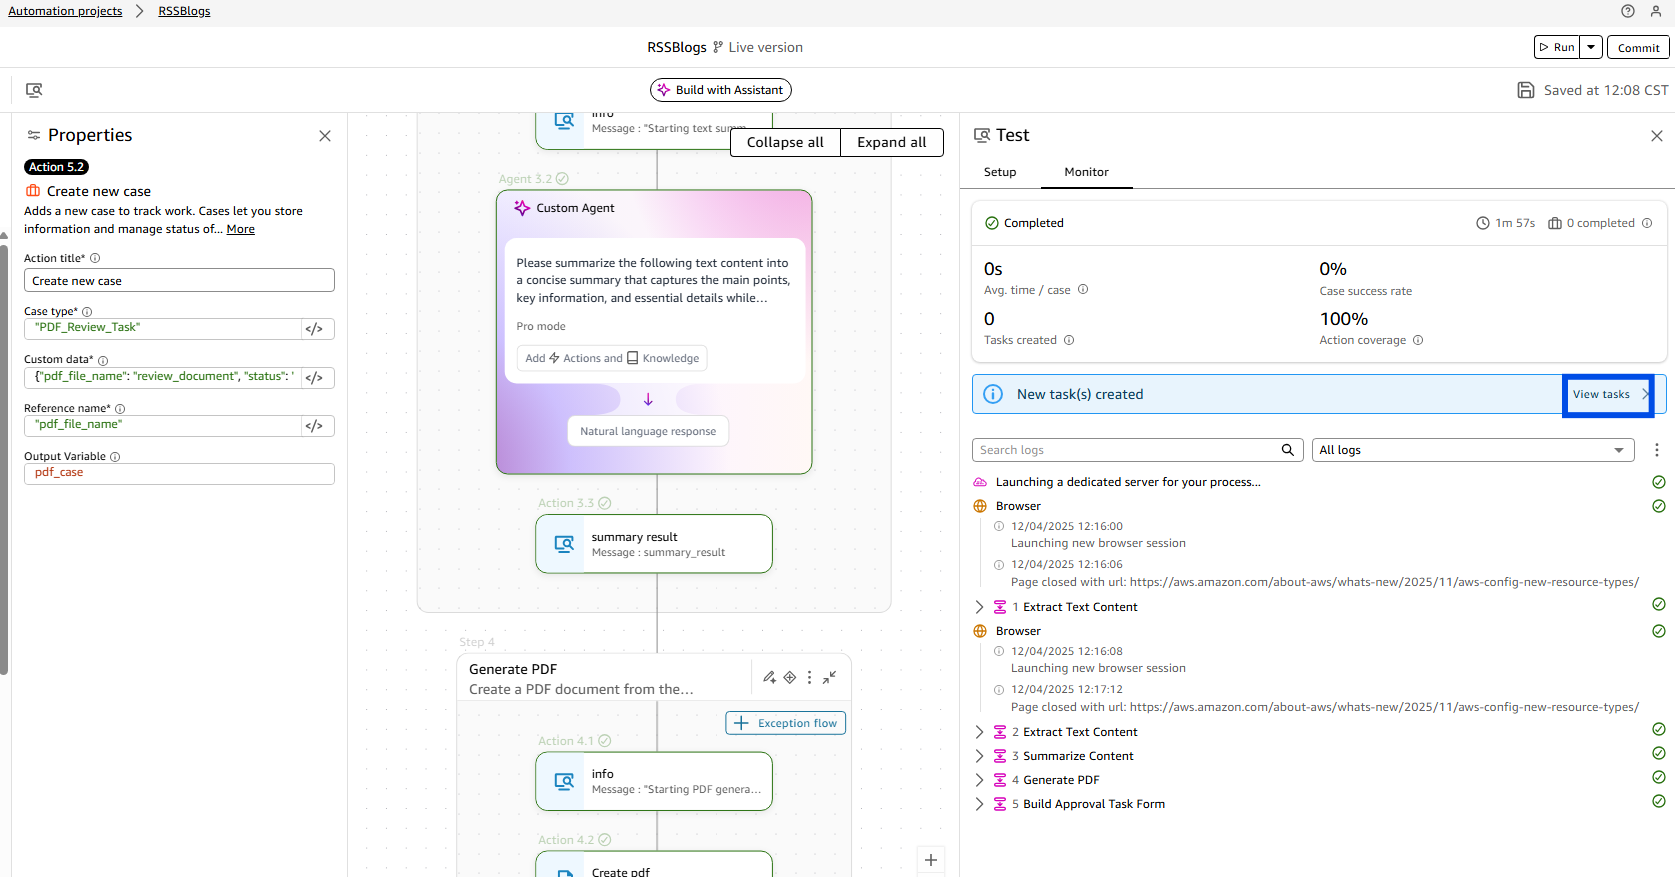
- Click the run button in top-right of the screen, once the run starts you can see the automated logs as well as the logs you added step by step.
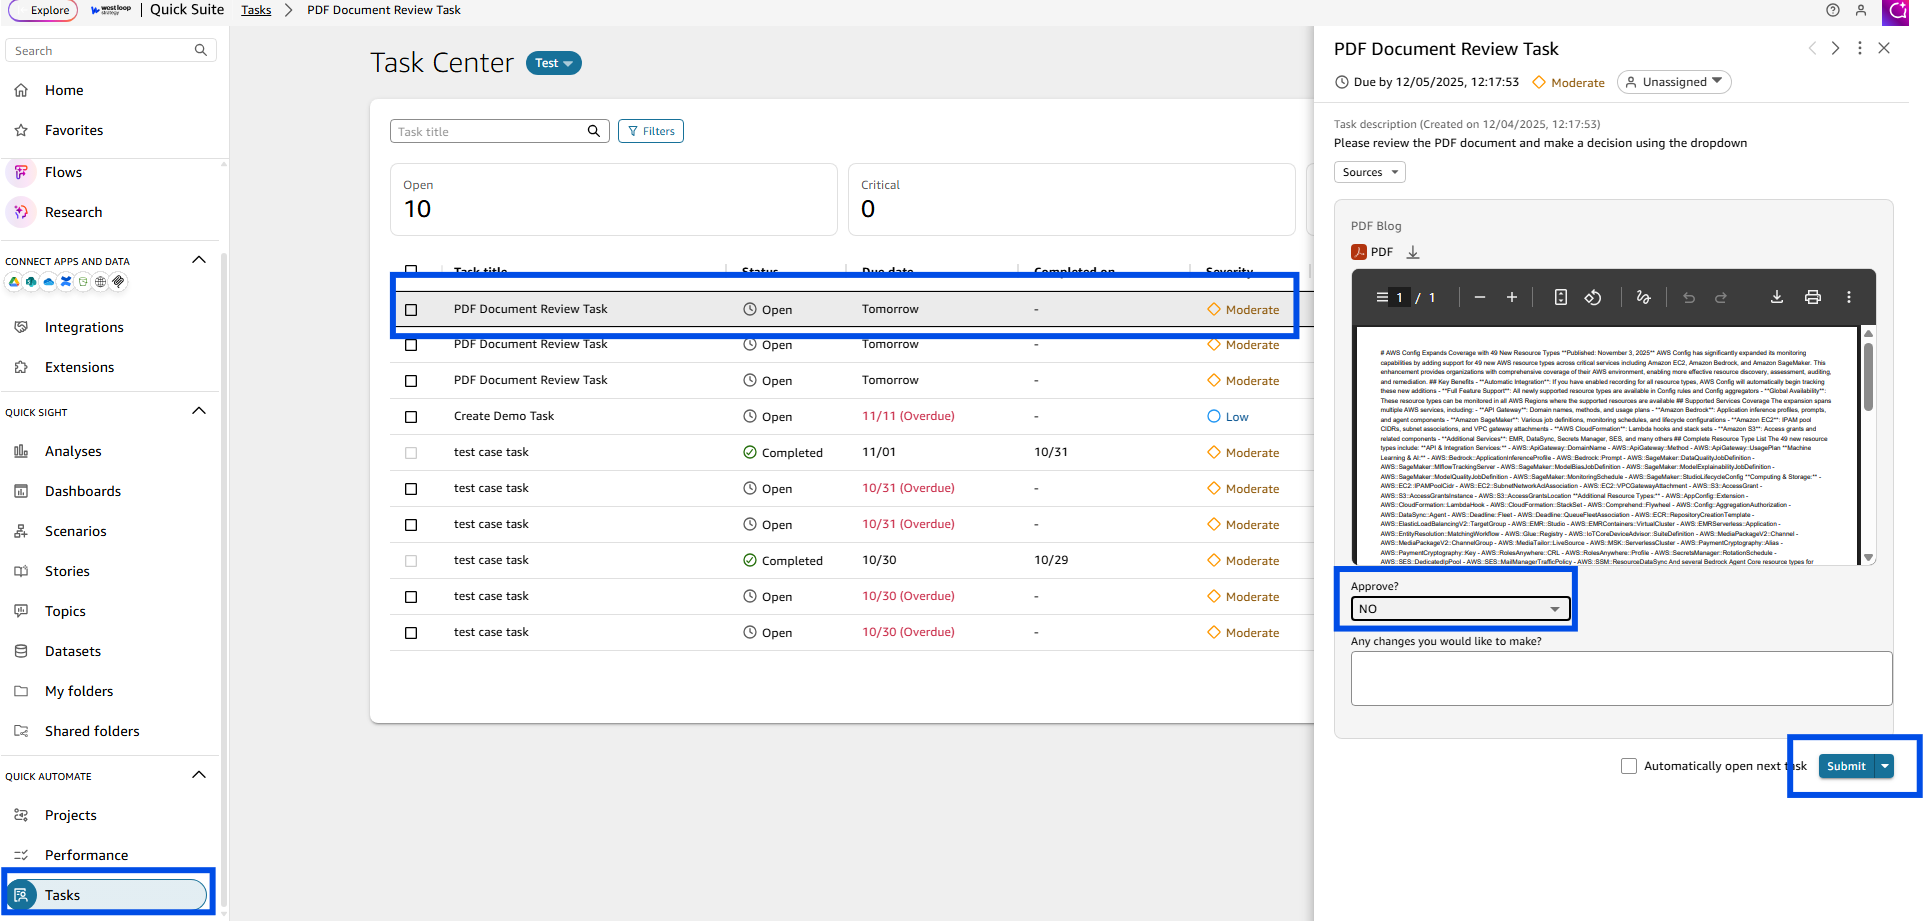
- Once its done running, click the View Tasks hyper link here:
- Click the latest task. The form should look like this depending on how you structured it.
If you need further guidance on AWS, our experts are available at ' 'AWS@westloop.io. You may also reach us by submitting the ' 'Contact Us form.